Showing posts with label PONDS. Show all posts

Friday, 23 June 2017

Small Pond Installations for Irrigation and Wildlife - Part 2 - Liners

Welcome to part 2 in a series of posts covering the installation of small irrigation and wildlife ponds. Part one can be found here and covers planning and digging a pond.

During this post we'll look at liner options and the steps you need to take to install a liner for your pond.


Lining the pond in Ataraxia

Welcome to our Online Store where you can find Forest Garden/ Permaculture plants, seeds, bulbs and Polyculture multi-packs along with digital goods and services such as Online Courses, Webinars, eBooks, and Online Consultancy.  We hope you enjoy the store and find something you like :) It's your purchases that keep our Project going. Yuu can also find our full list of trees. shrubs and herbs for forest gardens on our website here 

Pond Liner Options  


The majority of ponds will need some kind of liner to hold water. For ponds in lowlands with a high water table on clay soils, or ponds where you have  a perennial source of water that can flow into and out of the pond, a liner is not at all necessary. For rain fed (either direct or via roof/land catchments) ponds and for ponds with an ephemeral source of input water,  in climates with long dry seasons, a liner will most likely be needed.

In my experience sealed ponds are necessary in the following scenarios

1. the location is not a natural catchment,
2. you have no perennial water source to fill the pond
3. the soil you are excavating  has a low percentage of clay or high % of sand and stones
4. there is an uneven distribution of rain throughout the year 
5. water seepage may do damage to neighboring properties


We commonly use tri-laminate LDPE liners for our ponds as they are relatively light, easy to install and good value.

Tri-laminate LDPE liner


However, there are a variety of pond liners available to suit your site conditions and budget and before looking at how we install our liners we'll go briefly over the options starting with the natural liners.    

Regenerative Landscape Design - Online Interactive Course

Want to learn how to design, build and manage regenerative landscapes? Join us on our Regenerative Landscape Design - Online Interactive Course.

The course includes 20 lessons, with 20 hours of one-to-one mentoring/consultancy, drawn from over 20 years of experience designing, implementing and managing polyculture gardens, farms, food forests and regenerative landscapes across a variety of climate zones.
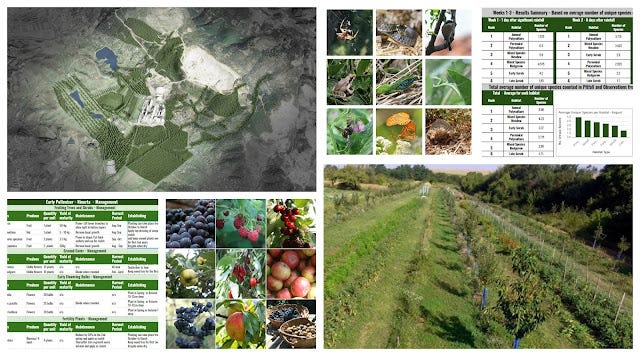
We look forward to providing you with the confidence, inspiration, and opportunity to design, build and manage landscapes that produce food and other resources for humans while enhancing biodiversity.

You can access all of the course material without the one-to-one tutoring by becoming a paid annual subscriber to our Substack, which grants you access to the Bloom Room for just 70 USD per year. Subscribe below to join now.

I look forward to having you join us!


Natural Liners


Puddled Clay - Using clay to line a pond is a great idea if you have the right kind of clay soils on the location of the pond or very near by. Otherwise given the large quantity of clay required the excavation and transport costs probably make it not worth considering. You also need to be sure you have a constant water level if using certain clay that will shrink and swell. This is because when the water level drops cracks will appear and water will drain into the cracks when it refills.

Clay cracking when water levels drop 

Another thing to consider if you are adding a clay layer on top of permeable soils such as sandy and stony soils is that aquatic plants with expansive rhizomatous roots such as reeds, sedges, watermint and yellow flag can easily damage the clay layer creating holes that will lose water.

Some soils are unsuitable for clay . Gravelly, silty and peaty soils are affected by ground water and move. The puddle clay will also move, resulting in cracks and leaks.


Bentonite Clay Liners are a composite product manufactured using the naturally occurring Bentonite clay resource. The powdered Bentonite clay is sandwiched between a woven and non woven geotextile, resulting in a very strong robust product. The biggest advantage of bentonite is that it can self-heal and expand around punctures if it’s installed correctly. The biggest disadvantage is that it's relatively expensive, extremely heavy (making delivery costs high) and often heavy machinery is required to place the liner.   

Gley - The idea behind a gley liner is to produce an anaerobic layer in the soil underneath the pond that forms a bio film that should prevent water from soaking into the soil. It's something I came across in the Permaculture Design Manual and having tried it on three occasions I can safely say it does not work.  

Following instructions for the gley method we applied approx 2 tonnes of manure to our pond in the Paulownia garden, covered this with a layer of vegetation and added a further cover of  tarps and carpets. It did not hold water and we eventually added a tri laminate LDPE liner.

Synthetic liners 


Tri Laminate LDPE - These are the liners that we use for our ponds. They have two basic benefits – they are very economical, and they are tear proof and flexible so can be used to line ponds with various depths, shelves and peninsulas i.e wildlife ponds. The liners are made of low density polypropylene and they are made to last for years.

Tri Laminate HDPE -  HDPE geomembranes are tough and non-flexible. In cold weather conditions the handling of HDPE geomembranes is a big handicap and not being very flexible they only work on basic shaped ponds.

Rubber Liners - like LDPE these liners can be easily shaped to fit the unique contours of any pond, thus allowing more design flexibility. There are two main types of rubber liners EPDM and Butyl. They are both synthetic rubber membranes and both liner types have similar properties despite having different chemical compositions. EPDM is a less expensive product to manufacture and as a result its popularity has surpassed that of Butyl. EPDM pond liners are guaranteed fish-friendly and they don't contain any additives or release chemicals that affect fauna or flora. These liners are slightly more puncture resistant than the LDPE and HDPE and PVC liners.

PVC pond liners – PVC pond liners are usually around 0,5 mm thick. The liner is stretchy and flexible , however it's not tear proof, so if the material is punctured, it may get worse over time.  They are more expensive than LDPE and HDPE but just as vulnerable and more so to UV exposure,  so I don't see much upside to this liner.

Preformed fiber glass pond liners – As the name suggests, these liners are preformed. You dig the hole to fit the shape. They are relatively expensive and are probably one of the easy ponds to install.

Cost comparison for Liners 


I made a quick cost comparison for a 18 m x 18 m liners. It's by no means exhaustively researched but it does provide a fair representation of the varying costs of liners.    


Liner Price based on a 18m x 18m liner
324m2
Price per m2 Source Notes
Rubber Liner - Butyl£1,940.76£5.99http://watergardeningdirect.comnot including delivery
no underlay
Rubber Liner - EPDM£1,710.72£5.28www.aqualinersdirect.co.uknot including delivery
no underlay
Bentonite Clay Liners£1,101.60£3.40www.bentomat.co.uknot including delivery
no need for underlay
PVC £842.40£2.60www.aqualinersdirect.co.uknot including delivery
no underlay
Tri Laminate LDPE£533.60£1.65ebay.co.uk including delivery and underlay
Tri Laminate HDPE£223.56£0.69China - Alibaba
(could not find a European source) 
not including delivery and customs tax 


We've been using tri laminate LDPE liners in our ponds for the last 6 years and have lined 4 ponds with it.  The first pond we made still holds water well although I expect that the ground under the liner will have formed a natural impermeability by now due to anaerobic microorganisms creating a bio film. 

Our first pond 

I've noticed that the material does weather when exposed to sunlight so we keep the liner covered with a layer of sand/soil and this also provides good rooting medium for aquatic plants. Wildlife appears to flourish in the ponds and I have no reason to believe the material is toxic in any way.  

Wildlife from our ponds 

Sizing the liner 


To calculate how big your liner needs to be you can use the following equation.   

Length + Depth + Depth + 2m = Length of Liner
Width + Depth + Depth + 2m = Width of Liner

You can find an online pond liner size calculator here  in imperial and metric units :) 

Often the ponds we create have varying depths and beaches as we are designing habitat into the ponds. In this case you can take the longest length, depth and width to be sure you have enough liner. The off cuts are useful for doubling up areas of the pond that may receive foot traffic or for creating very small tyre ponds.

Tractor Tyre pond lined with an off cut from the main pond liner 


Applying  the liner


Here are the steps we took to line the pond. For how we dug the pond and planning the location of the pond see our previous post here.

1. Remove sharp stones and other debris 
2. Level the banks of the pond 
3. Establish the outlet and overflow management 
4. Add Protective Underlay 
5. Place the liner 
6. Fill the pond 


1. Remove sharp stones and other debris 


Remove all stones and sharp objects from the area where the liner will be placed

Just one of the piles of stones we removed from the pond.


2. Level the banks of the pond 


Following the excavation it's a good idea to allow and deposited soil around the edges of the pond to settle. 2 weeks is adequate time for the soil to settle.  The next step is to level the bank of the pond .


Using a transit level we go around the pond perimeter adding or removing soil until we have the same level all round.


3. Establish the outlet and overflow management 


Create the outlet of your pond (where the pond will overflow). It's very important you have considered where the pond will overflow and have managed the overflow properly to avoid the water causing damage on or beyond your property. In our case we made a 2m x 1m marshy bed that drains into a 10m long by 1m contour swale that can disperse and overflow into the fields below planted with perennial crops. 

The outlet -  We then lowered the area of the wall that will serve as the outlet. In this case we made the outlet a 30cm wide channel that is approximately 10 cm lower than the rest of the wall.   

4. Add Protective Underlay 


If you have stony ground like we had on this pond, you can spend days removing the stones only to unearth more below. In such cases I recommend adding a layer of vegetation or straw, old clothes or carpets before adding the underlay. The idea is that this layer will decompose and form an anaerobic bio film that will prevent seepage if the stones happen to puncture the liner.

15 cm layer of straw applied to the surface 

Now is time for the underlay that generally comes in rolls. We placed the underlay along the longest side and overlapped each section by at least 20 cm and then taped the sections together. Working on a calm day without wind is a good idea when placing the underlay. Soaking the rolls in water also helps as the material is heavier and falls into place easier.
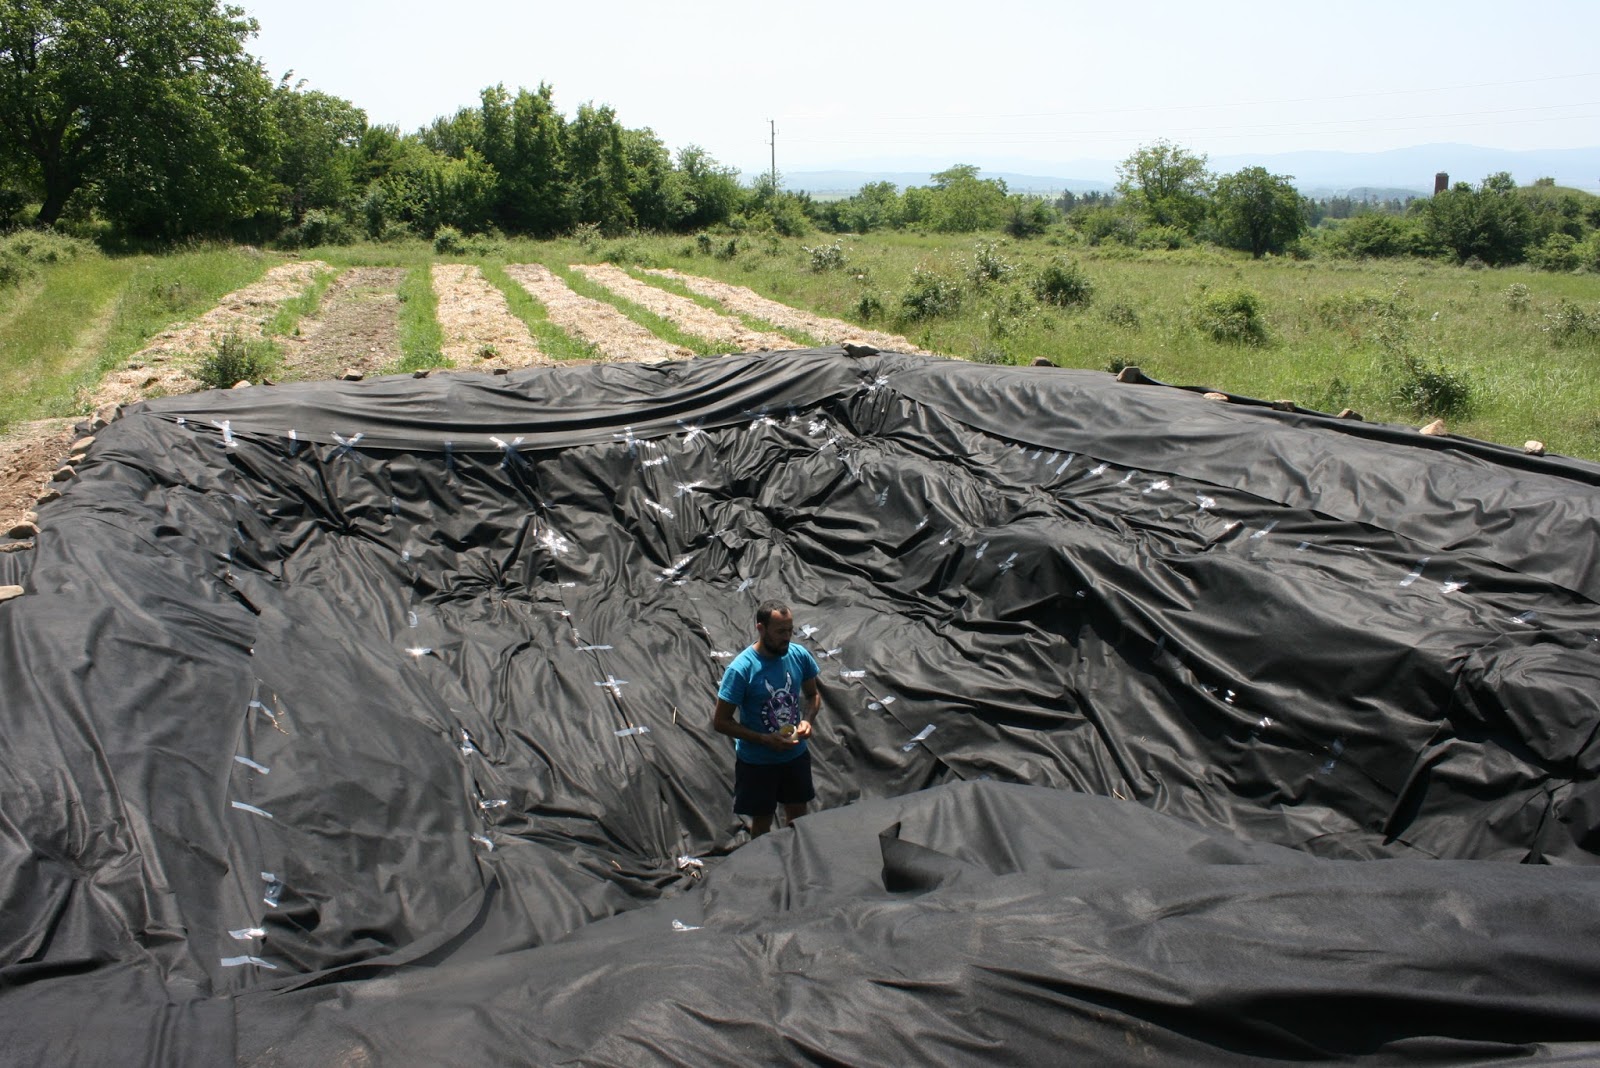

Rolling out the black carpet. 

5. Place the liner 


Unfold the liner and pull it into place ensuring you have adequate overlap on the sides. Push the liner into place to hug the contours and ease out any small wrinkles and neatly pleat any larger folds.

Liner in place with adequate overlap and folds where they should be.


Do not start work on finishing the pond edges until the pond is full. This is because as the pond fills with water the liner will be compressed to fit the pond floor and sides, and some slack on the edges allows the liner to move without stretching.  When the pond is full you will also be able to see whether your levels are correct and make any final  alterations before adding the pond border detail and fixing the liner to the border.

6. Filling the pond 


We filled the pond by diverting a stream from a nearby river. We channeled the stream to the pond and buried the liner under the channel to direct the water into the pond. The pond can hold approx. 150 m3 and took over 40 hrs to fill.

Here you can see the water just about to enter the liner  that is buried under the channel 


The stream is diverted onto the liner and the water flows into the pond. This pond took over 40 hrs to fill 

Almost full

If you would like the pond for wildlife then adding a bucket of water from a nearby wild pond will provide a range of microorganisms, aquatic plant seed and aquatic animals. Aquatic life is very fast to establish and in no time the pond will be full of aquatic insects.

It's best to keep the water level right to the top but this is not always possible. This will require regular topping up in summer as evaporation can reduce the levels. A pond liner that is exposed to the elements will have a shorter life and be more prone to mechanical damage.

Once the pond is full you can check you have the bank levels correct and make any adjustments that may be needed before adding the pond edging.

7. Edging The Pond Banks


The excess liner can be trimmed off allowing at least 50 cm of overlap that can be tucked under to provide a double layer around the edge of the banks. We have lots of stones and boulders around our site and place these on top of the liner and fill the gaps with sand and smaller stones. This makes the pond look natural and protects the liner from harmful UV from the sun.   

Rock borders with plants well established in  our wildlife pond 

For this pond we'll be experimenting with cascading plants such as Vinca spp. and Hedera spp. placing them around the edge of the pond to cover the exposed liner. More on that in part 3 where we'll be looking at wildlife habitat and planting out the pond.

   
If you would like to create a forest garden and gain some practical hands on experience join us this Spring. We'll be covering site surveying, landscape design software, installing access, beds, irrigation channels, planting tree, shrub, herb and ground layers and making a small wildlife pond. All in 3 days! And plenty of follow up material to take away with you to digest slowly.

Support Our Project

If you appreciate the work we are doing you can show your support in several ways.


---------------------------------------------------------------------------------------------------------------

We offer a diversity of plants and seeds for permaculture, forest gardens and regenerative landscapes including a range of fruit and nut cultivars. We Deliver all over Europe from Nov - March. - Give a happy plant a happy home :)


Our Bio-Nursery - Permaculture/Polyculture/ Regenerative Landscape Plants 


Thursday, 27 April 2017

Small Pond Installations for Irrigation and Wildlife - Part 1

We've done a couple of pond installations recently, one for our new perennial polyculture trial garden (Ataraxia) and another for Catherine Zanev's  permaculture farm/orchard Venets.


Wildlife ponds in our gardens


Introduction 


In both the recent ponds we dug we hired a machine and driver to carry out the dig. Previous ponds we've dug by hand. With some willing help, a 6 x 4 x 1.5 m pond is very doable and I'd estimate that  3-4 people with good tools would take about 8- 10 hrs on moderately light soils, probably longer in clay.

The Pond in the Paulownia Garden - dug by hands 

The recent ponds we made required 3 and 4 m depths and were larger in surface area so we opted for machines. For the pond in the new garden (Ataraxia), we used a mini digger and it took us approximately 7 hours to dig 10 m x 6 m x 3.5 m. The soil is sandy silt full of smooth boulders ranging in size from basketballs to tennis balls.  

The mini-digger at work in our polyculture trial garden (Ataraxia)

For Catherine's pond, we used a JCB excavator. I was planning to use a JCB backhoe but the excavator turned up and actually I was really pleased with the machine. Perhaps the front bucket on the back hoe would have cleared the topsoil a little faster but the excavator made a great job of...er.... excavating :)  It took around 5 hours to dig a 12 m x 6 m x 4 m hole, level the 2 m wide pond walls, and make a 30 m inlet swale and a 15-meter spillway. The soil is heavy clay.


The JCB excavator starting the dig at Catherine Zanev's permaculture farm  

So here's an overview of our design and installation process.

Pond Design and Installation Overview


Check the legalities and regulations of building a pond in your area. For ponds containing over 200 m3 of water and ponds on steep slopes with retaining walls that will bear a lot of weight, it's best to seek professional advice and guidance before you start.

Selecting a Location


Topography - Based on the topography of the site we select the optimal location for the ponds and work out the positions of the inlet (where the pond receives water) and outlet (the exit point for overflow from the pond).

Google Earth  image of Ataraxia with 1 m contour intervals extracted from a Digital Terrain Map (DTM) DTM supplied by Geodetect, data extracted by georgipavlov.net


Pond placement in the northeast corner of the site is the highest point of the site and provides an opportunity to siphon water from the pond for irrigation. We have access to a stream that can be diverted from the N.E. to fill the pond. The beds are placed more or less on contour to ease irrigation.     


Surroundings - The pond location will benefit from protection from strong winds and some shade (to reduce evaporation). Having lots of deciduous and fruiting trees around the pond will result in large quantities of leaves and fruit falling into the pond that can cause eutrophic conditions unless cleared, and digging a pond around established trees will also inevitably damage the roots of the trees.

Regenerative Landscape Design - Online Interactive Course

Want to learn how to design, build and manage regenerative landscapes? Join us on our Regenerative Landscape Design - Online Interactive Course.

The course includes 20 lessons, with 20 hours of one-to-one mentoring/consultancy, drawn from over 20 years of experience designing, implementing and managing polyculture gardens, farms, food forests and regenerative landscapes across a variety of climate zones.

We look forward to providing you with the confidence, inspiration, and opportunity to design, build and manage landscapes that produce food and other resources for humans while enhancing biodiversity.

You can access all of the course material without the one-to-one tutoring by becoming a paid annual subscriber to our Substack, which grants you access to the Bloom Room for just 70 USD per year. Subscribe below to join now.

I look forward to having you join us!


What is the pond for?


Clarifying your objectives for having a pond is important and determines the shape and size of the design.

If you would like to encourage wildlife you will need to provide various depths within the pond to cater for a range of aquatic plants and you'll need a gentle slope for animals to enter and exit. Eventually, adding some features such as tree stumps or hollow rocks to the pond will provide hiding places for fish and other pond life and basking territory for amphibians.


The four categories of plants that should be present in a wildlife pond are Emergents (Marginal Plants) - Deep Marginals (Rooted Floating Plants) - Oxygenators (submerged plants) - Floaters (free-floating plants) 

Installing a pond is probably the single most effective thing you can do in a garden to enhance biodiversity and wildlife and the majority of the wildlife that will be attracted to the pond will be of great benefit to your garden or farm, i.e pollinators, and pest predators. For a wildlife pond, a maximum depth of 1.3 - 1.5 m is adequate. At this depth, most aquatic organisms including European carp -Cyprinus carpio can survive the winter.

Frogs and Toads are excellent predators of slugs and grubs in the vegetable garden 

If you need the pond for irrigation and do not have another source of water available it's best to dig deeper both to store more water and to moderate the water temperature to reduce the evaporation rates. Deep water stays cooler for longer and moderates the temperature of the surface water and water in the shallows will warm much faster and evaporate quickly.


Sketching the Pond Design


I make a few simple drawings showing the boundaries and dimensions including an overhead view and a cross-section of the width and length. This helps clarify how the pond will look and function. If using a hired machine/driver these sketches will also help communicate your vision.

The below sketches are for the pond we installed at Catherine Zanev's farm where the objective was to store rainwater from surface runoff during storm events for irrigation, but also to provide habitat for a range of wildlife and aquatic plants, hence we included shelves and beaches in the design.  

Overhead sketch
   
Cross section sketch 

Marking the shape of the pond and where the depth changes occur on the land also really helps.  A long rope works well for this as do stakes connected with string or spray paint.  

Welcome to our Online Store where you can find Forest Garden/ Permaculture plants, seeds, bulbs, and Polyculture multi-packs along with digital goods and services such as Online Courses, Webinars and eBooks.  We hope you enjoy the store and find something you like.  It's your purchases that keep our Project going. You can also find our full list of trees. shrubs and herbs for forest gardens on our website here 


Installation Day


Pegging out - Get on-site well before the machine arrives and mark clearly all relevant features of the pond such as the perimeter, the width of the wall, the path of the inlet and spillway, the locations of depth variation, and the highest and lowest points of the land that the pond will be placed.

Me and Stoyan Georgiev pegging out the spillway using a transit level.

Planning  Soil Deposits
- Select an area where the top soil and excess subsoil can be stored. Most of the subsoil can be used for a wall on the lower section of the pond (if working on a slope) or as a bank around the perimeter of the pond if working on level ground and your potential water source is higher than the wall height. In some cases, you may have excess soil. Have a plan for where to put it and how you will get it there.

It's also worth planning the route for the machine to enter and work in to avoid soil compaction and damage as much as possible and to restrict this to as small a space as possible.


Communicate the plan - When the driver arrives explain exactly what you want to do and why you want to do it as clearly as possible before work begins. An experienced operator will most probably have a good understanding of the fundamentals and may be able to offer some advice so it's a good idea to invite the driver's opinion.

Remove Top Soil - First off remove the topsoil from the pond area and from the area around the pond where the wall will be placed, The top soil is very valuable and can be used to dress the excavation at the end, helping to hasten revegetation. It can also be used in another area of the garden/farm.  


30- 40 cm  of topsoil is removed and stored separately for later use 

Start digging from an outside edge and dig down to the deepest part of the pond to assess the soil profile and depth. It may be you have planned a 4 m depth but hit bedrock after 3 m. Once you have established the depth you can start to distribute the subsoil to build up the lower sides of the pond. The excavator made a great job of compressing the various layers of soil that were piled up on the edges with the flat side of the bucket. A 2 m wide wall base is very secure for a pond of this size (12 m x 6 m x 4 m).


Subsoil used to build a 2m wide retaining wall 

Get the levels right  - If your water input is at ground level remember the highest level the pond water will reach will be no higher than the input source and once the pond fills to this level it will start to back-flood.

An overflow route that will slowly disperse the water should be implemented.  For the above pond design, we lowered a section in the wall to disperse overflow into a 16 m swale that runs just slightly off -contour into the adjacent fields.

Having a transit level on-site you can quickly check levels as you go to make sure the walls are high enough and that the overflow is where it should be.

We used the topsoil to build a berm slightly off-contour to disperse any potential overflow water into the fields. 

For any earthworks that we are sure won't be disturbed in the near future we re-apply the topsoil and sow with a cover crop. In this case, we used Trifolium repens - White Clover at a rate of 1.5g /m2 for the inlet and outlet swales.  

Trifolium repens - White Clover  

Following the dig, the deposited soil will sink and settle over the next few weeks. A few heavy rains will encourage the settling of the soil. After the soil has settled, we check the levels again and make any necessary adjustments before lining the pond.

In the following post, we'll look at liner options, how to install a liner, planting out the pond, landscaping the pond banks/earthworks, and pond maintenance. -  Small Pond Installations for Irrigation and Wildlife - Part 2

Support Our Project

If you appreciate the work we are doing you can show your support in several ways.


---------------------------------------------------------------------------------------------------------------

We offer a diversity of plants and seeds for permaculture, forest gardens and regenerative landscapes including a range of fruit and nut cultivars. We Deliver all over Europe from Nov - March. - Give a happy plant a happy home :)


Our Bio-Nursery - Permaculture/Polyculture/ Regenerative Landscape Plants