
During this post we'll look at liner options and the steps you need to take to install a liner for your pond.
 |
| Lining the pond in Ataraxia |
Welcome to our Online Store where you can find Forest Garden/ Permaculture plants, seeds, bulbs and Polyculture multi-packs along with digital goods and services such as Online Courses, Webinars, eBooks, and Online Consultancy. We hope you enjoy the store and find something you like :) It's your purchases that keep our Project going. Yuu can also find our full list of trees. shrubs and herbs for forest gardens on our website here

Pond Liner Options
In my experience sealed ponds are necessary in the following scenarios
1. the location is not a natural catchment,
2. you have no perennial water source to fill the pond
3. the soil you are excavating has a low percentage of clay or high % of sand and stones
4. there is an uneven distribution of rain throughout the year
5. water seepage may do damage to neighboring properties
We commonly use tri-laminate LDPE liners for our ponds as they are relatively light, easy to install and good value.
 |
| Tri-laminate LDPE liner |
However, there are a variety of pond liners available to suit your site conditions and budget and before looking at how we install our liners we'll go briefly over the options starting with the natural liners.
Regenerative Landscape Design - Online Interactive Course
Want to learn how to design, build and manage regenerative landscapes? Join us on our Regenerative Landscape Design - Online Interactive Course.
The course includes 20 lessons, with 20 hours of one-to-one mentoring/consultancy, drawn from over 20 years of experience designing, implementing and managing polyculture gardens, farms, food forests and regenerative landscapes across a variety of climate zones.
We look forward to providing you with the confidence, inspiration, and opportunity to design, build and manage landscapes that produce food and other resources for humans while enhancing biodiversity.
You can access all of the course material without the one-to-one tutoring by becoming a paid annual subscriber to our Substack, which grants you access to the Bloom Room for just 70 USD per year. Subscribe below to join now.
I look forward to having you join us!
Natural Liners
 |
| Clay cracking when water levels drop |
Another thing to consider if you are adding a clay layer on top of permeable soils such as sandy and stony soils is that aquatic plants with expansive rhizomatous roots such as reeds, sedges, watermint and yellow flag can easily damage the clay layer creating holes that will lose water.
 |
| Following instructions for the gley method we applied approx 2 tonnes of manure to our pond in the Paulownia garden, covered this with a layer of vegetation and added a further cover of tarps and carpets. It did not hold water and we eventually added a tri laminate LDPE liner. |
Synthetic liners
Tri Laminate HDPE - HDPE geomembranes are tough and non-flexible. In cold weather conditions the handling of HDPE geomembranes is a big handicap and not being very flexible they only work on basic shaped ponds.
Rubber Liners - like LDPE these liners can be easily shaped to fit the unique contours of any pond, thus allowing more design flexibility. There are two main types of rubber liners EPDM and Butyl. They are both synthetic rubber membranes and both liner types have similar properties despite having different chemical compositions. EPDM is a less expensive product to manufacture and as a result its popularity has surpassed that of Butyl. EPDM pond liners are guaranteed fish-friendly and they don't contain any additives or release chemicals that affect fauna or flora. These liners are slightly more puncture resistant than the LDPE and HDPE and PVC liners.
PVC pond liners – PVC pond liners are usually around 0,5 mm thick. The liner is stretchy and flexible , however it's not tear proof, so if the material is punctured, it may get worse over time. They are more expensive than LDPE and HDPE but just as vulnerable and more so to UV exposure, so I don't see much upside to this liner.
Preformed fiber glass pond liners – As the name suggests, these liners are preformed. You dig the hole to fit the shape. They are relatively expensive and are probably one of the easy ponds to install.
Cost comparison for Liners
| Liner | Price based on a 18m x 18m liner 324m2 | Price per m2 | Source | Notes |
| Rubber Liner - Butyl | £1,940.76 | £5.99 | http://watergardeningdirect.com | not including delivery no underlay |
| Rubber Liner - EPDM | £1,710.72 | £5.28 | www.aqualinersdirect.co.uk | not including delivery no underlay |
| Bentonite Clay Liners | £1,101.60 | £3.40 | www.bentomat.co.uk | not including delivery no need for underlay |
| PVC | £842.40 | £2.60 | www.aqualinersdirect.co.uk | not including delivery no underlay |
| Tri Laminate LDPE | £533.60 | £1.65 | ebay.co.uk | including delivery and underlay |
| Tri Laminate HDPE | £223.56 | £0.69 | China - Alibaba (could not find a European source) | not including delivery and customs tax |
 |
| Our first pond |
 |
| Wildlife from our ponds |
Sizing the liner
Length + Depth + Depth + 2m = Length of Liner
Width + Depth + Depth + 2m = Width of Liner
 |
| Tractor Tyre pond lined with an off cut from the main pond liner |
Applying the liner
1. Remove sharp stones and other debris
2. Level the banks of the pond
3. Establish the outlet and overflow management
4. Add Protective Underlay
5. Place the liner
6. Fill the pond
1. Remove sharp stones and other debris
Remove all stones and sharp objects from the area where the liner will be placed
 |
| Just one of the piles of stones we removed from the pond. |
2. Level the banks of the pond
Following the excavation it's a good idea to allow and deposited soil around the edges of the pond to settle. 2 weeks is adequate time for the soil to settle. The next step is to level the bank of the pond .
 |
| Using a transit level we go around the pond perimeter adding or removing soil until we have the same level all round. |
3. Establish the outlet and overflow management
 |
| The outlet - We then lowered the area of the wall that will serve as the outlet. In this case we made the outlet a 30cm wide channel that is approximately 10 cm lower than the rest of the wall. |
4. Add Protective Underlay
If you have stony ground like we had on this pond, you can spend days removing the stones only to unearth more below. In such cases I recommend adding a layer of vegetation or straw, old clothes or carpets before adding the underlay. The idea is that this layer will decompose and form an anaerobic bio film that will prevent seepage if the stones happen to puncture the liner.
 |
| 15 cm layer of straw applied to the surface |
Now is time for the underlay that generally comes in rolls. We placed the underlay along the longest side and overlapped each section by at least 20 cm and then taped the sections together. Working on a calm day without wind is a good idea when placing the underlay. Soaking the rolls in water also helps as the material is heavier and falls into place easier.
 |
| Rolling out the black carpet. |
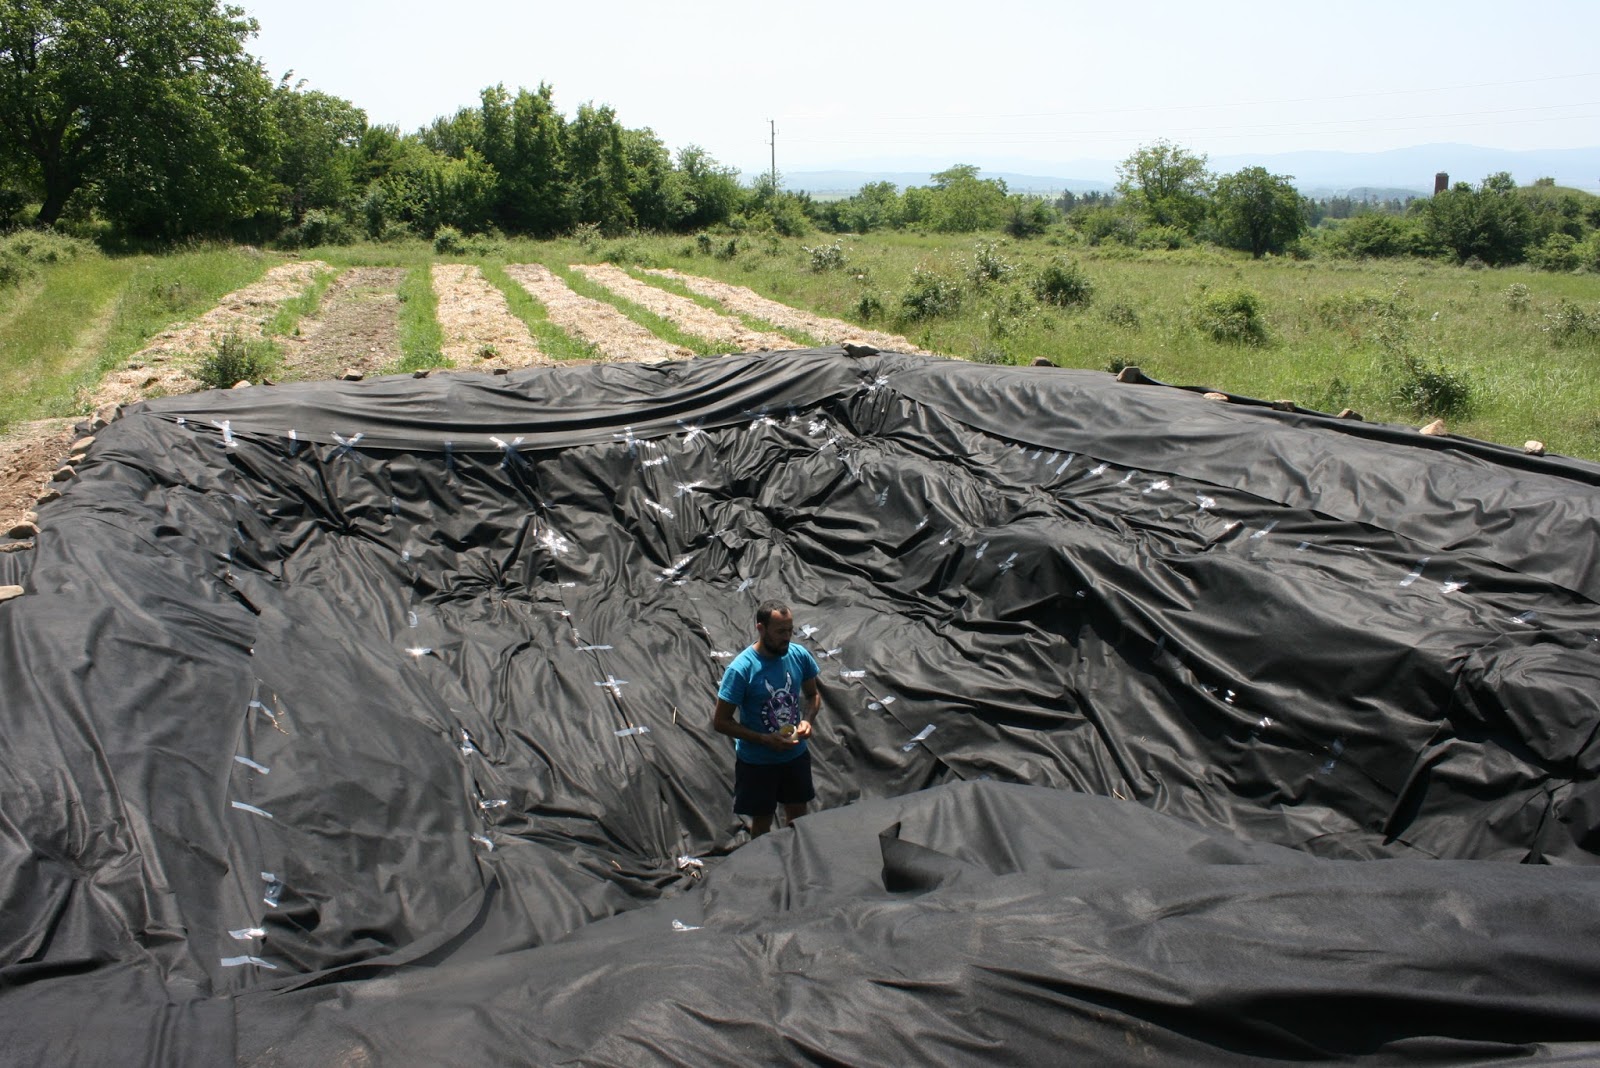
5. Place the liner
Unfold the liner and pull it into place ensuring you have adequate overlap on the sides. Push the liner into place to hug the contours and ease out any small wrinkles and neatly pleat any larger folds.
 |
| Liner in place with adequate overlap and folds where they should be. |
Do not start work on finishing the pond edges until the pond is full. This is because as the pond fills with water the liner will be compressed to fit the pond floor and sides, and some slack on the edges allows the liner to move without stretching. When the pond is full you will also be able to see whether your levels are correct and make any final alterations before adding the pond border detail and fixing the liner to the border.
6. Filling the pond
We filled the pond by diverting a stream from a nearby river. We channeled the stream to the pond and buried the liner under the channel to direct the water into the pond. The pond can hold approx. 150 m3 and took over 40 hrs to fill.
 |
| Here you can see the water just about to enter the liner that is buried under the channel |
 |
| The stream is diverted onto the liner and the water flows into the pond. This pond took over 40 hrs to fill |
 |
| Almost full |
If you would like the pond for wildlife then adding a bucket of water from a nearby wild pond will provide a range of microorganisms, aquatic plant seed and aquatic animals. Aquatic life is very fast to establish and in no time the pond will be full of aquatic insects.
It's best to keep the water level right to the top but this is not always possible. This will require regular topping up in summer as evaporation can reduce the levels. A pond liner that is exposed to the elements will have a shorter life and be more prone to mechanical damage.
Once the pond is full you can check you have the bank levels correct and make any adjustments that may be needed before adding the pond edging.
7. Edging The Pond Banks
 |
| Rock borders with plants well established in our wildlife pond |
Support Our Project
If you appreciate the work we are doing you can show your support in several ways.
Become a member of the Bloom Room with a $70 annual subscription to our Substack where you can access the content in our Regenerative Landscape Design Course , a member forum and more.
Make a purchase of plants or seeds from our Nursery or Online Store
Join us for one of our Onsite or Online Courses
Comment, like, and share our content. Sharing is caring !

Hi! Great article again! Thanks! I am working on a private property, where the client has 8 horses and five sheep on site. They have no access to any other water source except for rain. The soil is sandy loam, with big boulders (it was a stone mine in the Roman area). They want to cath as much rainwater as possible, cause the house will also rely on this source. So we will have to use liners. My only consern is animals. Do you think EPDM can stand accidentaly stepping in by horses or sheep? Or have any suggestion? Thank you
ReplyDeleteA Geomembrane Sheet is a synthetic, waterproof barrier made from materials like high-density polyethylene (HDPE), low-density polyethylene (LDPE), or polypropylene. These sheets are designed to provide a durable, impermeable layer that prevents the flow of liquids or gases through the material. Geomembranes are primarily used for containment, lining, and waterproofing applications in industries such as waste management, water conservation, mining, and agriculture.
ReplyDelete