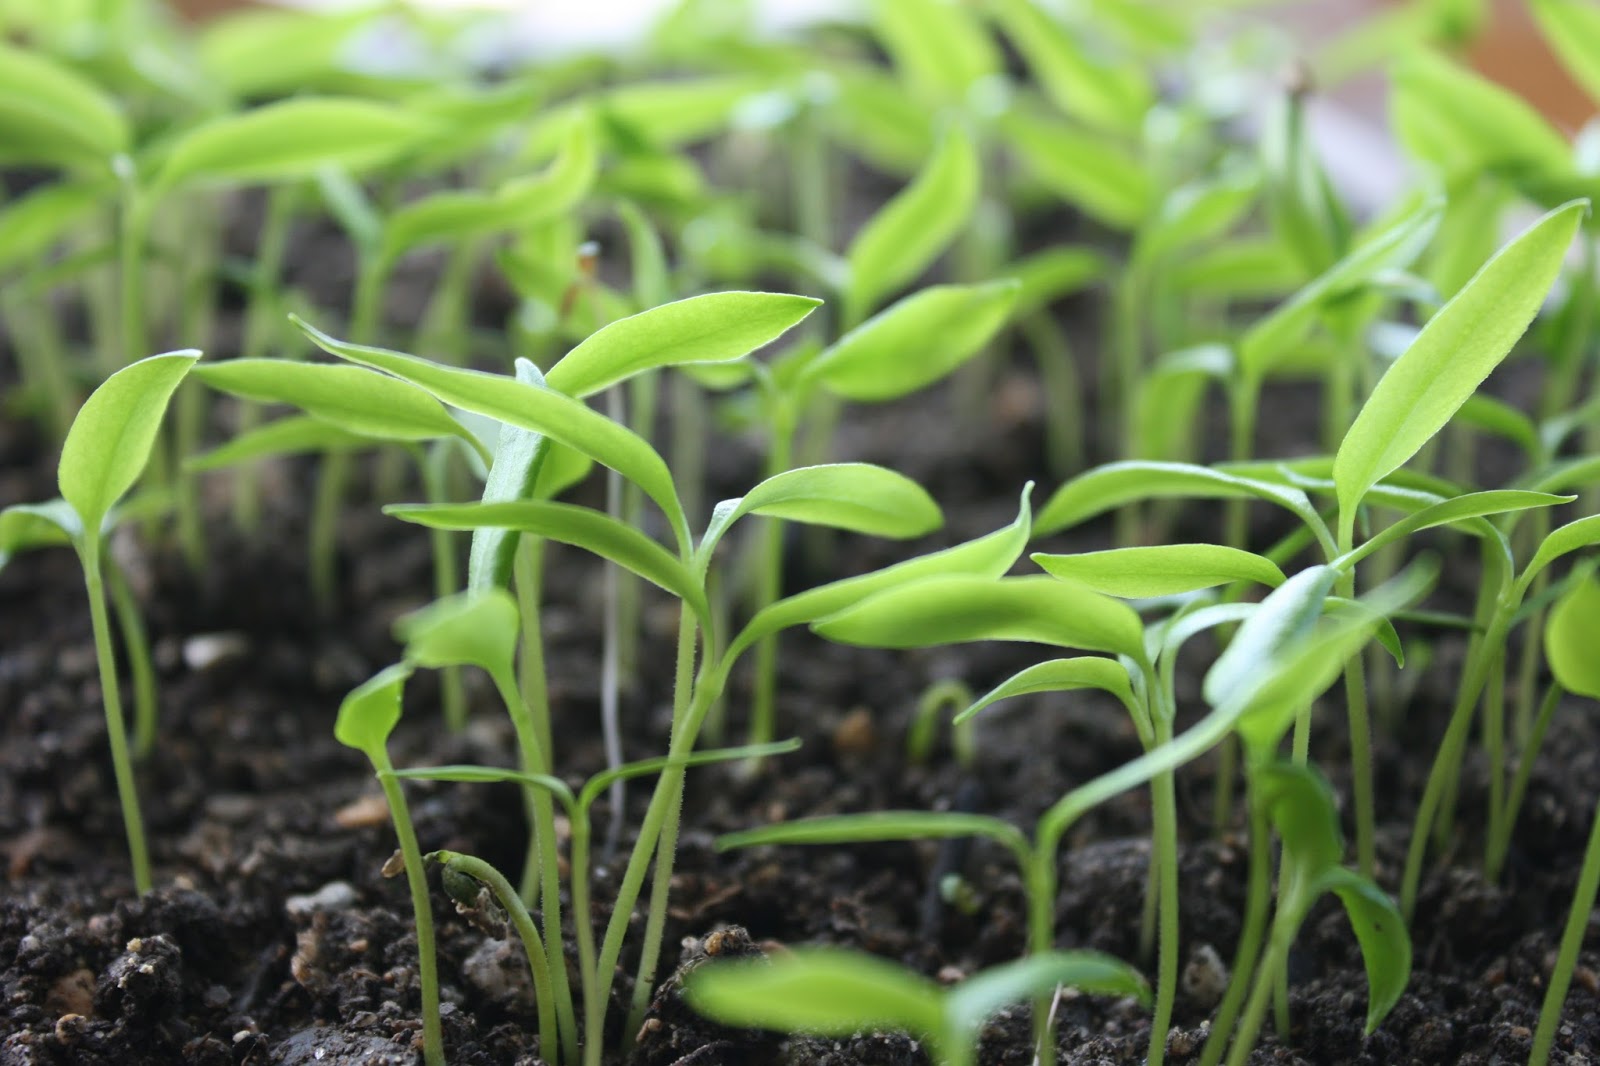
A few days ago we sowed the tomato seeds for this season's market and home garden. It never ceases to amaze me what little indoor space you need to rear thousands of seedlings. We use two 50 cm x 30 cm x 15 cm trays to germinate approx 150 seedlings from 10 cultivars. When they get bigger we move them into two 1.3 x 8 m beds covered with polythene to rear them before they take their permanent positions in the gardens in early - mid April.
Many of the plants we grow I prefer to sow directly outside and one of the most important things to consider when sowing is that the temperature of the soil is high enough for the seed to germinate.
Other important considerations include:
whether the seed requires any pre-treatment before it will germinate, i.e stratification and scarification (mainly relevant for perennial plants particularly trees and shrubs).
how deep you sow the seed - too shallow is better than too deep.
that the correct moisture levels are kept constant during the germination phase - not too wet, not too dry and with the ideal moisture levels similar to that of a wrung out cloth.
Elaeagnus commutata - Epigeal germination
This post we'll focus on soil temperature for germinating seeds. We'll look at why this is important, how to take soil temperature, and I've included a table showing the minimum and preferred soil temperatures for germination of some common plants.
Eruca sativa - Rocket germinating
Often you will find a monthly guide on a seed pack indicating when to sow seeds and this generally works okay, but can be misleading. If you have a long cold winter and the soil is cold, germination will be delayed and in some cases the seeds may rot in the ground. On the other hand, if the soil is unusually warm in the spring, it's possible to seed earlier. Being able to tell the soil temperature and being aware of the preferences of each plant will result in more or your seeds germinating.
Tomato seedlings
Measuring Soil Temperature
You want to measure the temperature at seeding depth and this will differ for each seed you sow. The general rule is sow to a depth of no more than twice the diameter of the seed, but like I said above it's better to go too shallow than too deep.
Any thermometer that will measure temperature at a specific depth can be used to measure soil temperature. Insert the thermometer into the area where the seeds will be sown and wait a few minutes before you take a reading.
Bear in mind that each area of your garden will probably have a different temperature. The soil temperature is influenced by the following factors:
Bare soil warms much faster than mulched soil and vegetated soil.
Dry soil will be warmer than wet soils.
South facing soils will be warmer than north facing, and the amount of shade cast on the soil will affect the temperature considerably.
Gingko biloba seedling
Warming up the Soil
As the air temperature starts to warm up in early spring you may like to get a head start with your sowing and accelerate the warming of the soil. If you have a mulch on your soil for the winter you can temporarily remove the mulch. The dark coloured soil will absorb all wavelengths of light and convert them into heat, warming the soil much faster. Another alternative is to leave the mulch on and cover the bed with a plastic sheet or glass pane. On a sunny day this will provide considerable heat. Of course you can also remove the mulch and use the sheet or glass on the bare soil and this has the added benefit of germinating any seeds in the patch that can be pulled before you start sowing.
Here's a table providing the minimum and preferred soil temperature for a number of crop seeds and the estimated time it takes the seeds to germinate
Minimum and Preferred Temperatures for Common Crops
We're super excited about running the course and look forward to providing you with the confidence, inspiration, and opportunity to design, build and manage regenerative landscapes, gardens, and farms that produce food and other resources for humans while enhancing biodiversity.
You can find out all about the course here and right now we have a 20% discount on the full enrollment fees. Just use the promo code RLD2023 in the section of the registration form to receive your discount.
We are looking forward to providing you with this unique online learning experience - as far as we know, the very first of its kind. If you are thinking of reasons why you should do this course and whether this course is suitable for you, take a look here where we lay it all out. Looking forward to it!
Autumn is a great time to plant out. The adequate rainfall and, consequently soil moisture levels at this time of year are perfect for the newly establishing plant roots. Although it may be cold above ground, the warmer soil temperatures make it possible for plant root growth to continue for longer and settle in before the spring growth bonanza.
Here's a step by step guide to planting out including a few things to consider before and after planting.
A few things to consider before planting
The best time to plant is when the soil is moist after a rain. If the soil is very wet, treading can cause compaction so avoid working on very wet soils particularly if you have clay.
In choosing the position for your plant bear in mind the light, fertility, water, temperature, space and community needs of the organism.
Consider the maximum size of the plant and how it will relate to the surroundings of the position you have chosen.
For plants that require cross pollination or are dioecious you will need to consider the pollination needs and make sure you have a pollinator in the vicinity.
If you are planting bare rooted plants ensure that the roots are not exposed to direct sunlight for too long and that they do not dry out.
Soak your plant roots well before planting. I have had no problems leaving the bare rooted plants submerged in water for up to 12 hrs. Cover so that sunlight cannot harm the roots when in the water.
Planting instructions
Dig your hole sufficiently big to allow some space around the root ball or roots i.e do not cram the plant into a small hole. Twice the diameter of your pot is adequate.
When digging, separate the top soil and sub soil layers. This is best achieved by placing two boards or tarps next to your hole. Dig the top soil out and pile it on one board/tarp, now dig the subsoil out and pile it on the second board/tarp.
Make sure the bottom and sides of your hole are not compacted from digging. If there are any smeared surfaces, scrap them loose with a fork. This ensures easier access into the soil for the establishing roots as well as providing good drainage and air spaces.
Water the empty hole well and allow time for the water to drain away. If your plant is in a container then rough up the sides of the root ball. The purpose of this is to ensure the fine roots make good contact with the soil when you infill the planting hole.
Due to the fast draining sandy loam I normally work with I plant a little lower than ground level to provide a dish for water to collect in. If you have poor draining soil (heavy clay) in an area of high rainfall and/or a high water table then you should consider planting higher then ground level.
If your planting site has a history of intensive application of fungicides you should re-establish the Mycorrhizal community. Mycorrhizas are symbiotic relationships between fungi and plant roots (the term means literally 'fungus root'). They are very common on crop plants as well as in wild plant communities, and in several cases they have been shown to be important or even essential for plant performance. The fungus obtains at least some of its sugars from the plant, while the plant benefits from the efficient uptake of mineral nutrients (or water) by the fungal hyphae. You can reestablish the Mycorrhizal community by simply adding half a spade full of soil from a healthy soil ecosystem nearby which should contain many of the beneficial fungal organisms. Mix the healthy soil with your pile of top soil.
Picture shows how the plant can draw upon a much larger pool of soil resources with the assistance of mycorrhizal fungi
Back fill the hole with the sub soil first, pack the soil in firmly around the roots or root ball and then add the top soil, again tampering the soil firmly to ensure good contact is made between soil and roots. The idea behind keeping the soil layers in order is to create minimum disturbance to the existing soil ecology. It may just look like plain earth but there are a myriad of organisms at work in there.
You can remove surrounding vegetation to approx 50cm radius of the plant stem so you end up with a circle of bare earth approx 1m diameter with your plant in the centre. If your plant is small then you can make this area smaller.
Imagine which way the water would flow across the land surrounding your plant and pile up the organic matter you have scrapped away from the surface along with any left over soil to create a barrier that will block the water from moving away from the plant. You want to keep the water around the plant where it can drain into the soil slowly and soak through to the roots below ground. It may be that on flat ground you need a barrier surrounding the plant creating a dish in which the water fills. If you have a low water table, lots of rain in your area and poor draining clay soil then this is not advisable.
Water the plant again applying more water then you think you will need and watch to see how well the water stays around the plant root zone. If you see the water escaping make some amendments to your barrier.
Once the plant is watered apply mature compost, approx 2-3 cm deep, covering the bare earth and place wet card board sheets or old clothing or cloth over the compost. If more than one piece of cardboard is needed overlap the cardboard so there are no gaps. This layer provides a barrier to prevent weed seeds in the soil from germinating and will decompose to add extra fertility to the soil. You can also use proprietary organic mulch mats, i've heard they last a few seasons.
Cover the cardboard/cloth/mulch with a further 3cm of well matured compost and then cover this with a 10cm layer of straw mulch (or other seedless mulch).
If trees are planted too deep or too much mulch is placed around the base of the tree, the constant moisture against the bark will create a condition called collar rot. Once the protective bark has rotted away, insects, micro organisms and fungi can easily enter the tree and begin to damage the plant. Make sure that the soil and mulch layers are not in direct contact with the bark around the base of the stem (the collar). Be sure to clear away the mulch and compost from that area so that you end up with a visible gap of at least 5 cm between stem and soil. You should check this every so often as the mulch usually makes its way back around the collar.
Collar Rot in a Apple Tree from - http://www.appleman.ca/korchard/treerots.htm
Aftercare considerations
If planted in Autumn it is likely that your new plants will not need watering until the mid spring. Keep an eye on your plant and water if you see/feel the soil below the mulch is dry. Its important to keep the plant from drying out in the first few years so plan time to monitor. 90% of all problems with newly-planted trees are because the steward didn't water them.
If planting a tree whip, according to some reports and contrary to popular belief, staking is not necessary. It is claimed to be counter productive and discourages a young tree from forming strong and secure anchor roots. Large container trees will however need staking.
Tree barriers are recommended to prevent herbivores committing planticide and according to the manufactures have many other purported benefits ;) I have never used these so cannot comment.
Check your plant from time to time and make sure the mulch has not made its way back around the stem collar. Keep the area weed free for a few years by topping up the cardboard and if you have planted a tree with high nutrient demands apply extra compost the following autumn.
Finally, enjoy your plant!
If you are would like to learn how to Design and Build A Forest Garden ,we have a webinar coming up on Saturday, 28th of November 2020 - 19.00 GMT+3. It's a live session where we'll go through step by step what you need to know to get started and end with a Q&A session. We'll send you a recording of the webinar when it is finished along with our design spreadsheets and plant lists to help get you started with your own Forest Garden Design.
The webinar will be hosted on zoom and you can book your place here - Looking forward to it!
Welcome to our Online Store where you can find Forest Garden/ Permaculture Plants, Seeds, Cuttings, Bulbs, Rhizomes and Polyculture Multi-packs along with digital goods and services such as Online Courses, Webinars, eBooks, and Online Consultancy and finally we've added a Bulk Fruit and Nut Tree order form for Farms, Orchards, Nurseries, and Large Regenerative Landscape Projects. If there is anything in the store you would like to see but is not there, please let us know. We hope you enjoy the store and find something you like :) It's your purchases that keep our Project going. Thank you. Enter Our Store Here
Autumn is a great time to plant out. The adequate rainfall and consequent soil moisture levels at this time of year are perfect for the newly establishing plant roots. Although it may be cold above ground, the warmer soil temperatures make it possible for plant root growth to continue for longer and settle in before the spring growth bonanza.
Here's a step by step guide to planting out including a few things to consider before and after planting.
But first just to let you know we've revamped our Online Store where you can find Forest Garden/ Permaculture Plants, Seeds, Cuttings, Bulbs, Rhizomes and Polyculture Multi-packs along with digital goods and services such as Online Courses, Webinars, eBooks, and Online Consultancy and finally we've added a Bulk Fruit and Nut Tree order form for Farms, Orchards, Nurseries, and Large Regenerative Landscape Projects. If there is anything in the store you would like to see but is not there, please let us know. We hope you enjoy the store and find something you like :) It's your purchases that keep our Project going. Thank you. Enter Our Store Here
The best time to plant is when the soil is moist after a rain. If the soil is very wet, treading can cause compaction so avoid working on very wet soils particularly if your soil is clay.
In choosing the position for your plant, bear in mind the light, fertility, water, temperature, space and community needs of the organism.
Consider the maximum size of the plant and how it will relate to the surroundings of the position you have chosen.
For plants that require cross pollination or are dioecious you will need to consider the pollination needs and make sure you have a pollinator in the vicinity.
If you are establishing bare rooted plants ensure that the roots are not exposed to direct sunlight for too long and that they do not dry out.
Soak your plant roots well before planting. I have had no problems leaving the bare rooted plants submerged in water for up to 12 hrs. Cover so that sunlight cannot harm the roots when in the water.
Planting instructions
Dig your hole sufficiently to allow some space around the root ball or roots ie, do not cram the plant into a small hole. Twice the diameter of your pot is adequate.
When digging, separate the top soil and sub soil layers. This is best achieved by placing two boards or tarps next to your hole. Dig the top soil out and pile it on one board/tarp, now dig the subsoil out and pile it on the second board/tarp.
Make sure the bottom and sides of your hole are not compacted from digging. If there are any smeared surfaces, scrape them loose with a fork. This ensures easier access into the soil for the establishing roots as well as providing good drainage and air spaces.
Water the empty hole well and allow time for the water to drain away. If your plant is in a container then rough up the sides of the root ball. The purpose of this is to ensure the fine roots make good contact with the soil when you infill the planting hole.
Due to the fast draining sandy loam I normally work with I plant a little lower than ground level to provide a dish for water to collect in. If you have poor draining soil (heavy clay) in an area of high rainfall and/or a high water table then you should consider planting higher then ground level.
If your planting site has a history of intensive application of fungicides you should re-establish the Mycorrhizal community. Mycorrhizas are symbiotic relationships between fungi and plant roots (the term means literally 'fungus root'). They are very common on crop plants as well as in wild plant communities, and in several cases they have been shown to be important or even essential for plant performance. The fungus obtains at least some of its sugars from the plant, while the plant benefits from the efficient uptake of mineral nutrients (or water) by the fungal hyphae. You can re-establish the Mycorrhizal community by simply adding half a spade full of soil from a healthy soil ecosystem nearby which should contain many of the beneficial fungal organisms. Mix the healthy soil with your pile of top soil.
Picture shows how the plant can draw upon a much larger pool of soil resources with the assistance of mycorrhizal fungi
Back fill the hole with the sub soil first, pack the soil in firmly around the roots or root ball and then add the top soil, again tampering the soil firmly to ensure good contact is made between soil and roots. The idea behind keeping the soil layers in order is to create minimum disturbance to the existing soil ecology. It may just look like plain earth but there are a myriad of organisms at work in there.
You can remove surrounding vegetation to approx 50cm radius of the plant stem so you end up with a circle of bare earth approx 1m diameter with your plant in the centre. If your plant is small then you can make this area smaller.
Imagine which way the water would flow across the land surrounding your plant, and pile up the organic matter you have scrapped away from the surface along with any left over soil to create a barrier that will block the water from moving away from the plant. You want to keep the water around the plant where it can drain into the soil slowly and soak through to the roots below ground. It may be that on flat ground you need a barrier surrounding the plant creating a dish in which the water fills. If you have a low water table, lots of rain in your area and poor draining clay soil then this is not advisable.
Water the plant again applying more water then you think you will need and watch to see how well the water stays around the plant root zone. If you see the water escaping make some amendments to your barrier.
Once the plant is watered, apply mature compost approx 2-3 cm deep covering the bare earth and place wet cardboard sheets or old clothing or cloth over the compost. If more than one piece of cardboard is needed overlap the cardboard so there are no gaps. This layer provides a barrier to prevent weed seeds in the soil from germinating and will decompose to add extra fertility to the soil. You can also use proprietary organic mulch mats - I've heard they last a few seasons.
Cover the cardboard/cloth/mulch with a further 3cm of well matured compost and then cover this with a 10cm layer of straw mulch (or other seedless mulch).
If trees are planted too deeply or too much mulch is placed around the base of the tree, the constant moisture against the bark will create a condition called collar rot. Once the protective bark has rotted away, insects, micro organisms and fungi can easily enter the tree and begin to damage the plant. Make sure that the soil and mulch layers are not in direct contact with the bark around the base of the stem (the collar). Be sure to clear away the mulch and compost from that area so that you end up with a visible gap of at least 5 cm between stem and soil. You should check this every so often as the mulch usually makes its way back around the collar.
Collar Rot in a Apple Tree from - http://www.appleman.ca/korchard/treerots.htm
Aftercare considerations
If planted in Autumn it is likely that your new plants will not need watering until the mid spring. Keep an eye on your plant and water if you see/feel the soil below the mulch is dry. It's important to keep the plant from drying out in the first few years so plan time to monitor. Ninety percent of all problems with newly-planted trees are because the steward didn't water them.
If planting a tree whip, according to some reports and contrary to popular belief, staking is not necessary. It is claimed to be counter productive and discourages a young tree from forming strong and secure anchor roots. Large container trees will, however, need staking.
Tree barriers are recommended to prevent herbivores committing planticide and according to the manufactures have many other purported benefits ;) I have never used these so cannot comment.
Check your plant from time to time and make sure the mulch has not made its way back around the stem collar. Keep the area weed free for a few years by topping up the cardboard and if you have planted a tree with high nutrient demands apply extra compost the following autumn.
We're super excited about running the course and look forward to providing you with the confidence, inspiration, and opportunity to design, build and manage regenerative landscapes, gardens, and farms that produce food and other resources for humans while enhancing biodiversity.
You can find out all about the course here and right now we have a 20% discount on the full enrollment fees. Just use the promo code RLD2023 in the section of the registration form to receive your discount.
We are looking forward to providing you with this unique online learning experience - as far as we know, the very first of its kind. If you are thinking of reasons why you should do this course and whether this course is suitable for you, take a look here where we lay it all out. Looking forward to it!
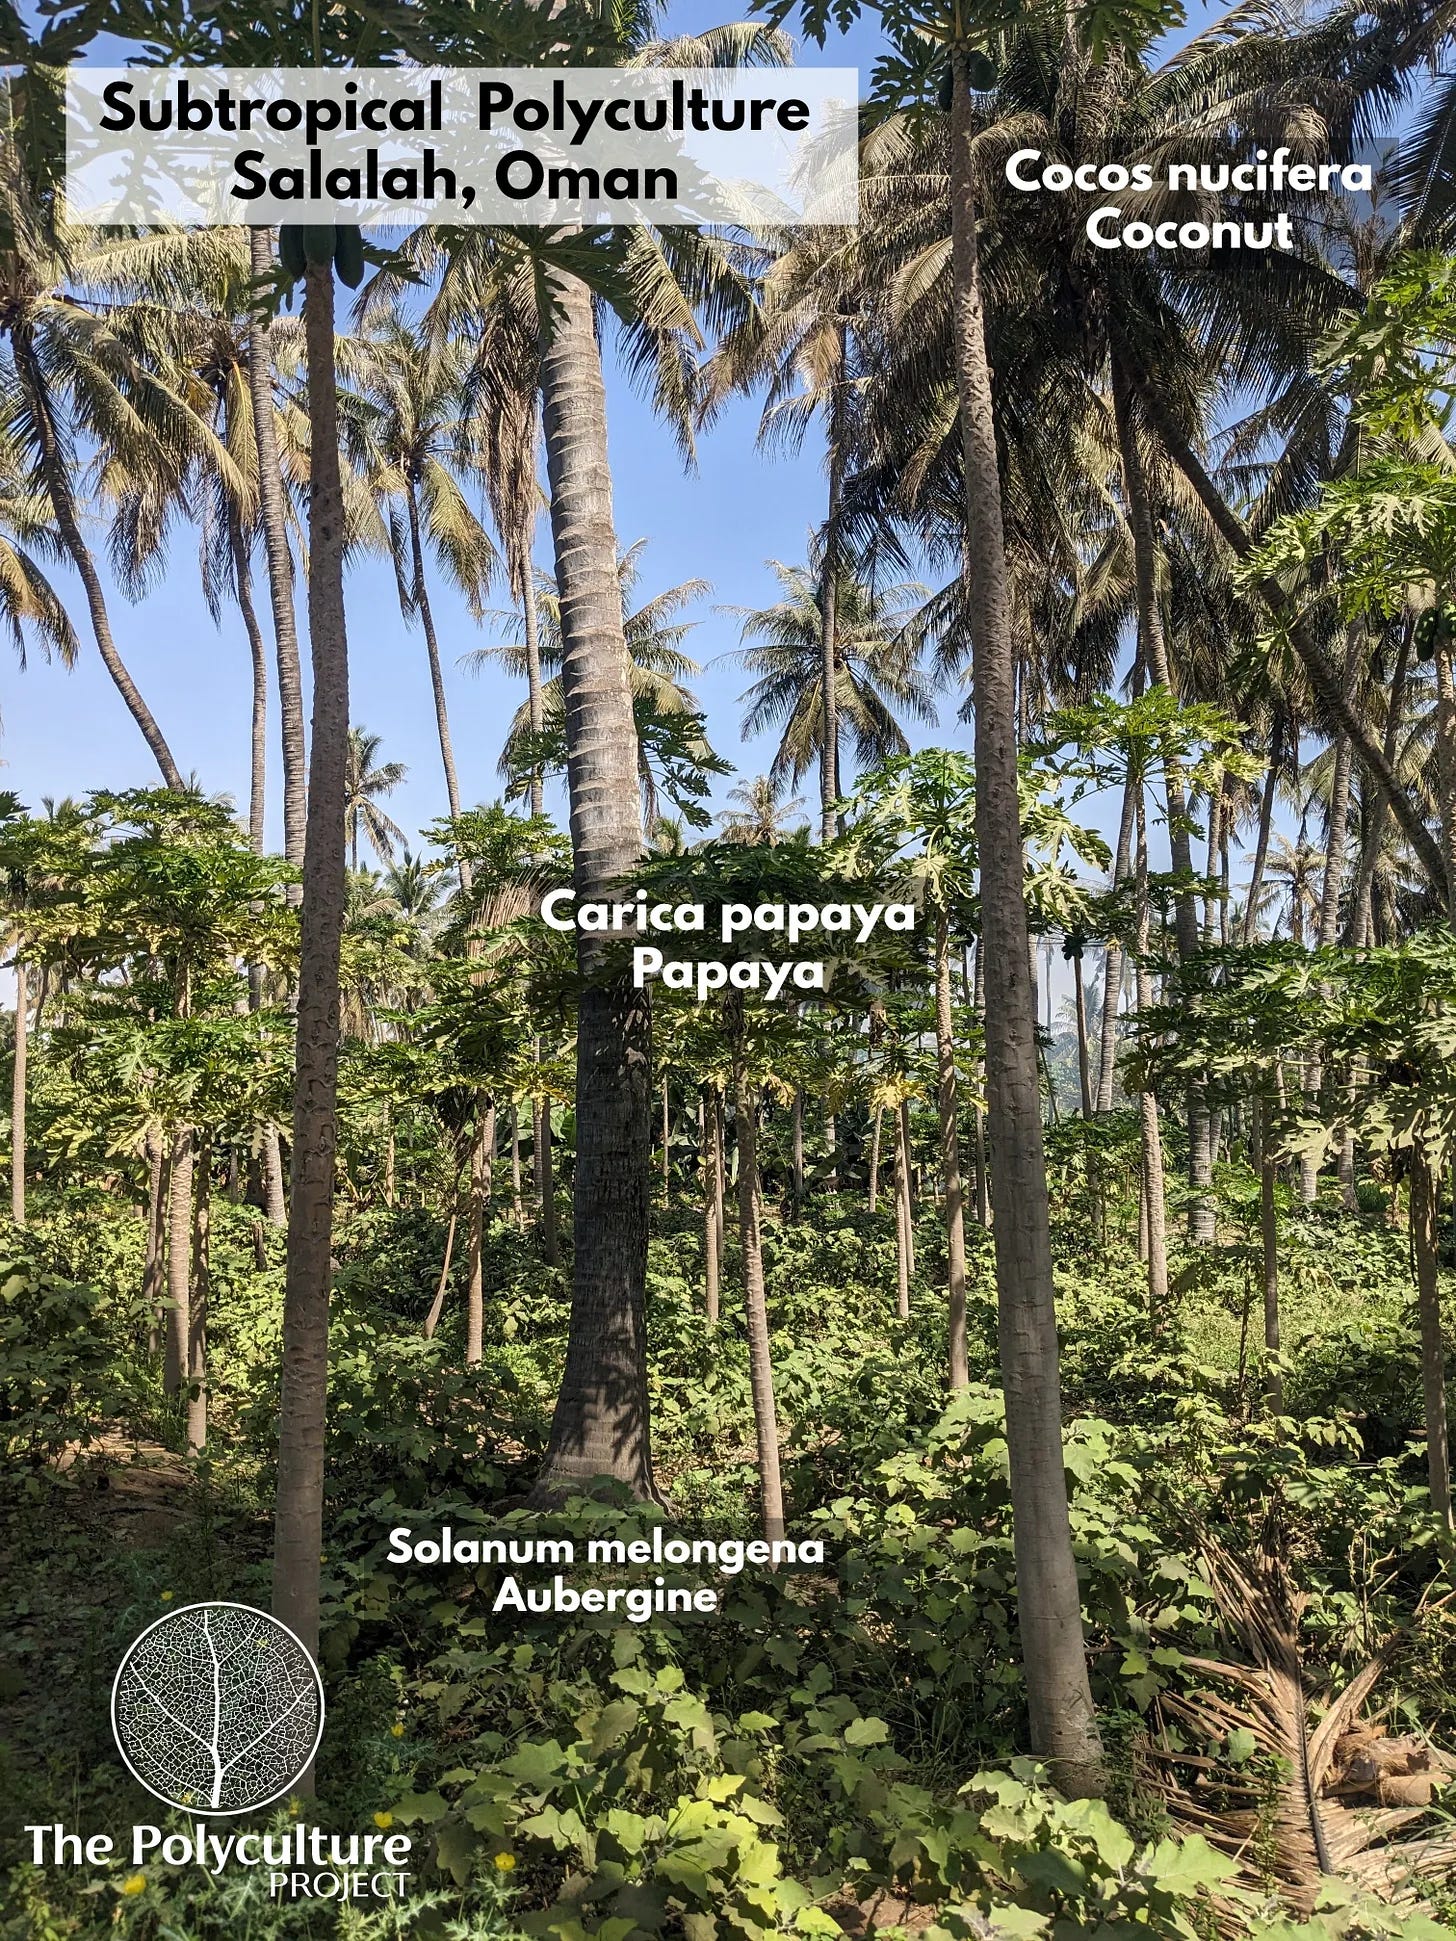
Welcome to a new series that will focus on regenerative polycultures for dry and hot climates, which I’ll refer to as Xeric Polyculture. The intention of this series is to provide useful and practical advice for growers in xeric regions of the world and to present a portfolio of plants and polycultures that can be used as broadly as possible within these regions.
We’ll start with an introduction to the xeric regions of the world, looking at the conditions and challenges of growing in these areas and how we may overcome these challenges. In future articles, we’ll introduce polyculture designs, plant lists, and best practices for growers with the ultimate aim being to provide a guide for designing, building and managing regenerative systems for this climate.
The Polyculture Project is a reader-supported publication. To receive new posts and support my work, consider becoming a free or paid subscriber.
The series will include the following:
Part 1 - Introduction to Xeric Regions - Geographical Categories - Conditions and Challenges for growers in these regions and how to address them.
Part 2 - Xeric Forest Gardens - Multilayered Xeric Polyculture - Canopy, Shrub, Herb, and Ground Layers.
Part 3 - Building Soil - Biomass Plants, Producing Biomass, Composting, Manures.
Part 4 - Productive Polycultures - Home Forest Gardens - Commercial Growing, Edible Landscapes for Drylands.
Part 5 - Support and Fertility Polycultures - Xeric Nitrogen Fixers, Mineral Repositors, and Borg Plants.
Part 6 - Infrastructure Polycultures - Windbreaks, Hedging, and Amenity Planting.
Part 7 - Management - Irrigation, Harvesting, Pest Control, Pruning, and Fertility.
So, let’s get started with an overview of the xeric regions of our planet.
Introduction to Xeric Regions
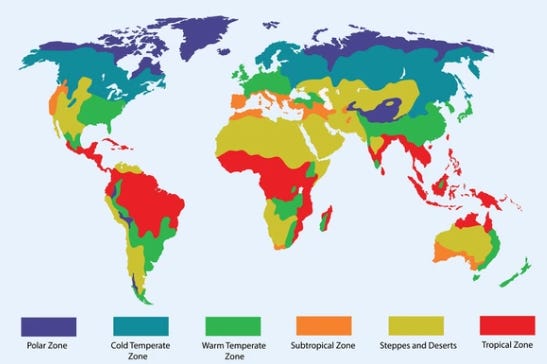
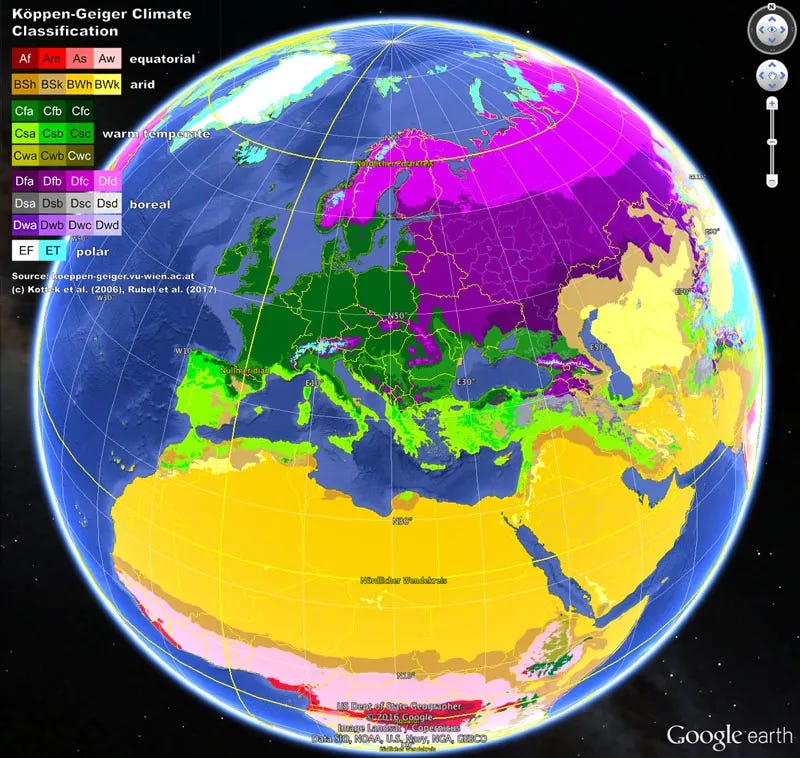
The term "xeric" comes from the Greek word "xēros," meaning "dry," and is used in ecological and botanical contexts to describe environments or habitats that have very low moisture levels. Xeric conditions are typically found in deserts or arid regions, where plants and animals have adapted to survive with minimal water. The yellow areas in the map below do a good job of indicating where you will find these conditions on our planet.
Xeric regions are characterized by their dry climates, low rainfall, and arid conditions. The broad regions of the world typically considered xeric include:
Deserts
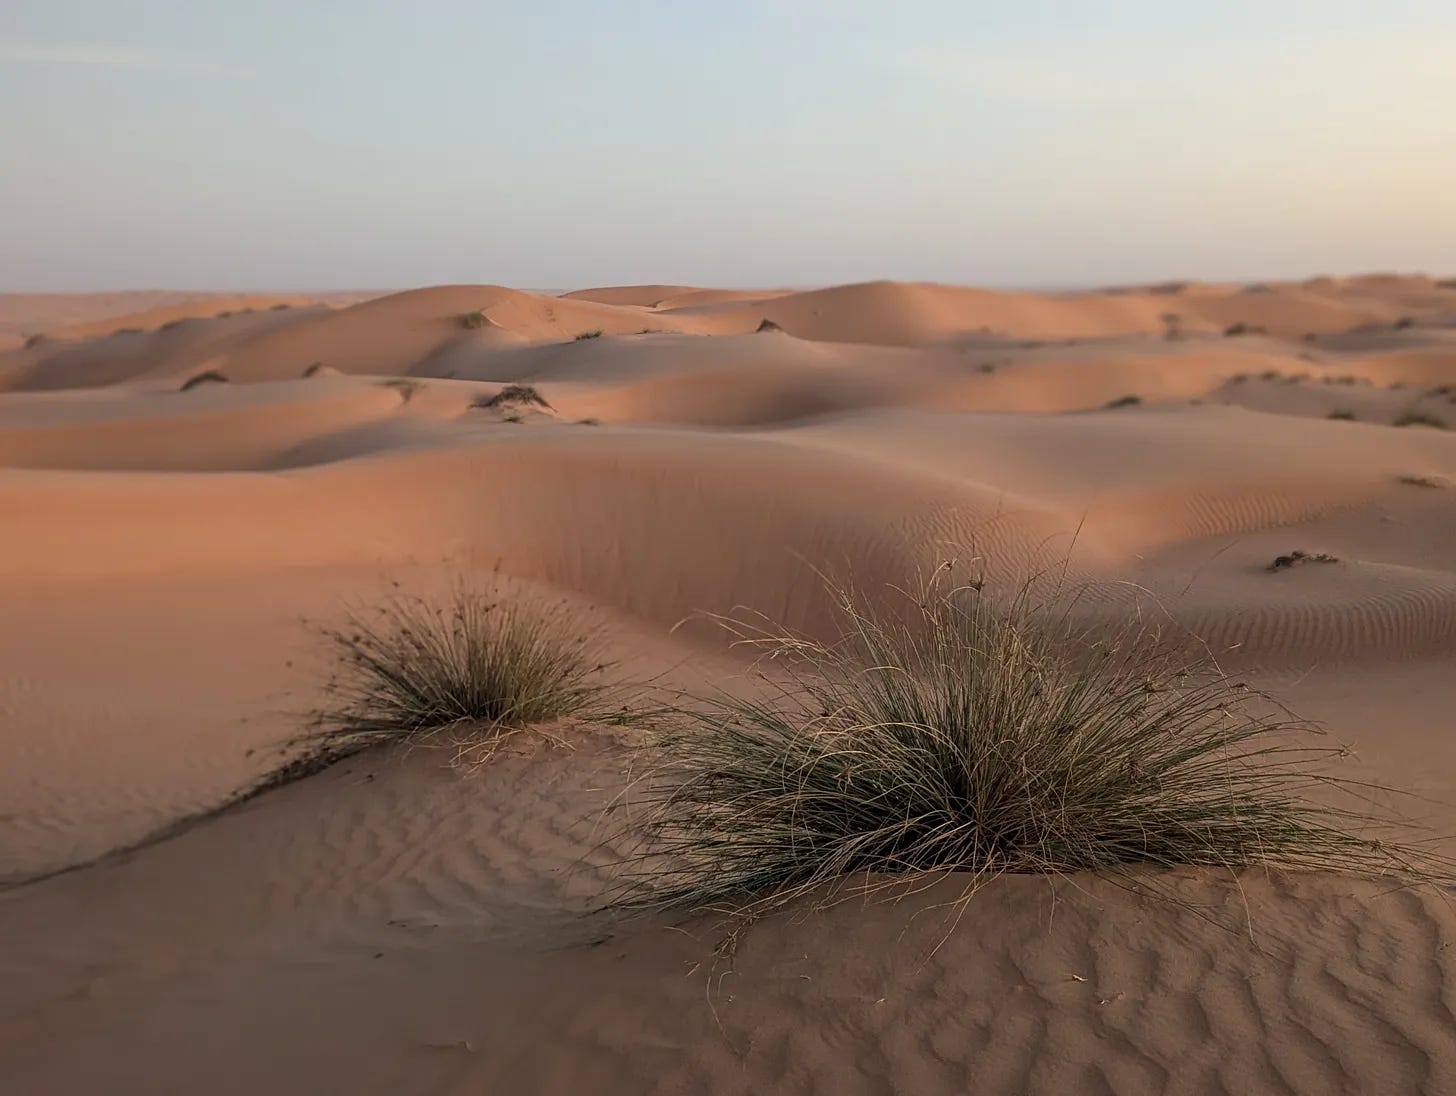
Cyperus conglomeratus growing on the dunes of the magnificent Sharqiya Sands in Oman.
Sahara Desert (North Africa)
Arabian Desert (Middle East)
Kalahari Desert (Southern Africa)
Sonoran Desert (North America)
Mojave Desert (North America)
Atacama Desert (South America)
Gobi Desert (Central Asia)
Semi-arid Regions
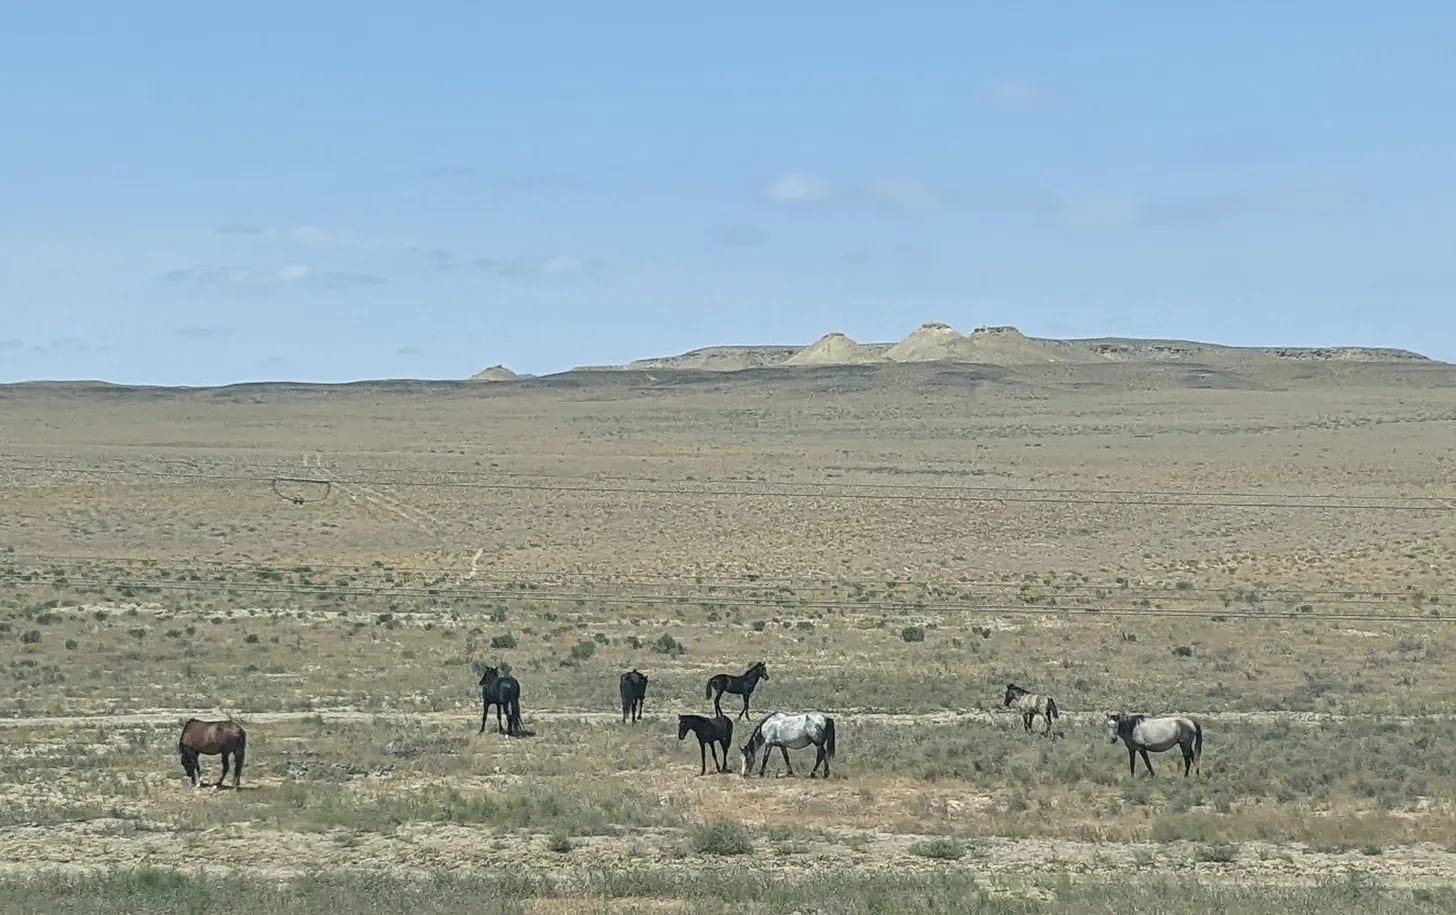
Great Plains of West Kazakhstan
Great Plains of West Kazakhstan
Great Plains (North America)
Central Asia (including parts of Kazakhstan and Mongolia)
Mediterranean Regions (areas with dry summers and wet winters)
Savannas
Some savanna regions, particularly those with long dry seasons, can also be classified as xeric.
Mountain Regions
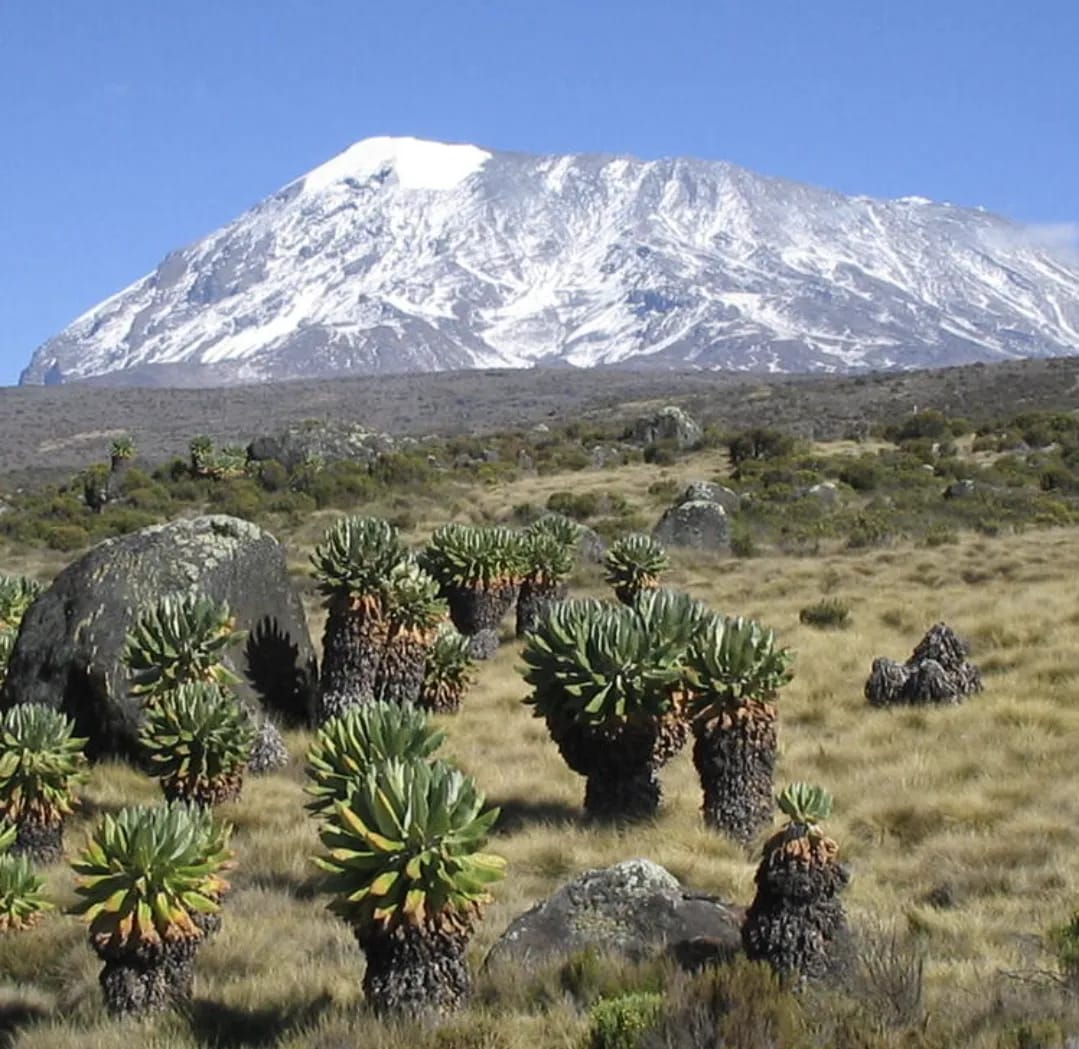
Kilimanjaro National Park - Tanzania
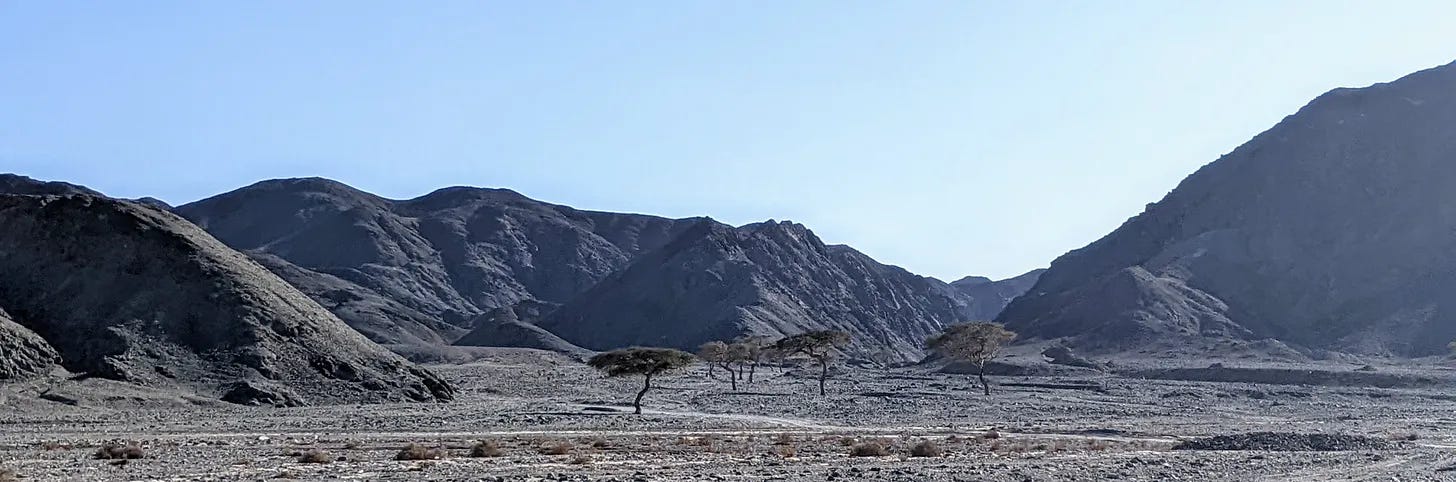
Certain high-altitude areas can have xeric conditions due to rain shadow effects.
These regions are often characterized by specific flora and fauna adapted to low water availability. However, growing strategies and planting schemes that work in one place will not necessarily work in another. There are several variables to take into account that will determine which plants to use and the optimal practices to carry out.
Design Variables to Consider
Climate Variability: Different xeric regions have varying temperatures, humidity levels, and seasonal rainfall patterns. For example, the Sahara is much hotter than the Atacama Desert, and plants that survive in one place may not be hardy enough to survive in another.
Soil Types: Soil composition and nutrient availability can differ significantly. Some areas may have sandy soils, while others may have clay or rocky substrates, impacting water retention, pH, and fertility.
Local Flora and Fauna: Native plant species are adapted to specific conditions. One region's native plants may not be appropriate for another's and can, in rare cases, be invasive when introduced into new environments.
Water Availability: Access to water sources, such as underground aquifers or seasonal rivers, varies, affecting irrigation techniques and plant selection.
Pest and Disease Pressure: Different regions may have unique pests and diseases, requiring tailored management strategies and suitable species selection.
Practically Similar Xeric Regions of the World
Accounting for these variables, some regions share similar enough conditions that should allow for the same or similar polycultures to thrive. Here are some potential groupings:
Hot Deserts: The Sahel, a vast semi-arid region of Africa separating the Sahara Desert to the north and tropical savannas to the south. The Arabian Peninsula, Sonoran Desert, Mojave Desert.
Semi-arid Regions: Great Plains, Central Asia, Eastern Europe, Kazakhstan, Mongolia.
Mediterranean Regions: Mediterranean climates (parts of Southern Europe, California, and Australia).
Savannas: African savannas and parts of South America.
As mentioned above, it’s crucial to consider local soil, water availability, and pest pressures, and incorporating native species should always be a priority in regenerative polyculture designs.
For finer grain categorization and to locate areas that are climatically compatible, we can refer to the Köppen climate classification, where we will find the B classification indicating a hot desert climate.
These regions share hot desert climates characterized by low precipitation and high temperatures, especially in summer. Many areas have sandy or rocky soils with low organic matter, affecting water retention and nutrient availability. Water sources are often limited, leading to reliance on irrigation from aquifers or desalination in coastal areas.
Being a sun lover with a strong desire to escape the temperate winter, I’ve spent a lot of time in North Africa, the Levant, and the Arabian Peninsula over the last five winters, observing both the native plants in these regions and the cultivation practices. That said, I’ll be focusing the polyculture designs, plant lists, and practices for this climate zone, specifically centered around BWh: Hot desert climate, where B = Arid and semi-arid climate, W = Indicates a desert climate, and h = Hot, meaning the hottest month averages above 18°C.
Countries that have a significant area of land in this climate type include:
Saudi Arabia
United Arab Emirates
Qatar
Bahrain
Oman
Yemen
Egypt (parts of)
Jordan (parts of)
Kuwait
Iraq
Sudan
Libya
Iran (parts of)
Some mountainous regions in these areas may exhibit a more temperate climate, classified as Csa (Mediterranean climate), but the majority can be classified as desert and mostly subtropical, with the exception of Iran, which has a temperate climate in the north.
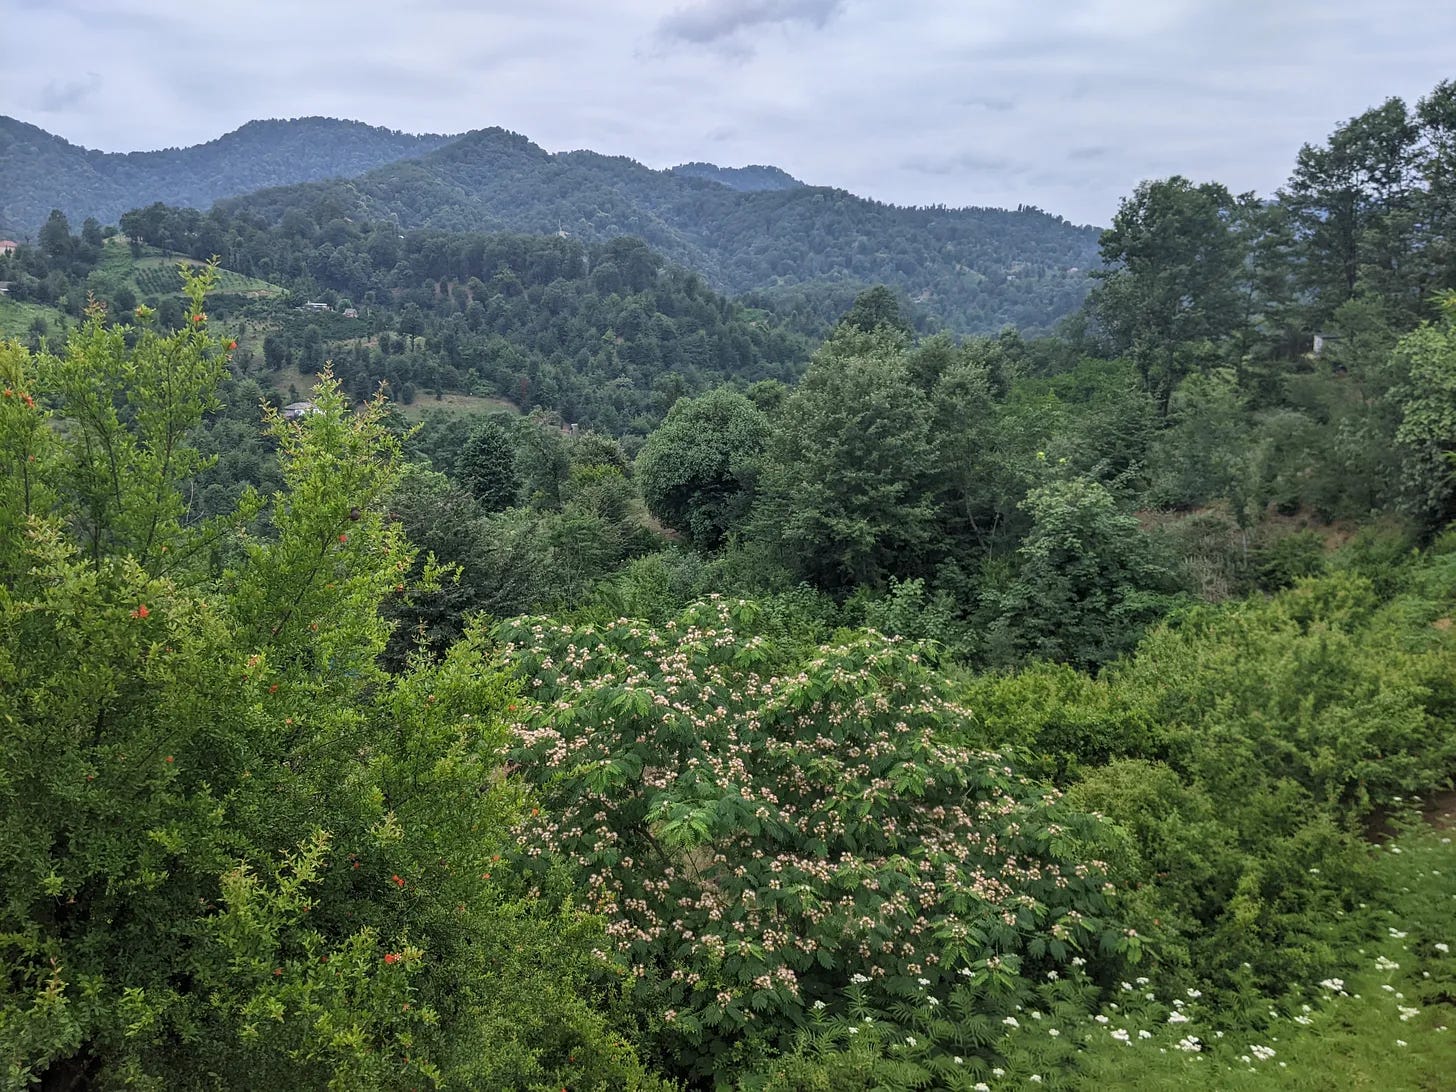
Temperate deciduous broadleaf forests of North Iran in Talysh Mountains
Although the focus will be on the BWh Köppen climate classification, there should be enough overlap to make the information in this series useful for growers in the following zones too:
If you are curious as to exactly which KCC zone you are located in, you can download a Google Earth overlay from here. I’d recommend the high-res download, although mid-res works well too.
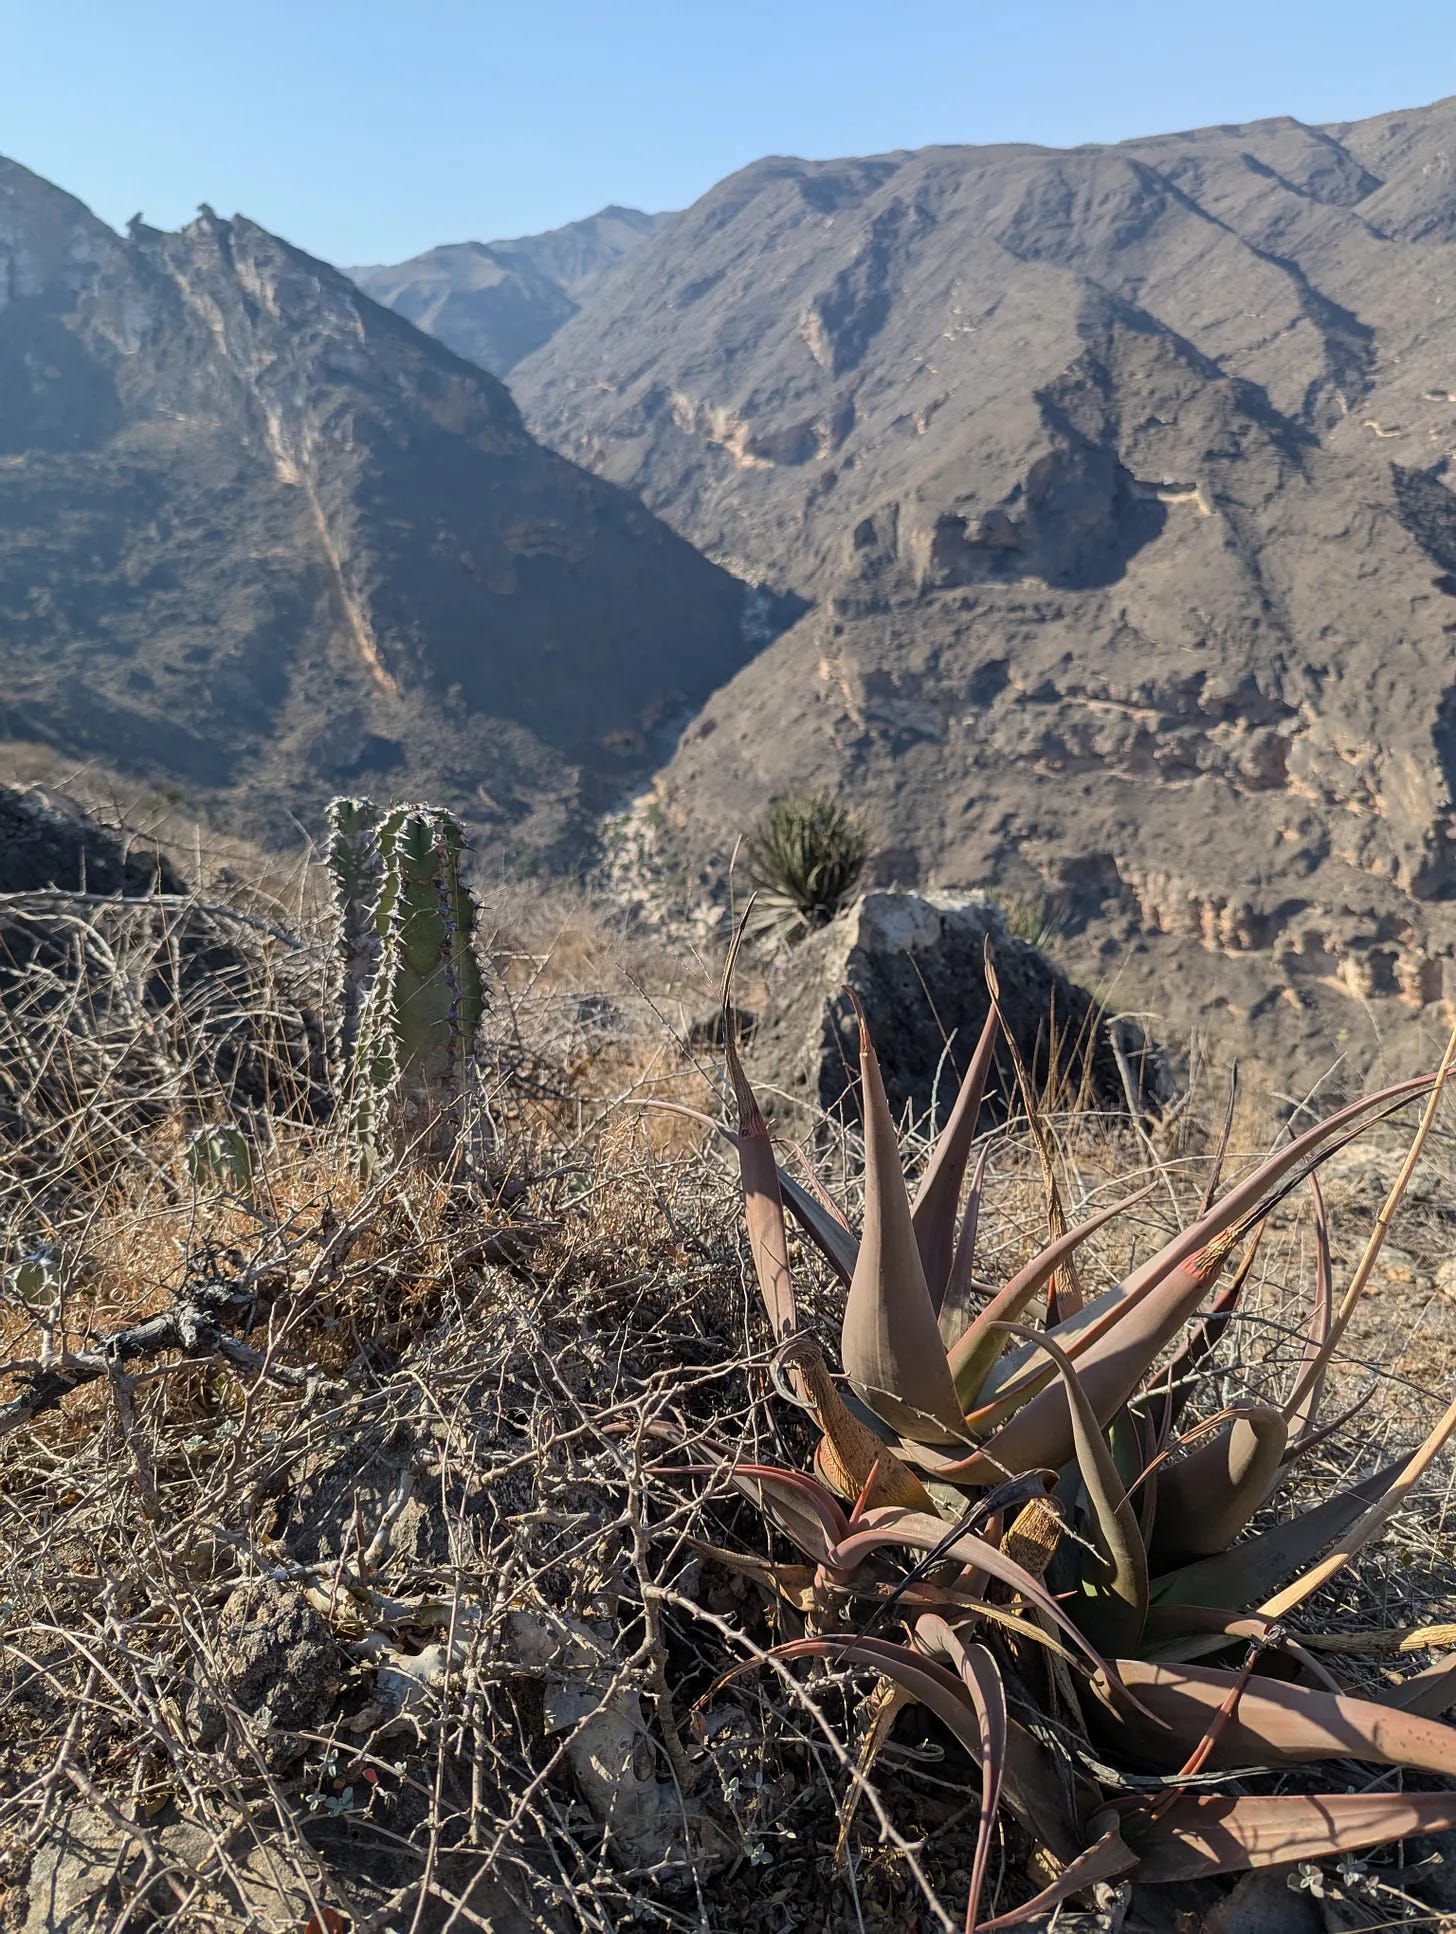
Another factor to consider is microclimate, which includes exposure to wind, light, and water within a specific location. For example, the photo below is of a north-facing slope sheltered somewhat from salt-laden winds from the sea to the south and intense heat from the sun for a significant period of the day. In stark contrast to the south-facing slope on the other side of the valley, this slope is well-vegetated and home to a diversity of plants, insects, reptiles, and birds.
North facing Slope in Dhofar Mountains Oman
So now that we know the climate and regions of the planet we are focusing on, let’s look at the conditions, challenges, and potential solutions when growing in these regions.
Want to learn how to design, build and manage regenerative landscapes? Join us on ourRegenerative Landscape Design - Online Interactive Course. We look forward to providing you with the confidence, inspiration, and opportunity to design, build and manage regenerative landscapes, gardens, and farms that produce food and other resources for humans while enhancing biodiversity.
You can access the course material at anytime and join the live sessions and interactive forums that run from May - Oct every year. All members of the Bloom Room receive a 500 EUR discount. To take up this offer all you have to do is become an annual subscribers to our Substack andregister herewith the promo code BLOOM.
I look forward to you joining !
Typical Soil Conditions
Overview of Soil Formation
In temperate regions, soil is formed through the natural processes of rain, frost, plants, and microorganisms that break down rocks into fine particles, blending them with organic material from decaying vegetation. Conversely, in arid regions, this process is much slower, resulting in minimal natural soil and even less organic matter. The bedrock in these areas is often limestone, leading to alkaline soils that can inhibit plant growth. Additionally, salinity can pose challenges in some locations.
Enhancing Soil Quality
To improve the quality and depth of soil, especially in areas with poor natural soil, it is often necessary to import additional materials. Even established growing areas can benefit from the addition of organic matter. Before sourcing soil materials, it is essential to understand the present soil types and the ideal conditions for plant growth. Typically, the soils found in these regions include sandy and silty soils.
Sandy Soils
When natural material is present, it is most commonly sand. Sandy soils consist of large particles that allow for easy cultivation and excellent drainage, which many plants require, especially during humid periods when they are prone to rot.
Advantages:
Well-drained and easy to work with.
Disadvantages:
Lacks essential nutrients.
Nutrients are quickly washed away.
Dries out rapidly and requires frequent irrigation and feeding.
Fine Silty Soils
Fine silty soils, often sourced from wadi basins and recharge dams, are commonly referred to as "wadi soil." They consist of very fine particles that form a solid mass, allowing for significant water retention.
Advantages:
Excellent water-holding capacity.
Disadvantages:
Becomes slimy and unmanageable when saturated.
Forms hard lumps when dried.
Lacks air spaces, creating a challenging environment for root respiration.
Water cannot penetrate easily, resulting in surface pooling while lower layers remain dry.
Neither silt nor sand is ideal, but a mix of the two, creating loamy soil, makes a good medium for plant growth. The mix of particle sizes holds water better than sand while allowing better aeration and drainage than silt.
The Importance of Organic Material
Incorporating organic material into the soil offers numerous benefits and serves as a fundamental solution to various soil issues across all climates. Organic matter can take many forms, including peat, compost, tree bark, coconut fiber, animal manure, and homemade compost. It acts as a soil conditioner, enhancing moisture retention while preventing waterlogging.
Rich in beneficial soil bacteria, organic material breaks down micronutrients into simpler forms that plants can easily absorb, which are essential for healthy growth. Its mildly acidic nature also helps to counterbalance the typically high alkaline levels often found in the soils of this region.
Certain types of organic material, such as animal manure, not only improve soil structure but also enrich it with essential nutrients. In contrast, peat serves primarily as a conditioner, though it is low in nutrient content.
The high temperatures of the region accelerate the decomposition of organic material by soil bacteria, leading to significant breakdown within six months to a year. As a result, it is crucial to regularly replenish organic matter in the soil. Throughout this series, we will delve deeper into these concepts, exploring strategies and polycultures designed to enhance biomass growth.
Soil Mixes Commonly Used by Landscapers
The following soil mixes are used by landscapers in this region and will vary depending on how much drainage is required and how much fertility needs to be provided. Generally speaking, the more organic material in the mix, the better.
The soil issues typical for these regions are alkalinity, salinity, and hardpan.
Soil Alkalinity
Soil acidity and alkalinity are measured on a pH scale that ranges from 0 to 14. A pH above 7 indicates alkaline soil, while a pH below 6.5 is considered acidic. The optimal pH level for plant growth lies between 6.5 and 7, which is neutral to slightly acidic.
Soil pH is influenced by the underlying bedrock, with limestone being prevalent in many regions, leading to generally alkaline soils. High alkalinity can hinder plants from absorbing essential nutrients, particularly iron and magnesium, leading to poor growth and a condition known as chlorosis. Symptoms of chlorosis include dark green mid-ribs and veins, with the rest of the leaf appearing pale.
Chlorosis due to alkaline conditions
Fortunately, this issue can be addressed by incorporating organic matter into the soil, which helps to increase acidity and improve nutrient availability for plants.
Soil Salinity
Salts are a natural component of all soils. In areas with sufficient rainfall, these salts dissolve and are washed away into streams and the sea. However, in arid regions or areas without a direct drainage route to the ocean, some of this water evaporates, leading to a concentration of dissolved salts. This process can result in the formation of salt lakes, brackish groundwater, salinized soil, or salt deposits.
خور جنوف Salt Lagoon , Dhofar, Oman
High salinity levels can significantly hinder plant growth. Affected plants often display small, pale leaves, and in severe cases, leaf edges may brown, ultimately leading to plant death. While some plants may continue to survive, they often remain stunted and poorly developed. If you notice poor plant growth despite good soils and adequate irrigation, it’s probably saline soil, and it’s a good idea to test the soil for salinity.
To mitigate salinity, salts can be leached from the soil through ample application of fresh water, provided that drainage is adequate and water is available. Another option is to incorporate compost and cultivate plants in free-draining raised beds. However, salinity issues can often recur in the long term. A more effective approach may be to grow tougher, salt-tolerant plants, of which there is a wide variety, while more sensitive species can be cultivated in containers.
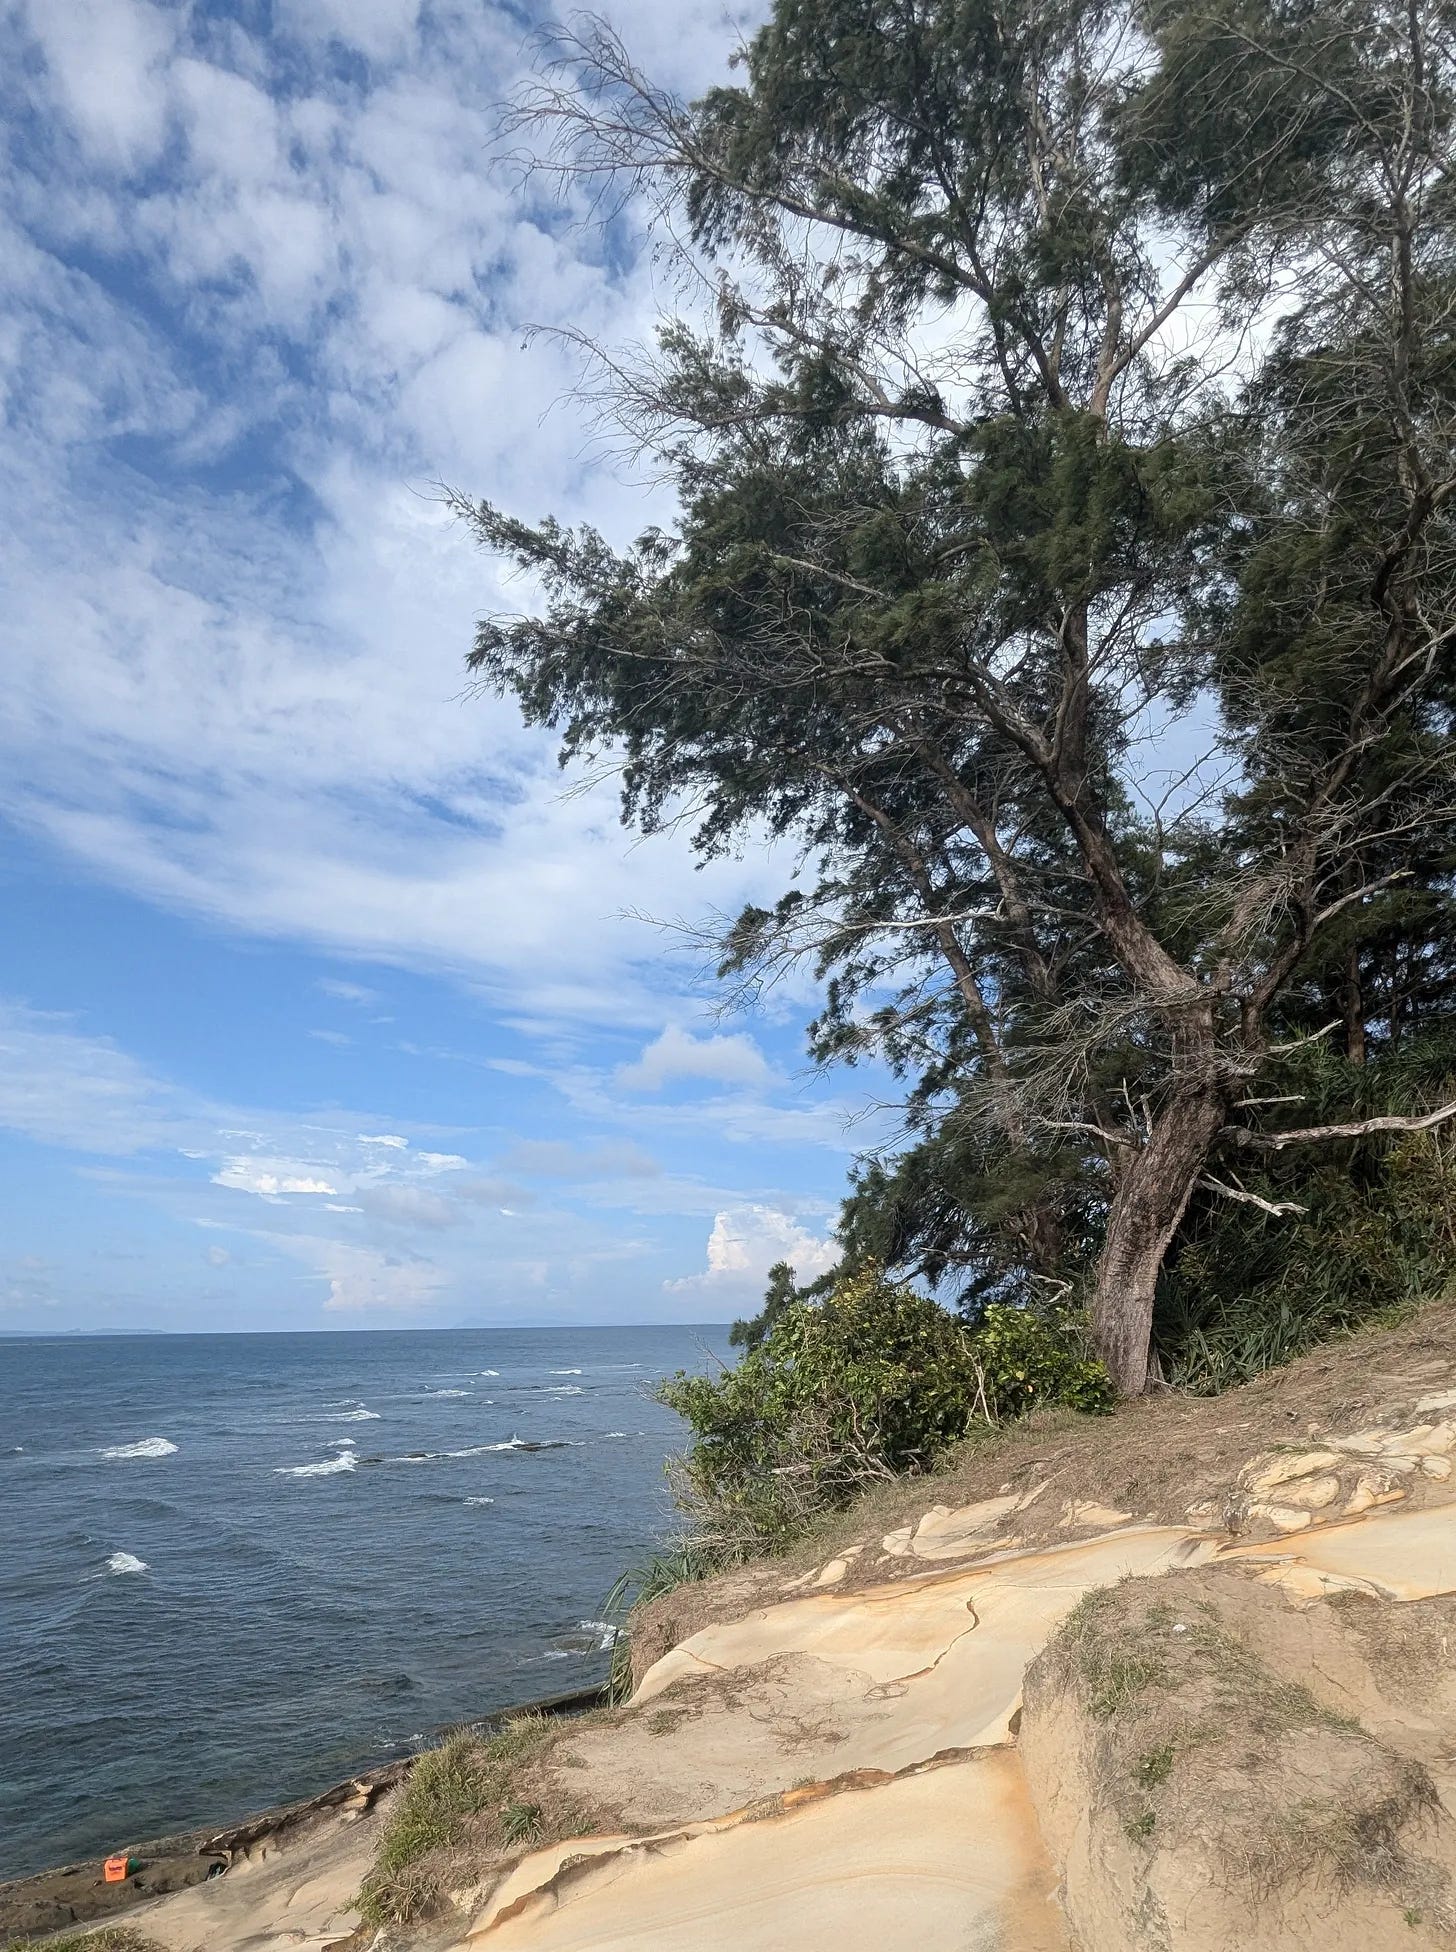
Casuarina equisetifolia growing on the rocky shores on the tip of Borneo, Kudat, Malaysia
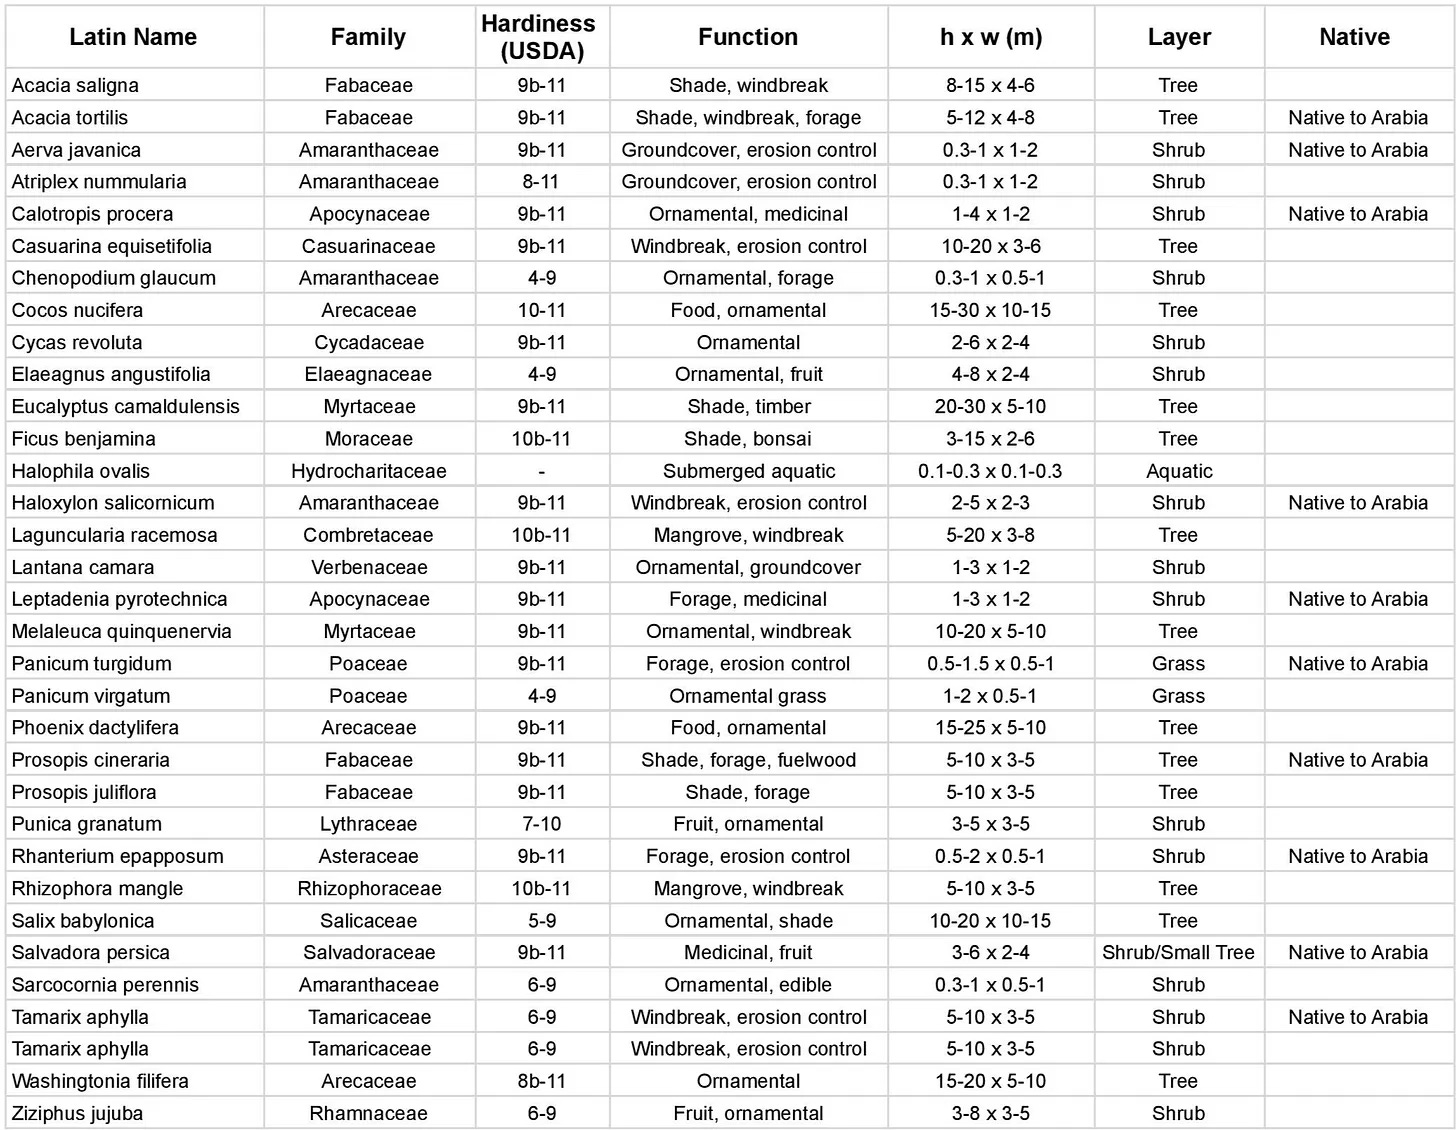
Here is a list of plants that will thrive in saline conditions and suitable for this region. In future articles, we will explore more closely specific plants and polycultures and examine the general salt tolerance levels of various species.
Hardpan
A hardpan can often be found in areas where fine silts have been washed in, settled, and baked hard in the heat. The result is a layer of dense, impermeable material that forms below the soil surface and inhibits water drainage, leading to localized waterlogging and creating a barrier for plant roots.
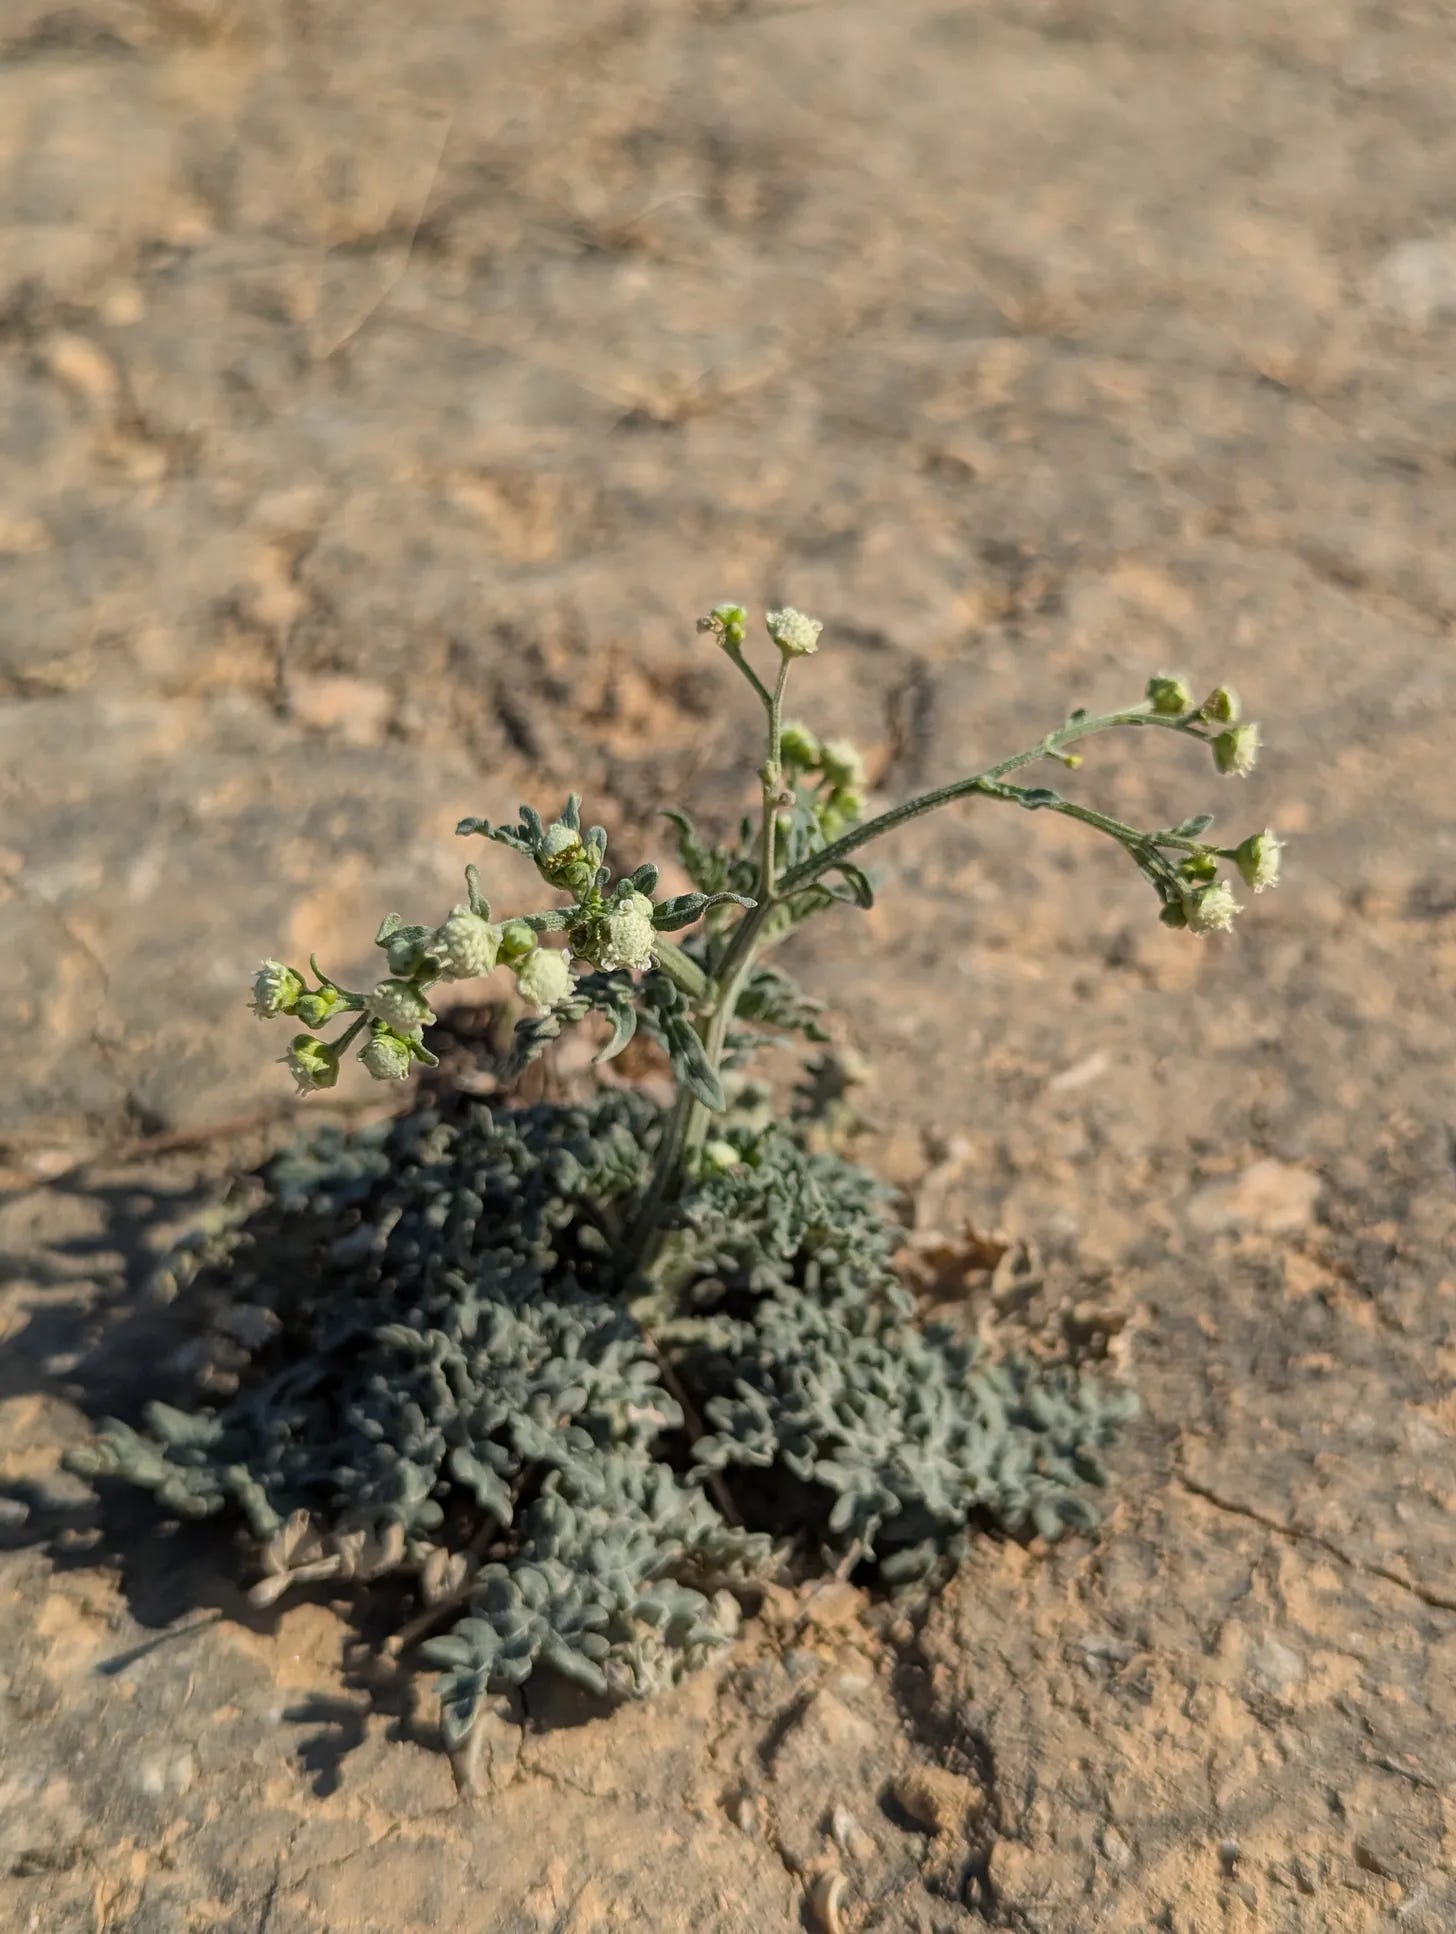
Parthenium hysterophorus - Congress Grass growing within a hard pan
To alleviate hardpans, they can be manually broken up using a pickaxe, or for larger areas, various plowing implements attached to a tractor can be employed. Once the hardpan is disturbed, it is essential to continuously add organic matter to the surface, such as maintaining a mulch layer and providing shade through growing plants. This will help prevent the hardpan from re-forming. Additionally, well-designed earthworks and effective site grading that channels rainwater runoff can minimize sediment accumulation and reduce the formation of hardpans in the first place.
Animal Browsing and Fencing
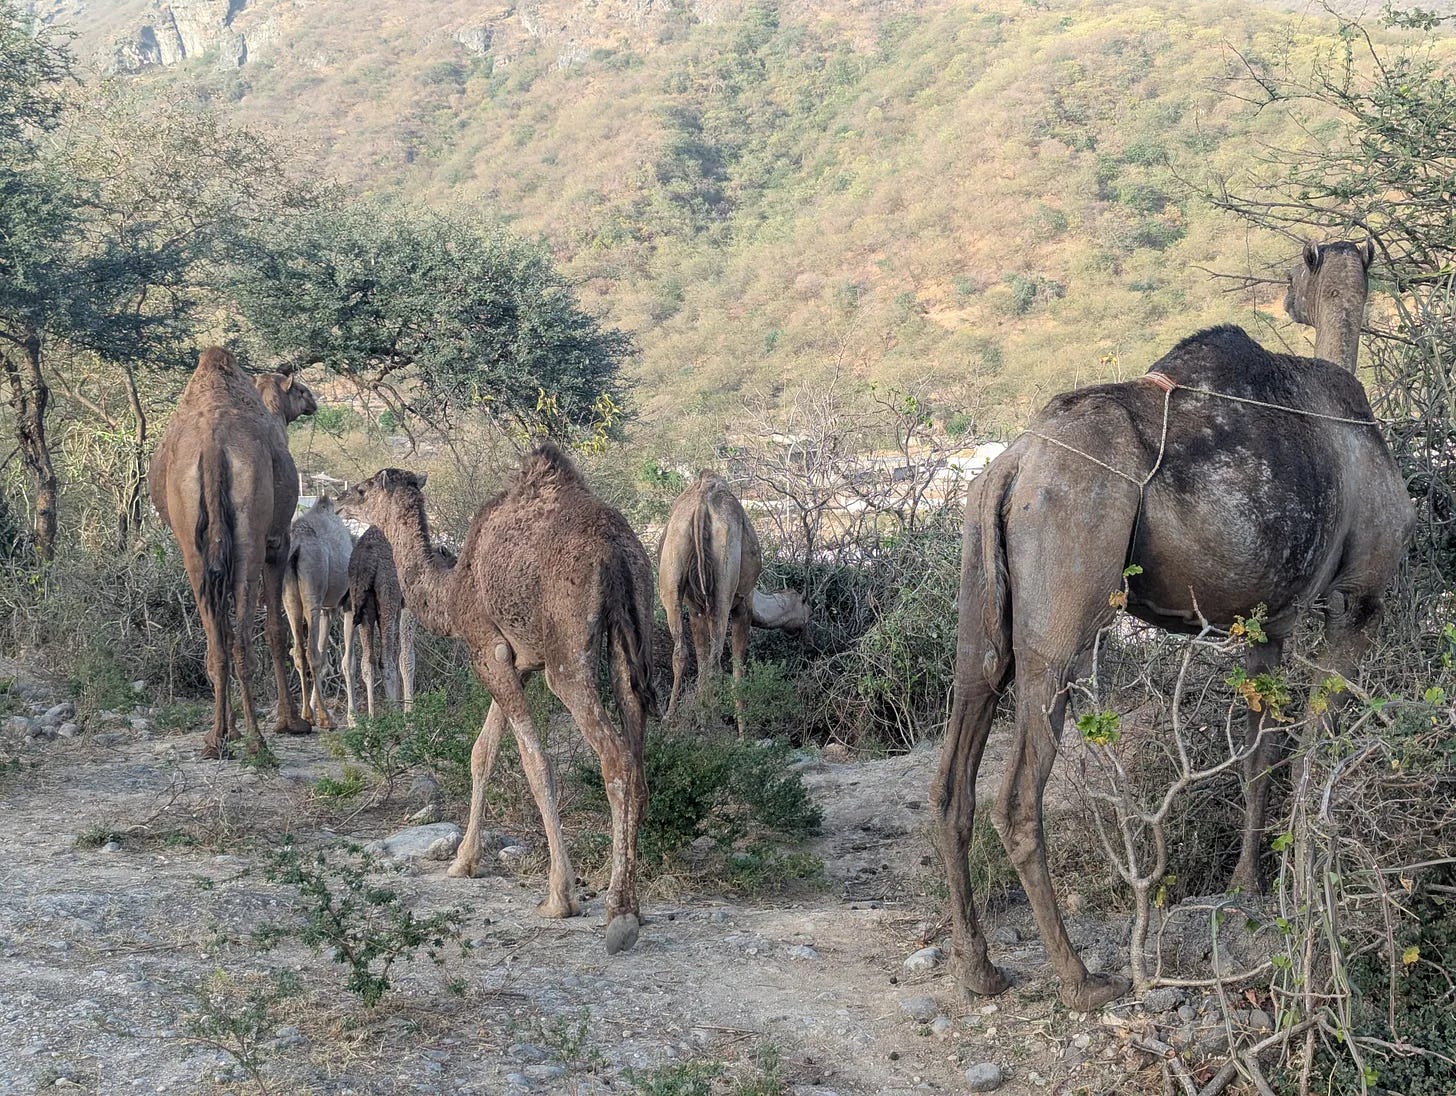
As anyone who has visited this part of the world will know, there is lots of land, with the majority of it open to explore for humans and other animals, including camels, goats, and sheep. Fencing should certainly be considered before planting out. We’ll look at various fencing options later in the series.
Dromedary Camel - Camelus dromedarius in Ain Garziz Park, Dhofar Oman
Xerophytic Plants
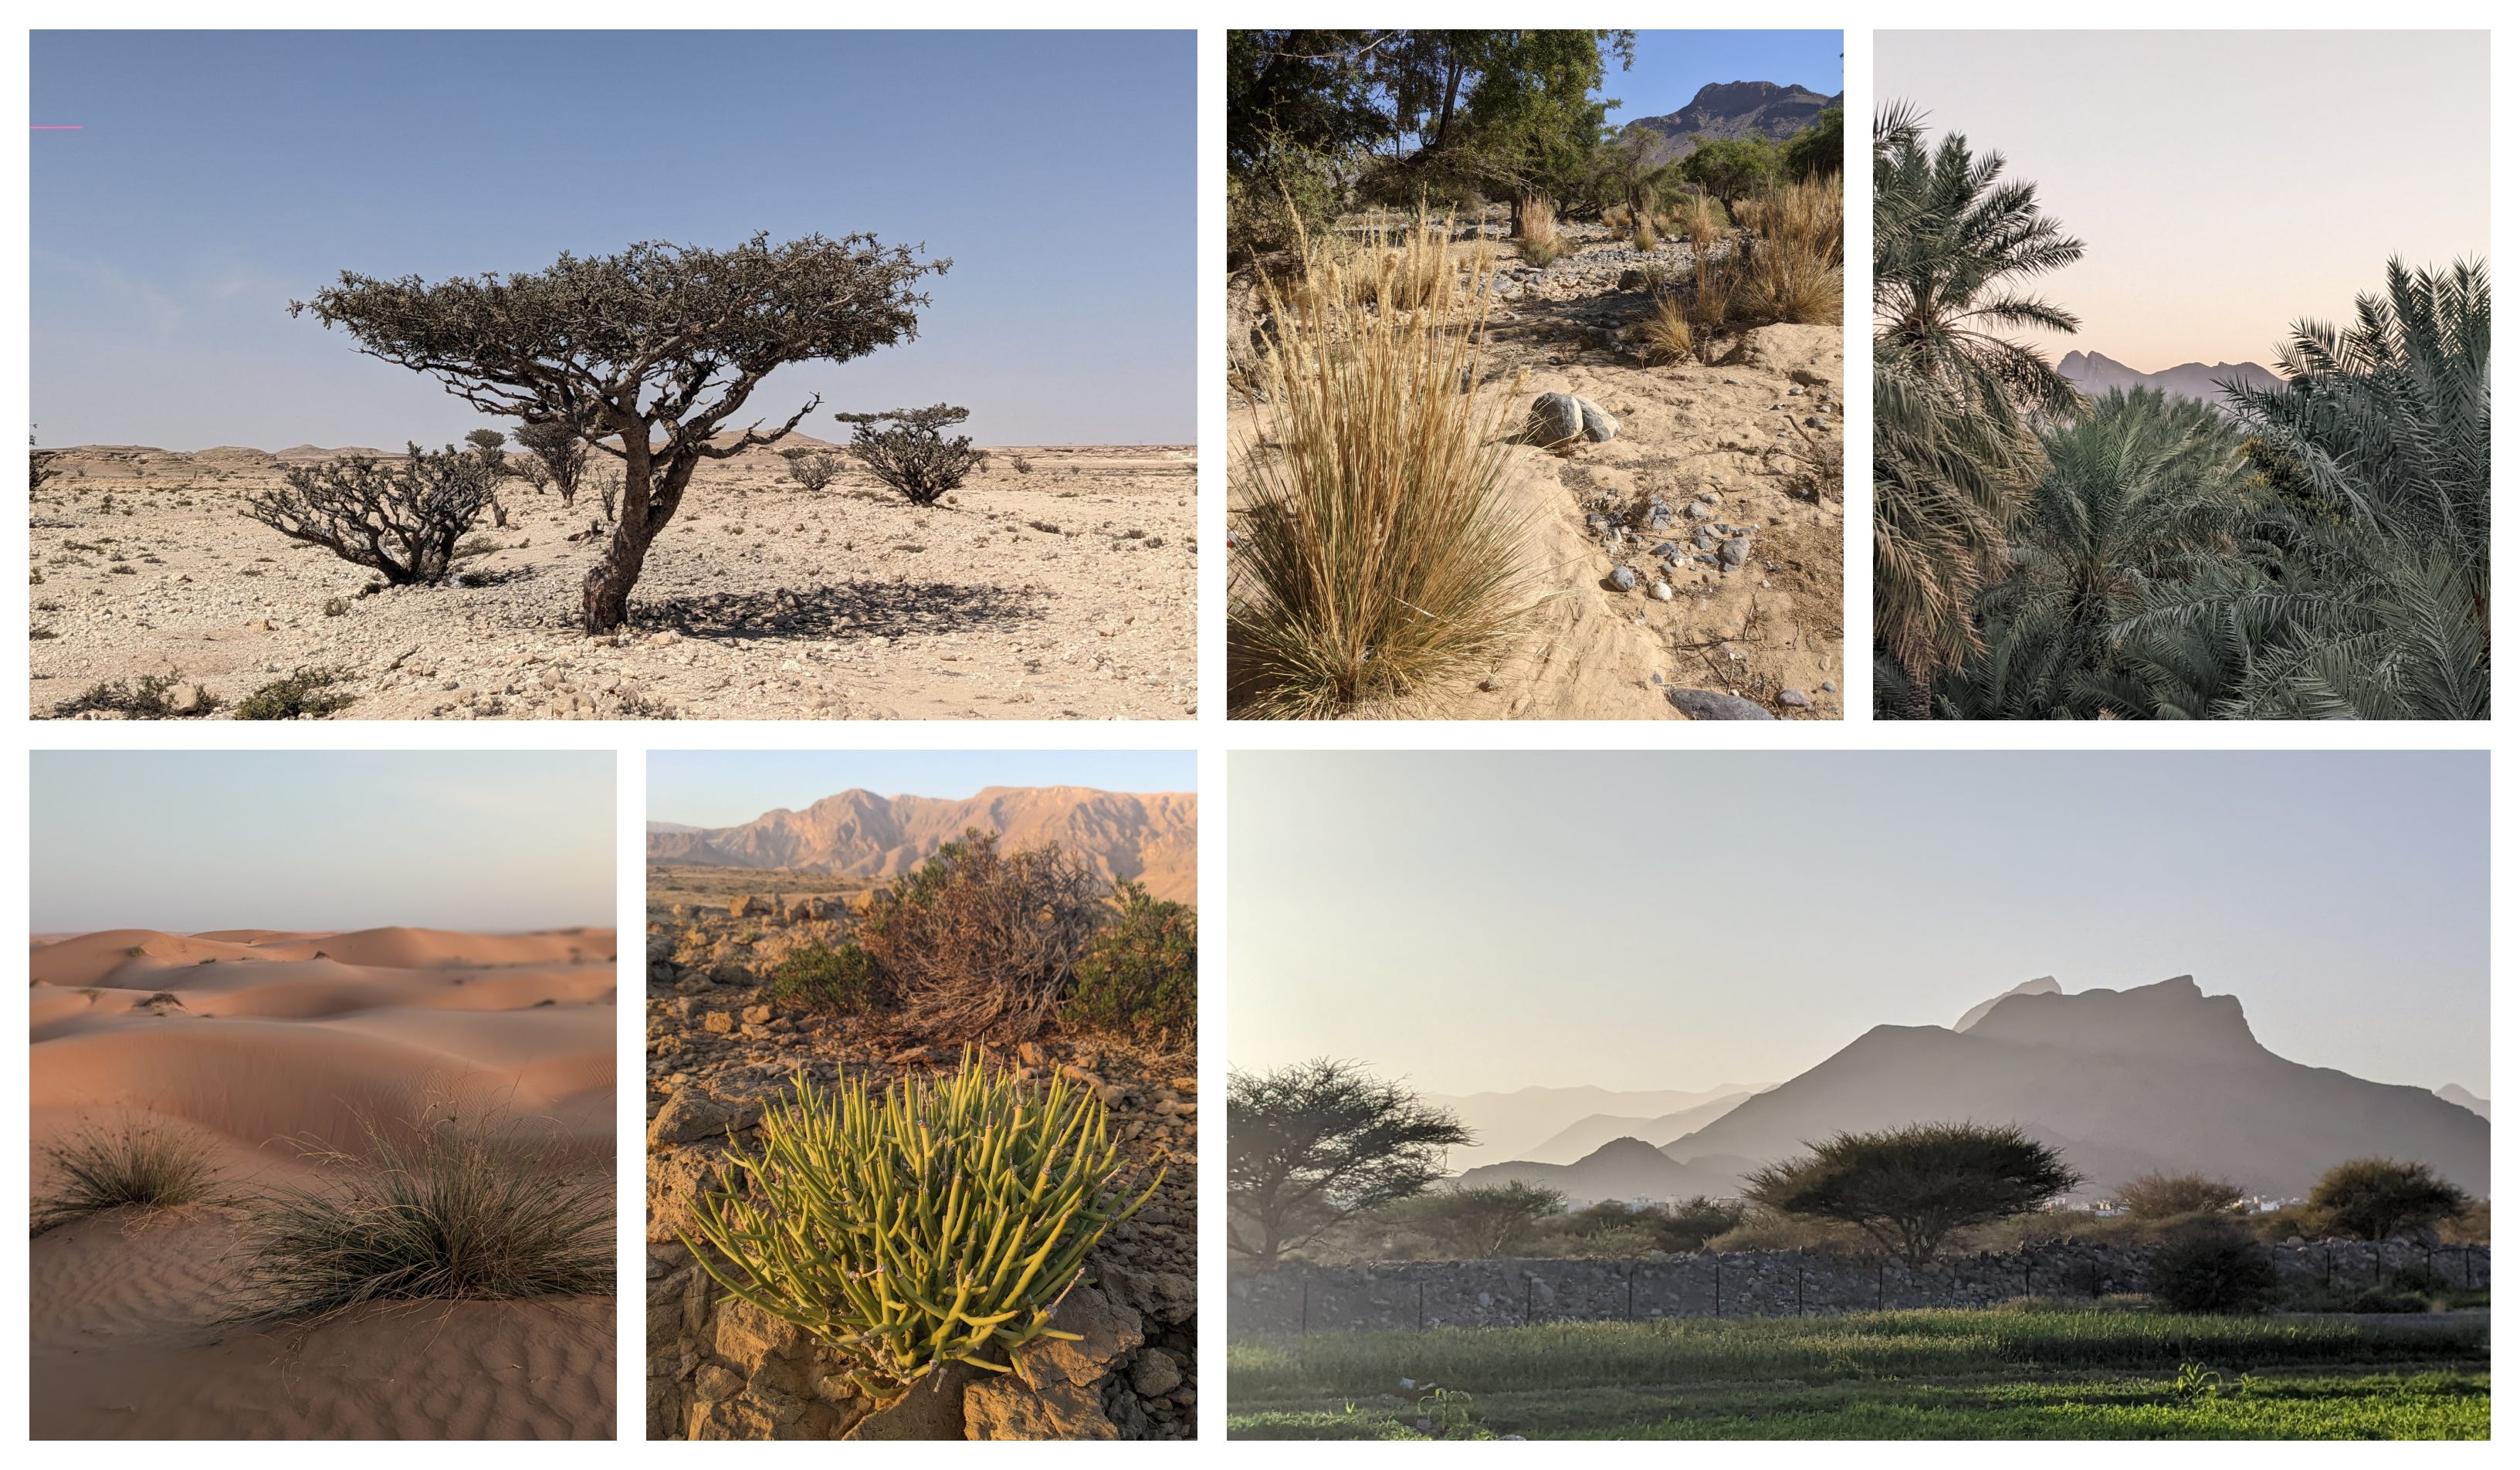
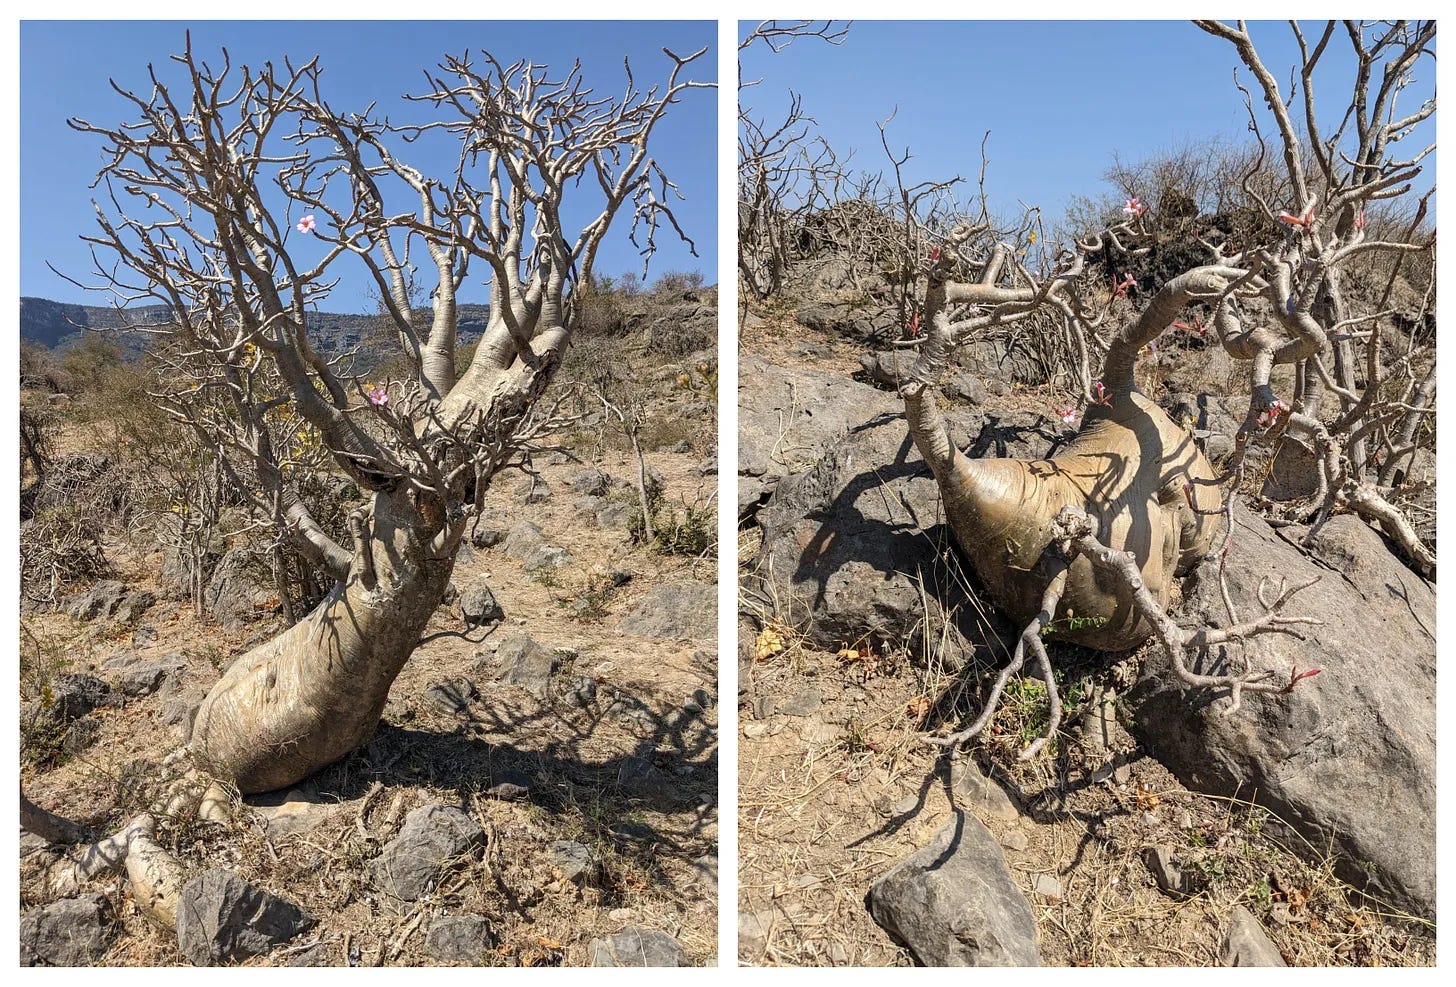
The climate naturally supports xerophytic, drought-tolerant shrubs and grasses, with some small areas of dry tropical scrub and thorn forest. We’ll be looking closely at these plants throughout the series, with a special interest in food and medicinal plants, nitrogen fixers, mineral repositors, and biomass plants.
Adenium dhofarense - Desert Rose up in the Dhofar Mountains, Oman
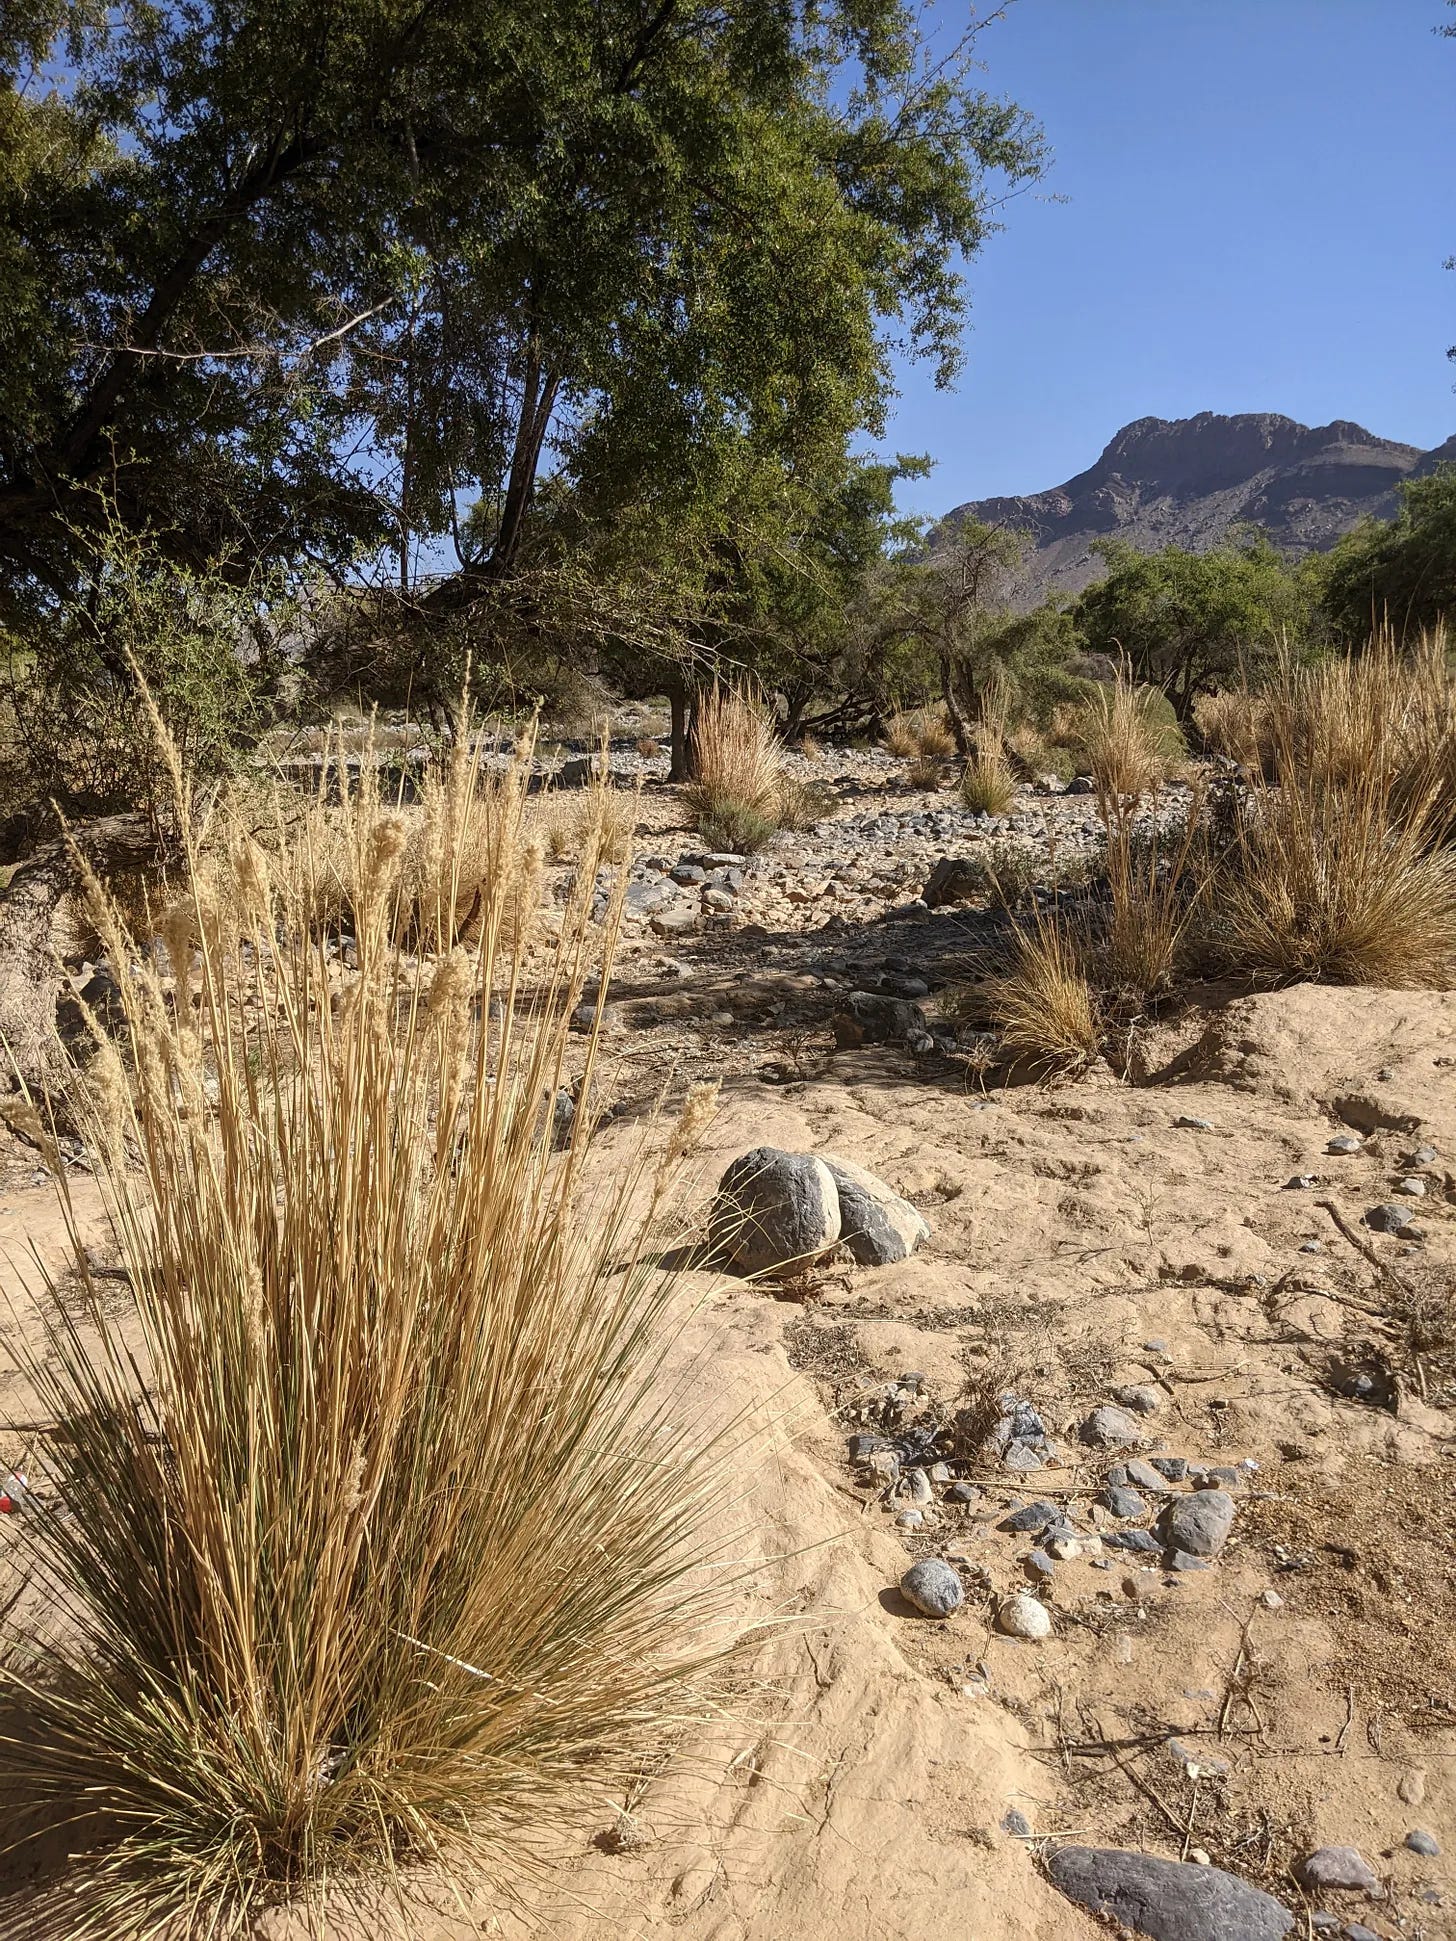
Native flora is ideally suited to the environment and benefits the wider ecosystem by being a host to native insects and birds. Native plants are not yet widely available in the nurseries of the region, but many of the species featured in this series are easy to grow from seed. These plants want to grow in this climate and need no assistance. Once established, native plants need very little water to thrive and are a long-term contribution to the environment.
Native Grasses with native Ziziphus spina-christi - Christ’s thorn Jujube in the background. In the Al Hajar Mountains, North Oman.
Welcome to our Online Store where you can find Forest Garden/ Permaculture plants, seeds, bulbs, and Polyculture multi-packsalong with digital goods and services such asOnline Courses, Webinars and eBooks. We hope you enjoy the store and find something you like. It's your purchases that keep our Project going.
You can also find our full list of trees. shrubs and herbs for forest gardens on our nursery website.
Other Challenges of Growing in Xeric Regions
Growing in xeric regions presents several significant challenges, primarily stemming from the inherent aridity of these environments. Obviously the most pressing challenge will be the lack of water and other challenges include:
High Evaporation Rates: The combination of high temperatures and low humidity can lead to rapid evaporation of soil moisture, further exacerbating water scarcity.
Limited Biodiversity: The harsh conditions often result in lower biodiversity, which can disrupt ecosystems and make them more vulnerable to pests and diseases. This reduced diversity can also negatively impact pollination and fertilization rates.
Temperature Extremes: These areas frequently experience extreme heat, particularly during the summer months. Such conditions can stress plants and lead to decreased yields. Additionally, significant temperature fluctuations between day and night, especially in desert regions classified as BWh, can further challenge plant survival. For example, daytime temperatures may soar, while nighttime temperatures can drop considerably. Weather patterns can also introduce occasional temperature spikes or drops, particularly during transitional seasons. The Khareef in South Oman and Yemen exemplifies this phenomenon.
Soil Degradation: Soils in xeric regions may be low in organic matter and nutrients, suffering from erosion or salinization, which adversely affects fertility. Limited vegetation cover can lead to increased soil erosion, particularly in windy conditions, further degrading soil quality.
Limited Crop Variety: The harsh conditions restrict the types of crops that can be cultivated, often confining growers to drought-tolerant species.
Plant Adaptation: When planting nursery plants, there may be a need for time to develop specific adaptations, such as light and heat tolerance, deeper root systems, or drought-resistant features. This process can be time-consuming and may not always yield successful results. Utilizing native plants, local cultivars, and sourcing plants from nurseries that cultivate them under field conditions—rather than the pampered conditions of industrial nurseries—may enhance success rates.
Economic Viability: The combination of lower yields and high input costs, particularly when utilizing desalinated water, can pose economic challenges for commercial agriculture in these regions. However, with an increasing number of developments from both public and private sectors and significant budgets allocated for grounds maintenance, introducing xeric polyculture appears feasible. This approach is likely to result in reduced costs and healthier plants and ecosystems.
Positives of Growing in Xeric Regions
While there are endless reasons to garden anywhere on our beautiful planet, the unique conditions in arid areas can really make a difference with some smart growing techniques.
Visual Appeal - In those hot, dry spots, the bright green of plants really pops against the landscape. Just a few strategically placed plants can create a stunning visual effect that brightens up the surroundings.
Long Growing Season - Xeric regions usually have long growing seasons. With a bit of irrigation, you can have something blooming or fruiting throughout the year.
Fast Growth - Many plants in this region grow surprisingly quickly. Some shrubs and trees can reach impressive sizes in just a year and with all that sunshine, you can create productive, layered gardens that maximize your space.
Focused Plant Choices - While there may be fewer plant options compared to other places, this makes it easier to really get to know the plants you’re working with. You can dive into the 2,000 to 3,000 native species, like different grasses, shrubs, and trees, many of which are perfectly suited for the dry conditions and are often overlooked.
All in all, growing in xeric regions not only brightens up the landscape but also supports local wildlife and encourages sustainable practices. By embracing the quirks of these areas, you can make a real impact and enjoy the journey along the way!
That’s all for Part 1. Subscribe to our Substack to get notifications of future posts, and please consider supporting the Substack by becoming a member, where you will receive a host of benefits, including live sessions, design tutorials, and discounts on upcoming courses.
See you next time for Part 2 - Xeric Forest Gardens - where we’ll cover multilayered xeric polycultures and look at species for Canopy, Shrub, Herb, and Ground Layers.
Support Our Project
If you appreciate the work we are doing you can show your support in several ways.
Become a member of the Bloom Room. A $70 annual subscription to our Substack provides you with access to live sessions, design tutorials, a members forum and more, see details here.
Comment, like, and share our content on social media.
We offer a diversity of plants and seeds for permaculture, forest gardens, and regenerative landscapes including a range of fruit and nut cultivars. We Deliver all over Europe from Nov - March. - Give a happy plant a happy home :)