
After a few months in the continental climate of Central Asia it was a refreshing change to be back in the Mediterranean Basin and even better to be here during September when the seas are still warm but the heat is less intense. During this post I’ll cover some of the exquisite habitats in the area, interesting wild plants I met along the way and the extremely productive and beautiful polycultures the people in this area cultivate and have probably been cultivating for many thousands of years.

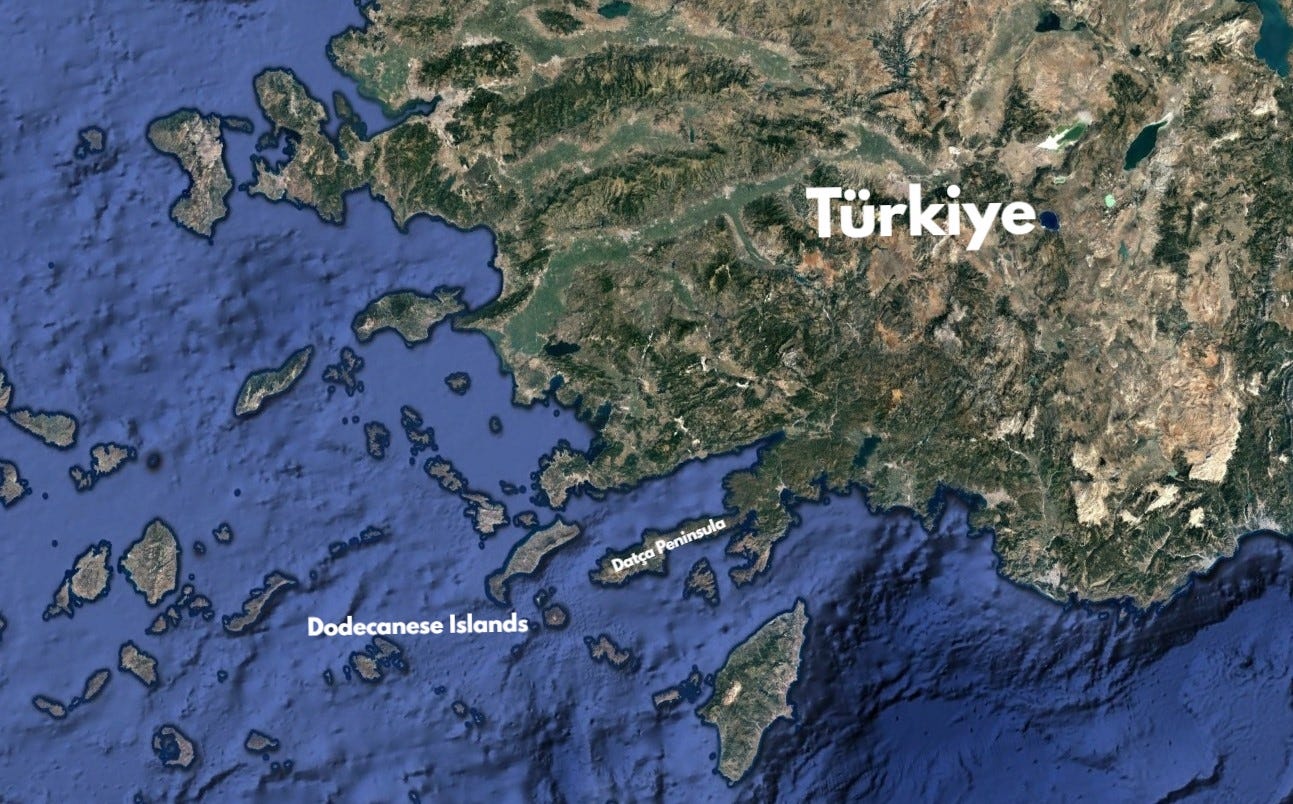
I've been working my way along the Turkish Riviera for the past few summers and have truly fallen in love with the more untamed sections of the coastline within the Muğla province. This season, I ventured towards an intriguing peninsula that protrudes amidst the Greek Dodecanese Islands, the Datça Peninsula, also know as Reşadiye Peninsula
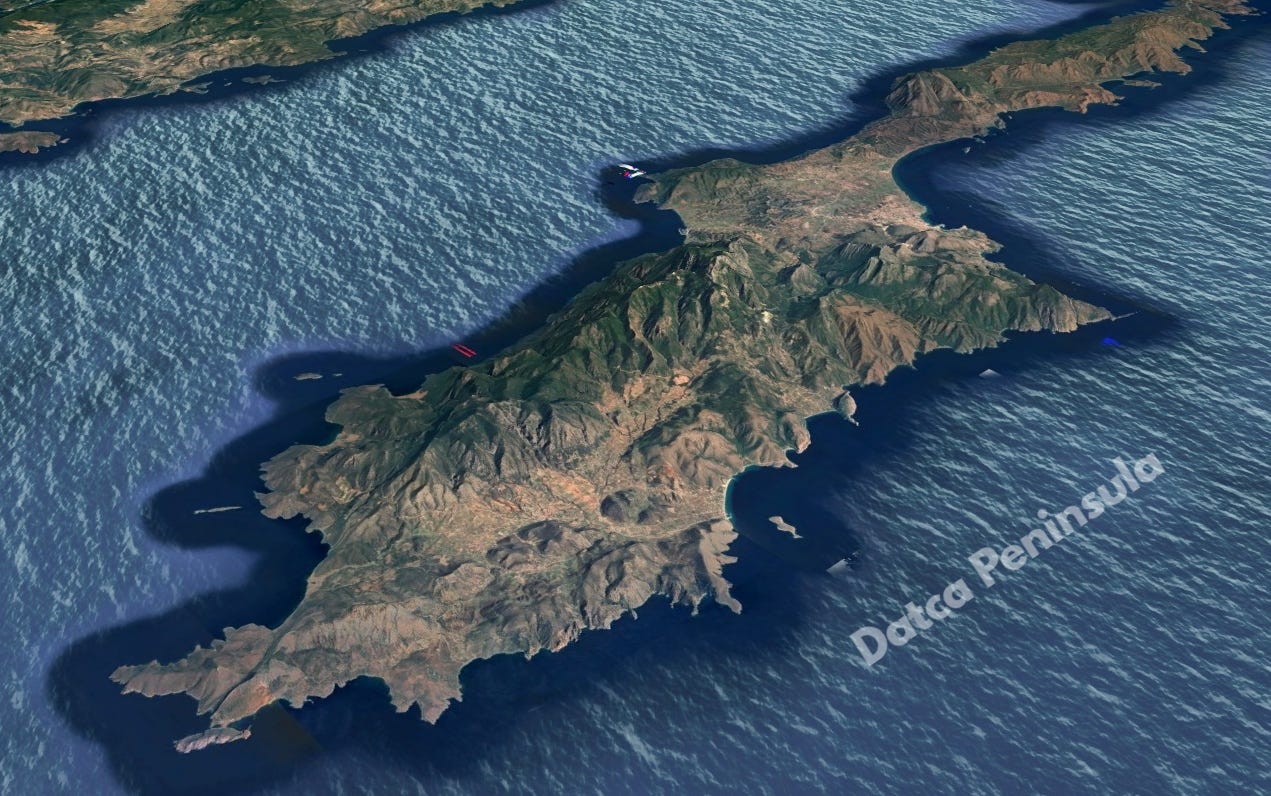
Just 25 years ago, the place was still inaccessible by cars before the main roads were constructed and it still retains that remote charm. Unlike the majority of the Mediterranean Riviera, the peninsula still feels more like a place where people live that tourists visit, rather than a place tourists visit that people live in.
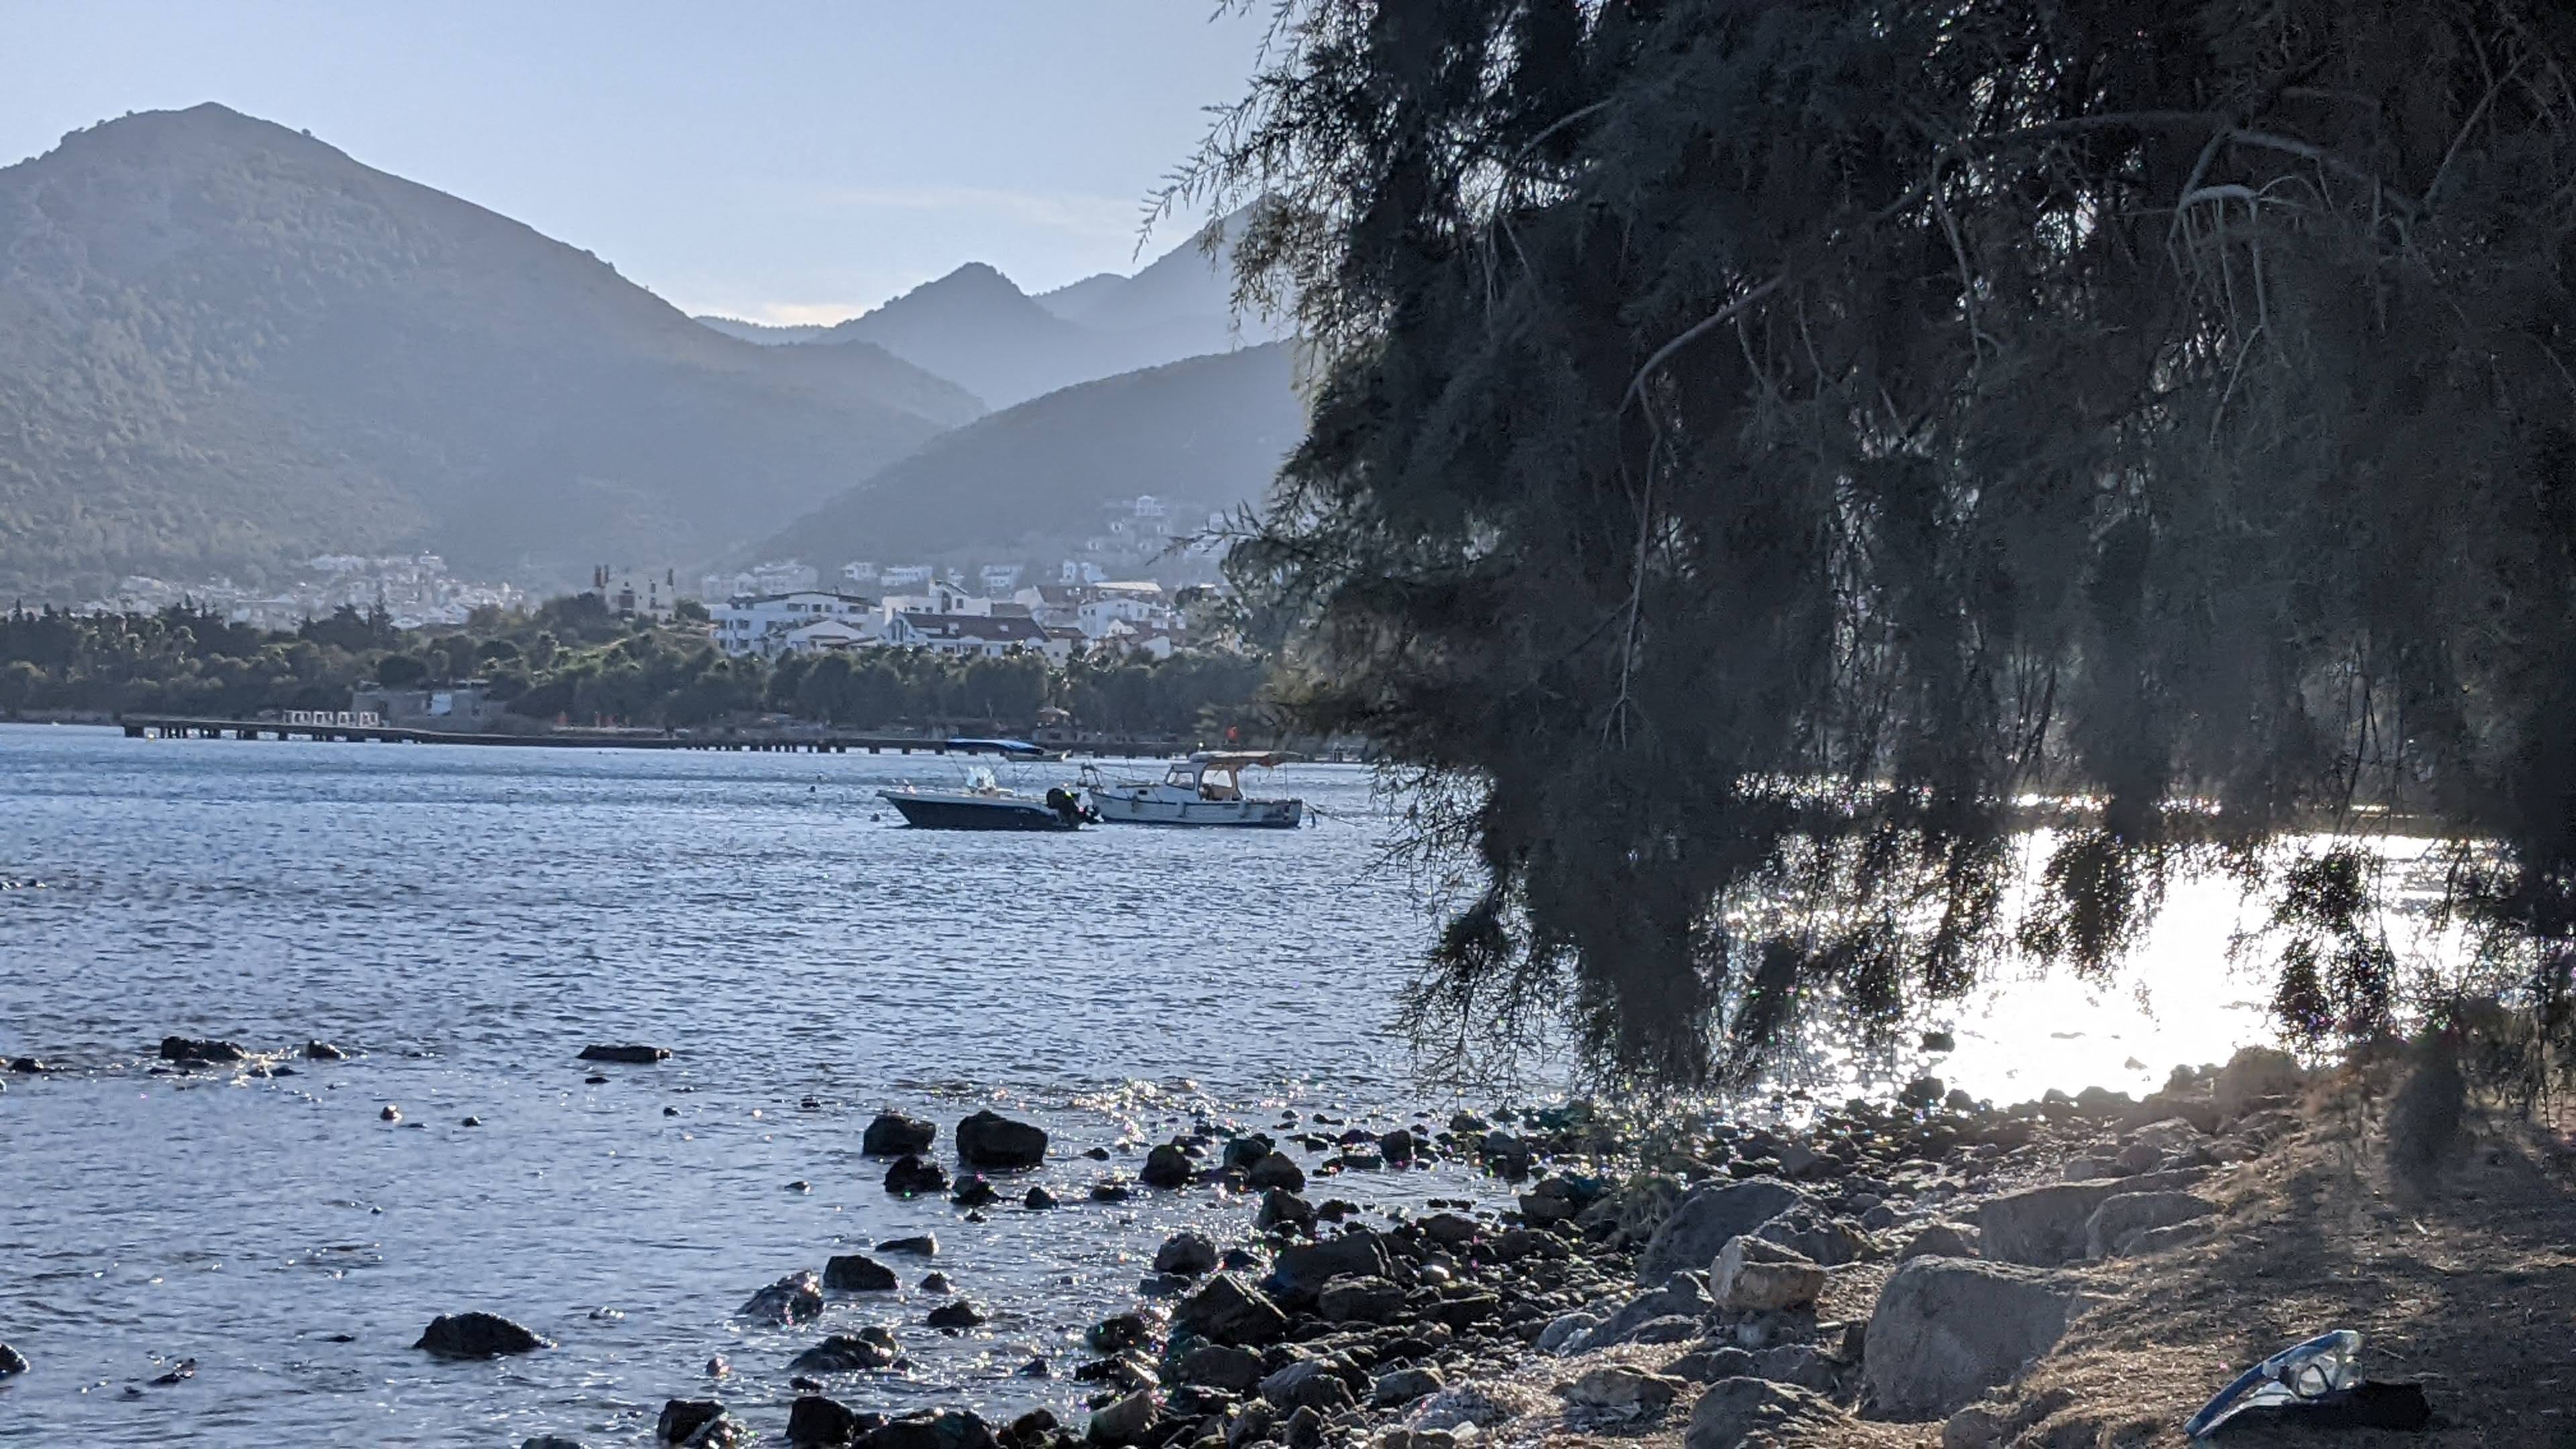
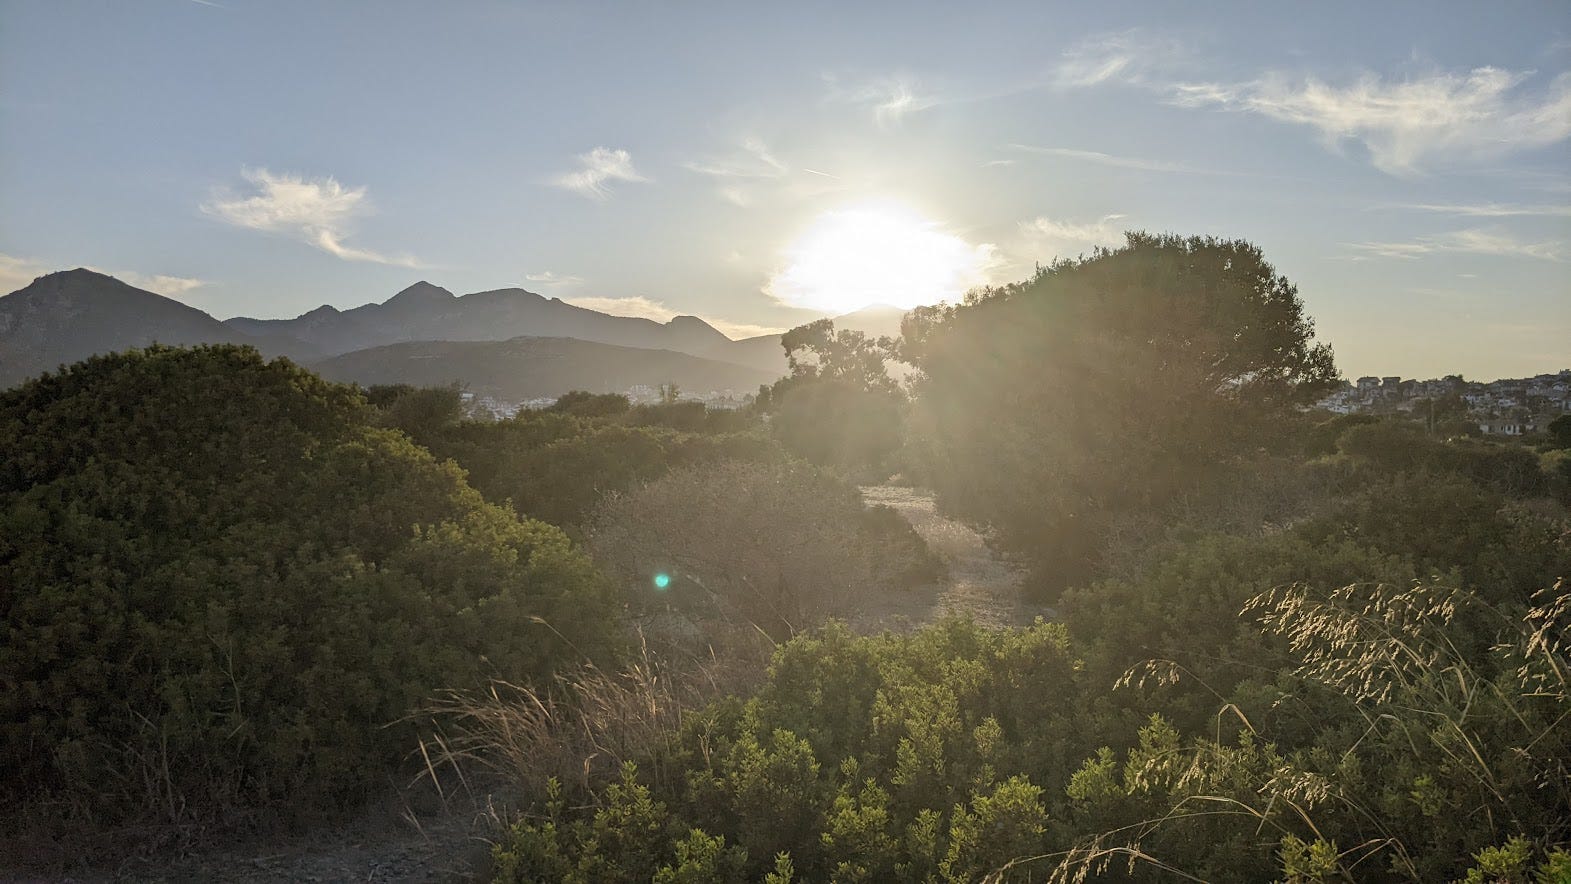
The town of Datça makes a great base to venture out from and you’ll find all the comforts one would expect to find in a seaside Mediterranean town along with the beautiful surrounding countryside and a sleepy shoreline composed of wild areas as well as farmland, orchards and some cozy local beaches.
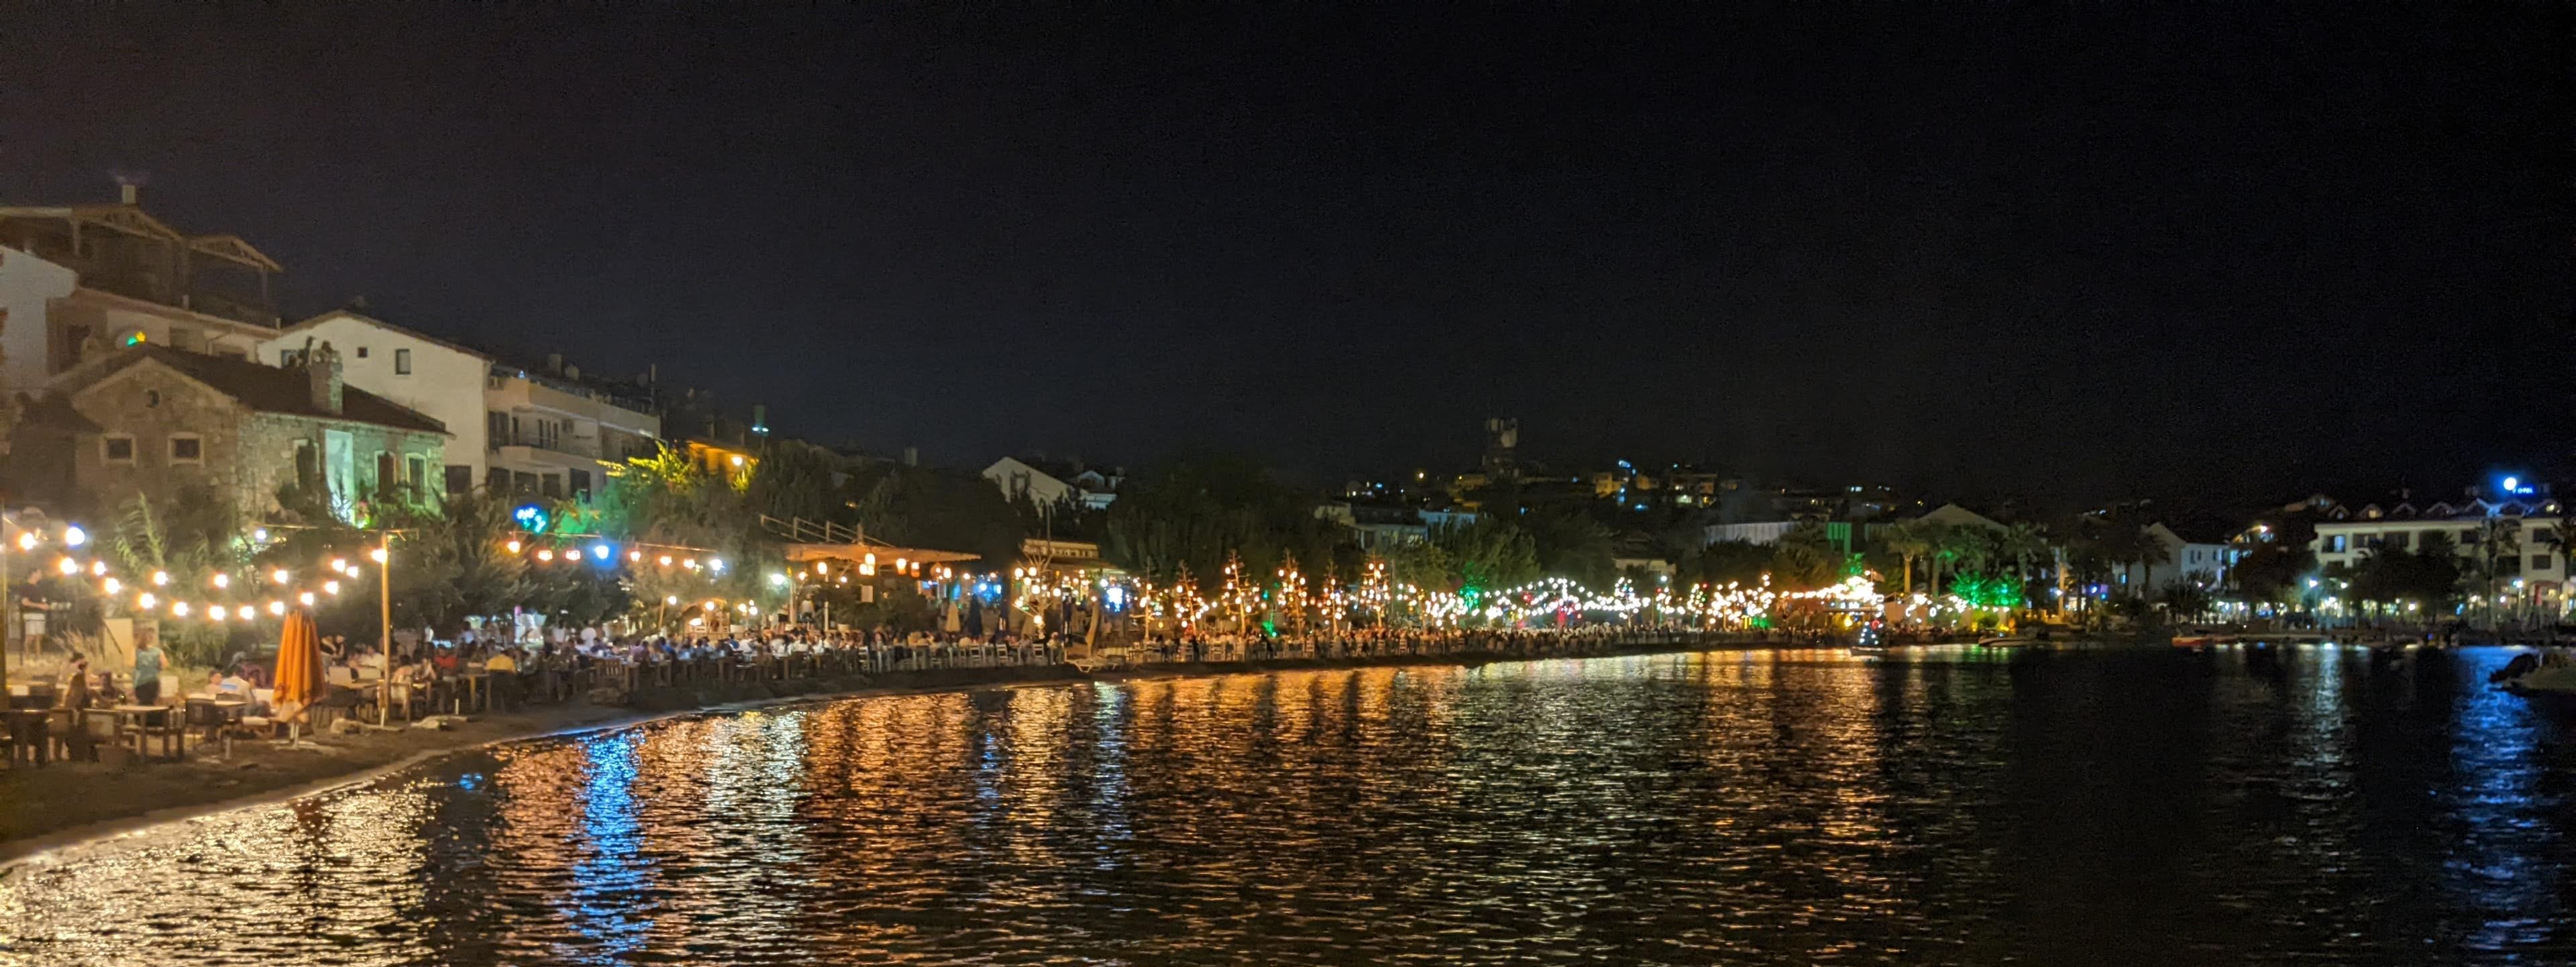
The west side of town is bustling with beachfront restaurants, cafes, and bars, and some excellent food stores on the road behind the seafront that offer a delectable variety of locally produced goods. Almonds and honey are the local specialties and it’s quite amazing the variety of produce made from these simple ingredients.
The promenade eventually leads to the marina and another vibrant public beach. The countryside around the town is beautiful, particular at sunrise and sunset with thickets of Pistacia lentiscus - Mastic Tree binding the sandy soils along with some magnificent Eucalyptus trees and an array of the usual med natives.
Old, dry stone walls delineate property boundaries between the farmlands and the beach, and some may even be ancient foundational walls, considering the area's long history of habitation. Regardless of their original purpose, these walls now serve as prime sunbathing spots for what I believe to be Laudakia stellio, or Roughtail Rock Agama. When disturbed, these agile creatures swiftly dart into the crevices

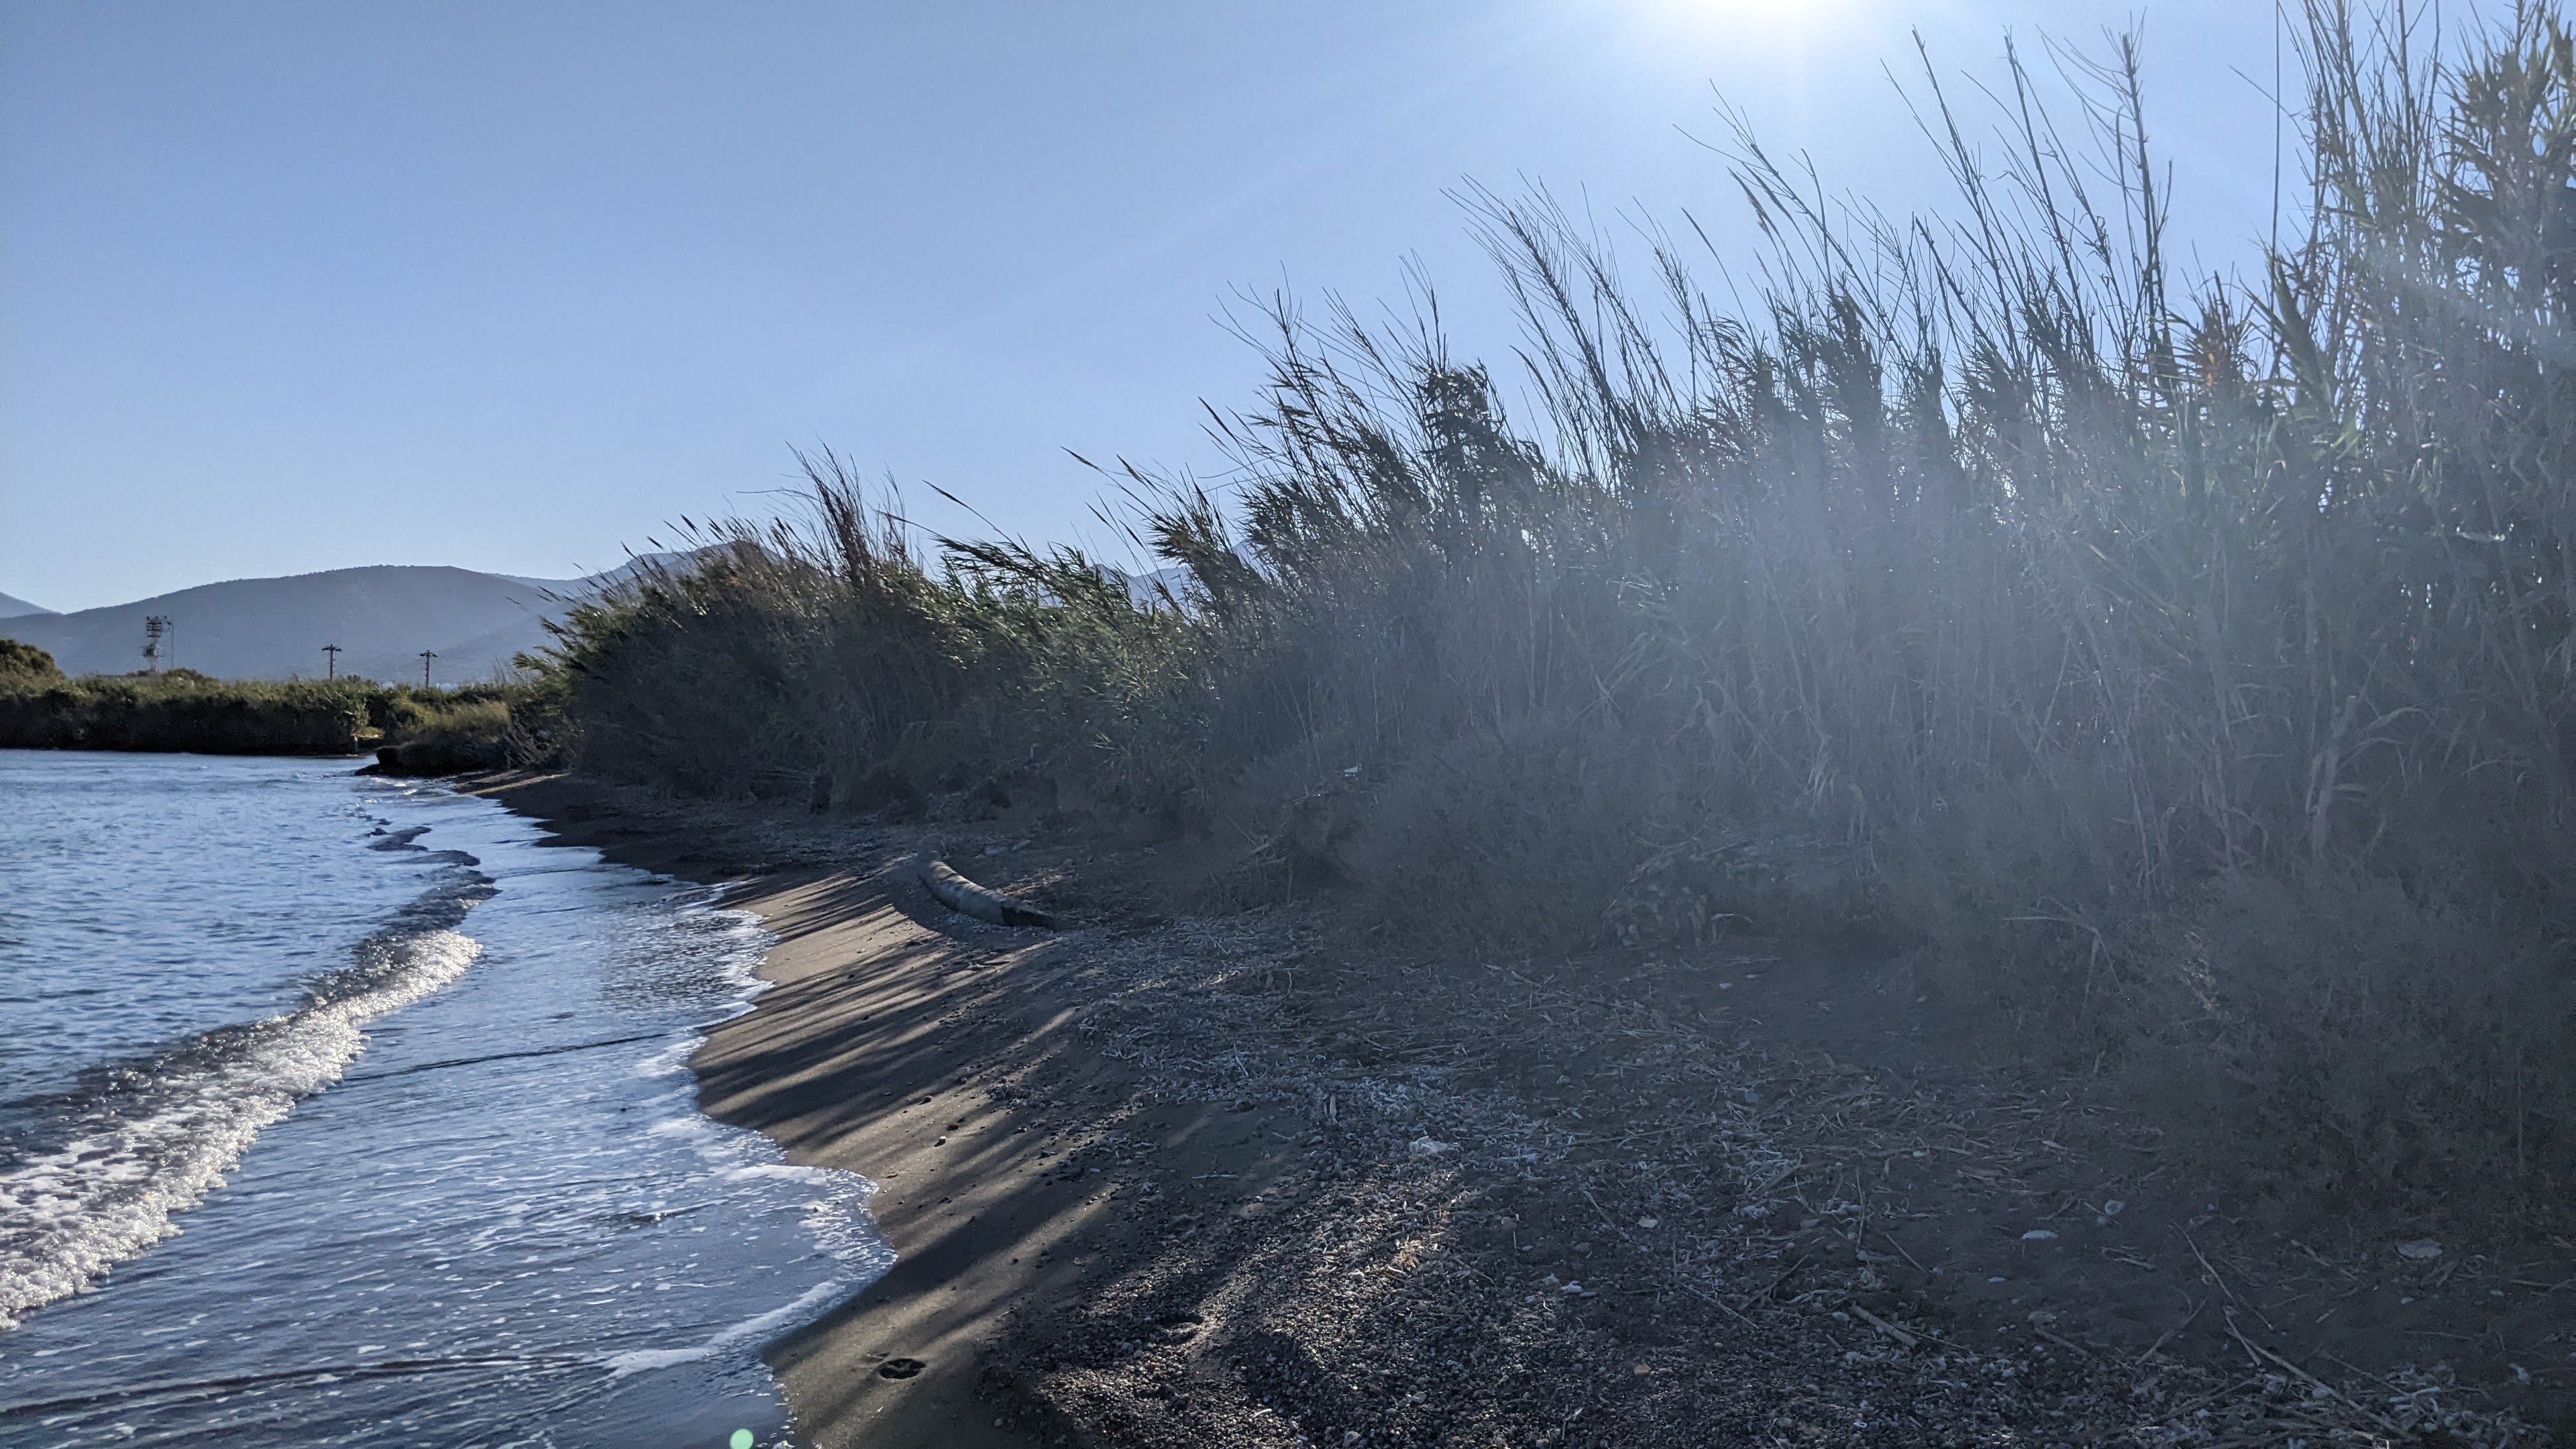
On other sections of the coast Phragmites australis - Common Reed grows in swathes, fighting a seemingly futile battle for territory with the sea
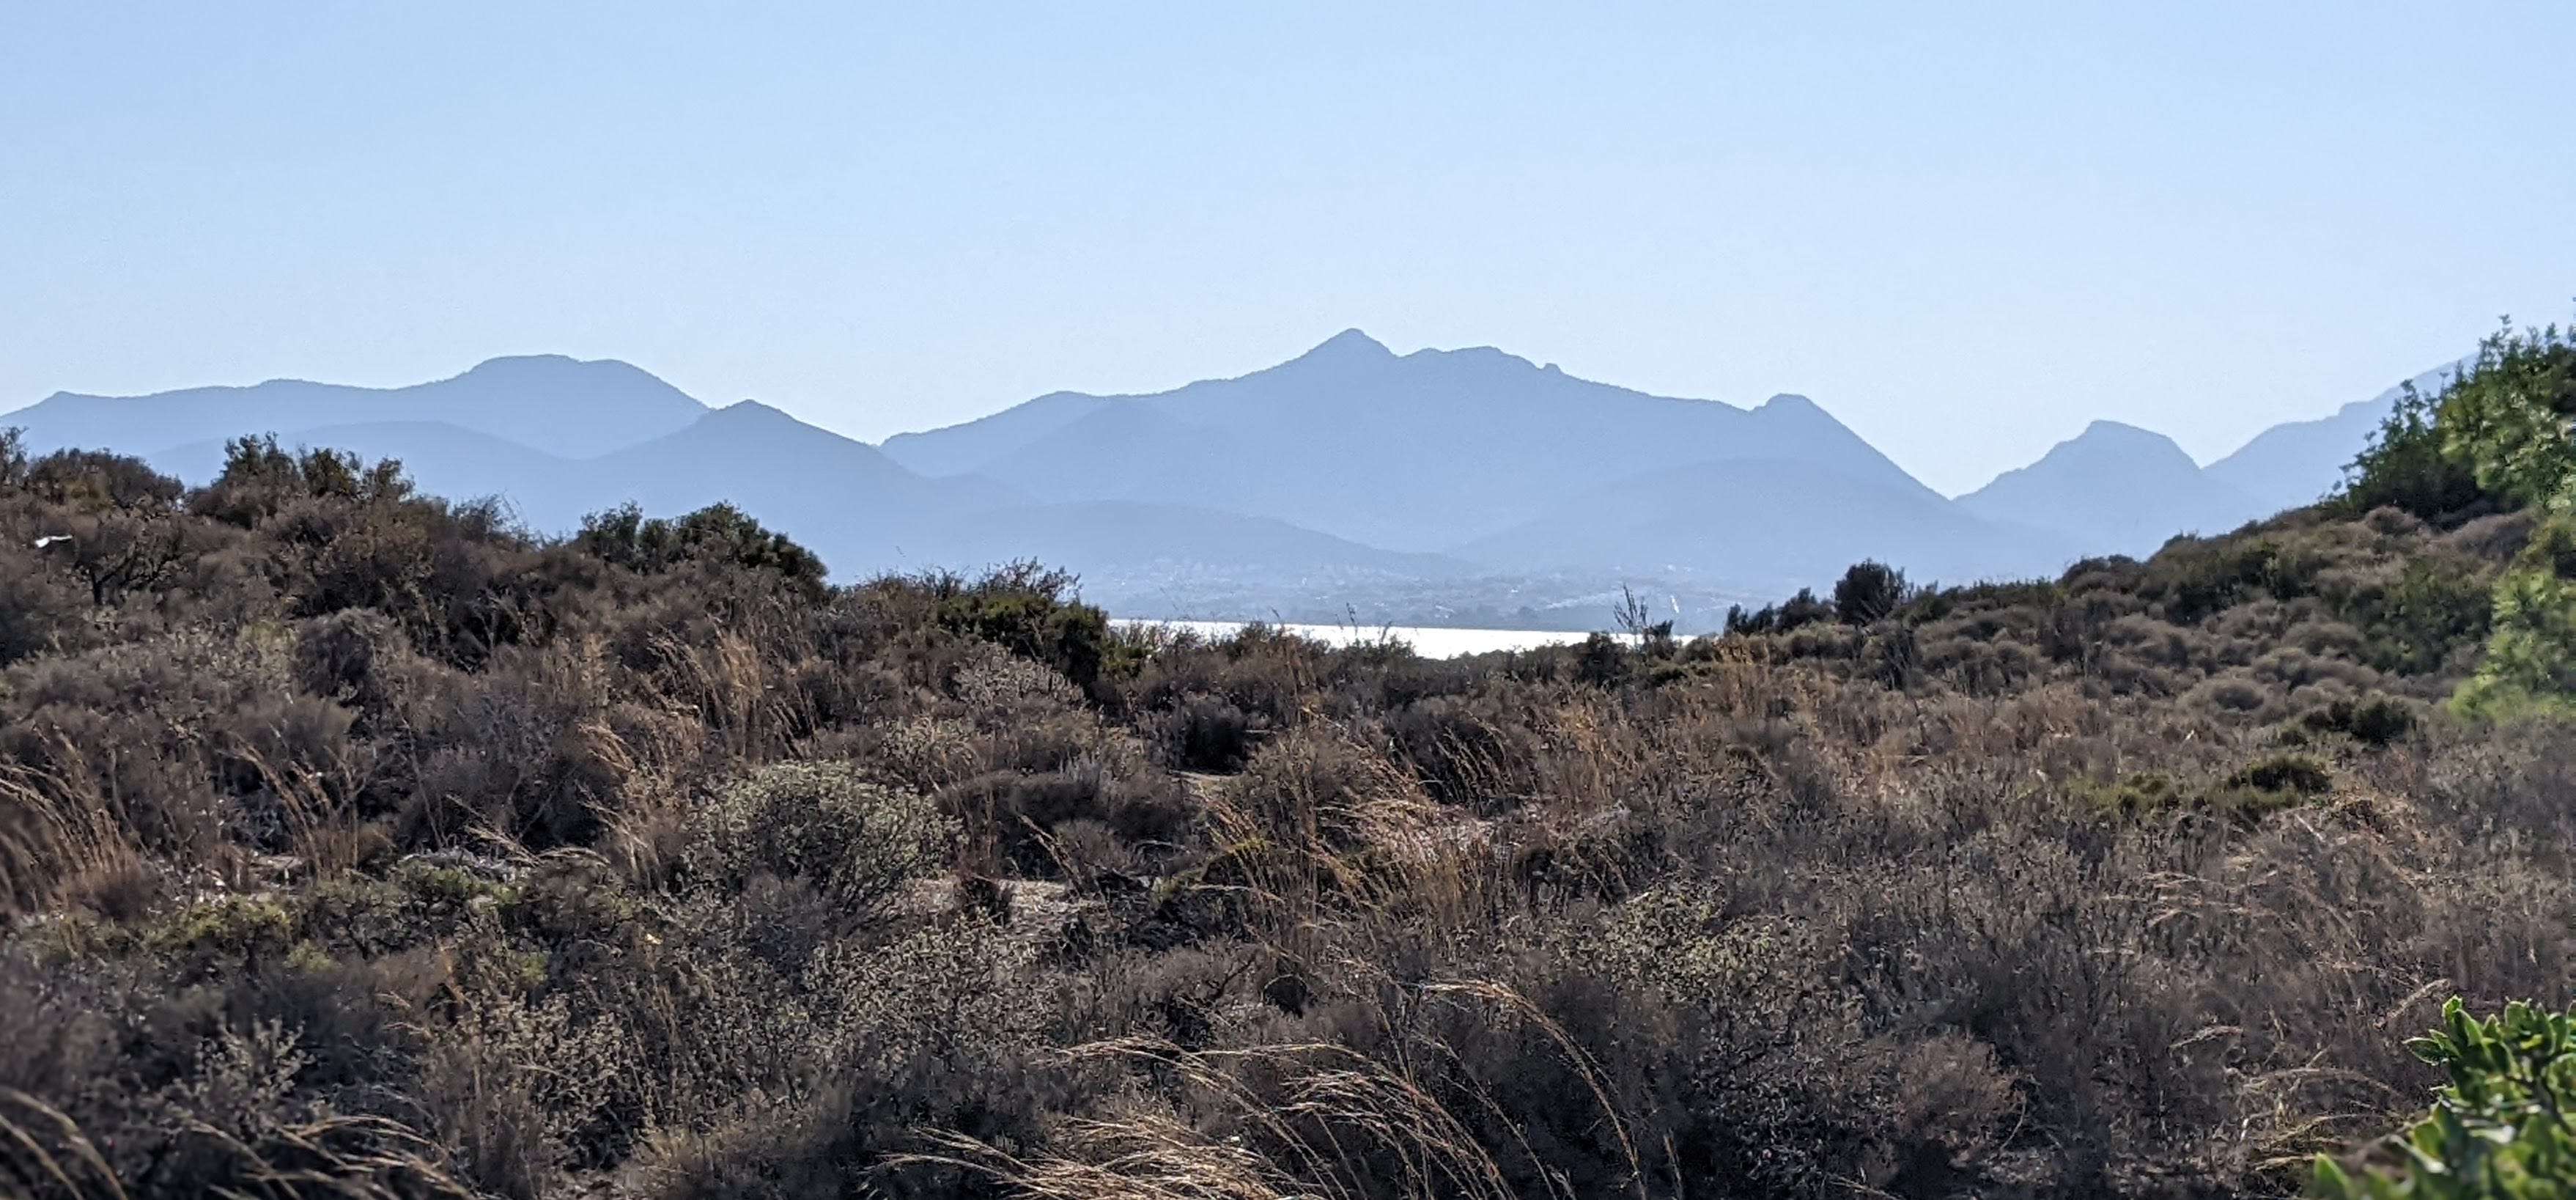
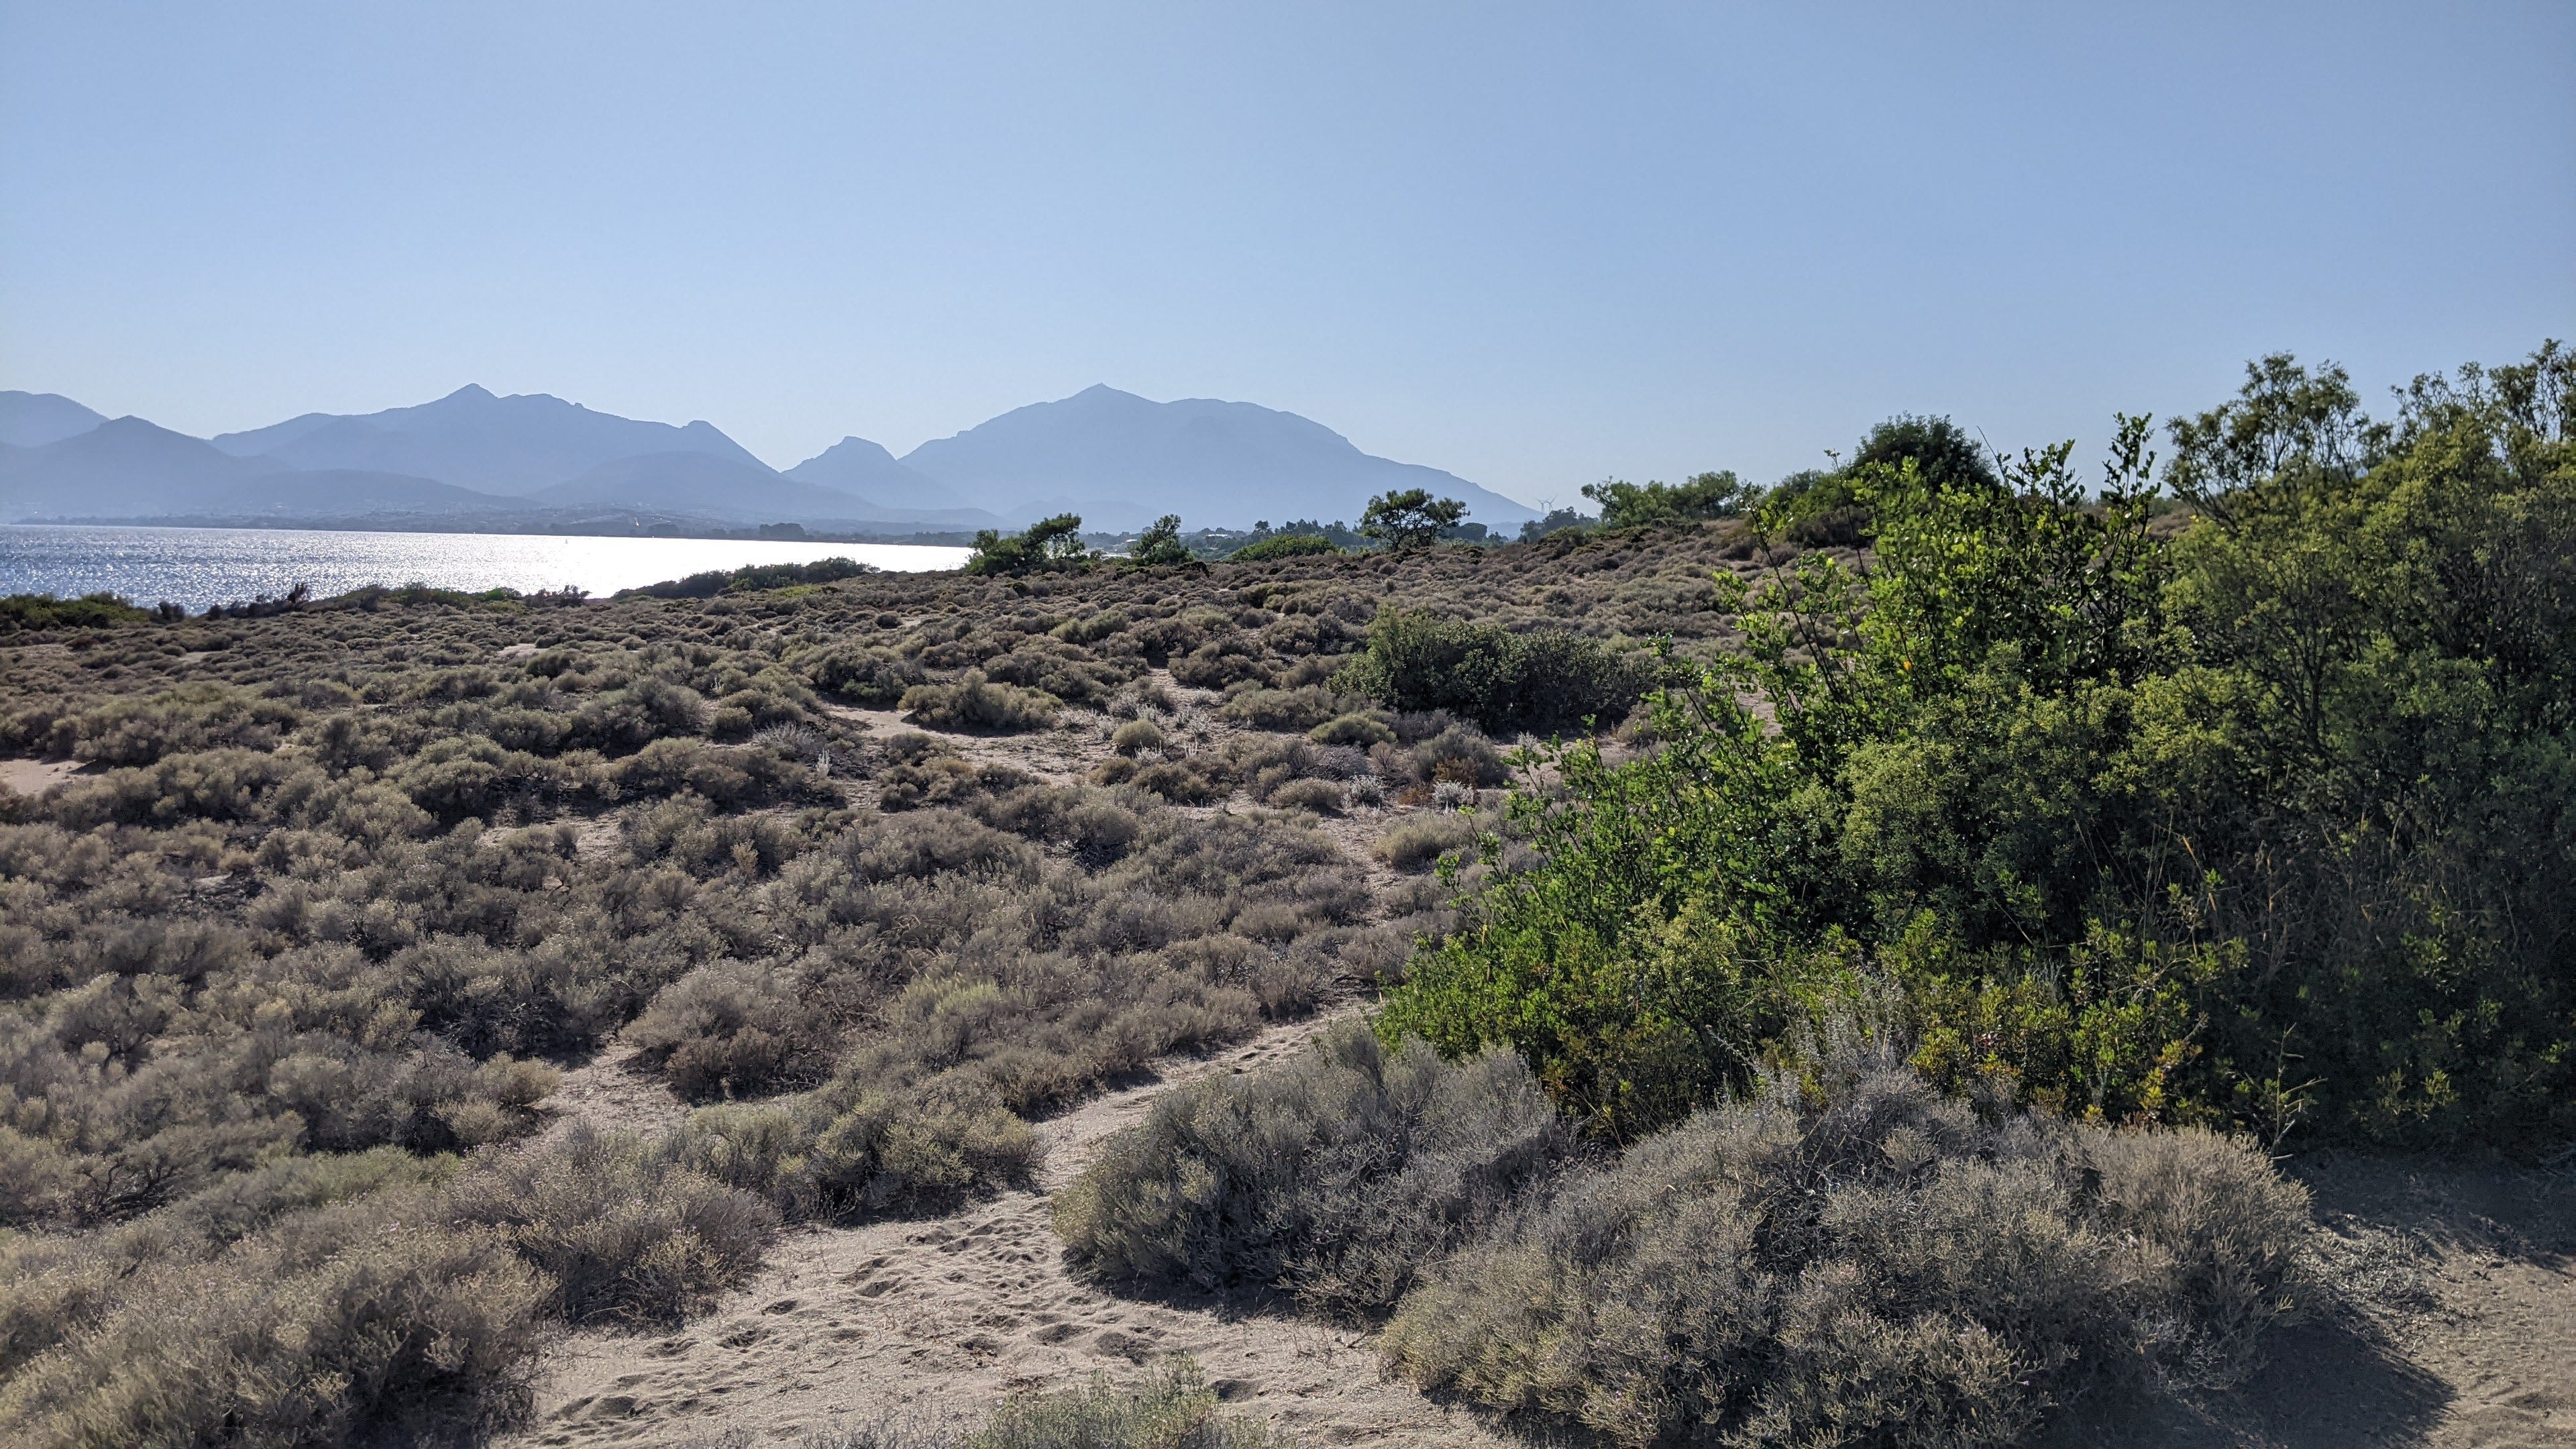
A 15 minute drive north from Datca is a beautifully preserved beach with untouched dunes called Gebekum Tabiat Parkı. The area is protected due to the geological features known as "fossil dunes” that have preserved remnants of dunes that formed millions of years ago.
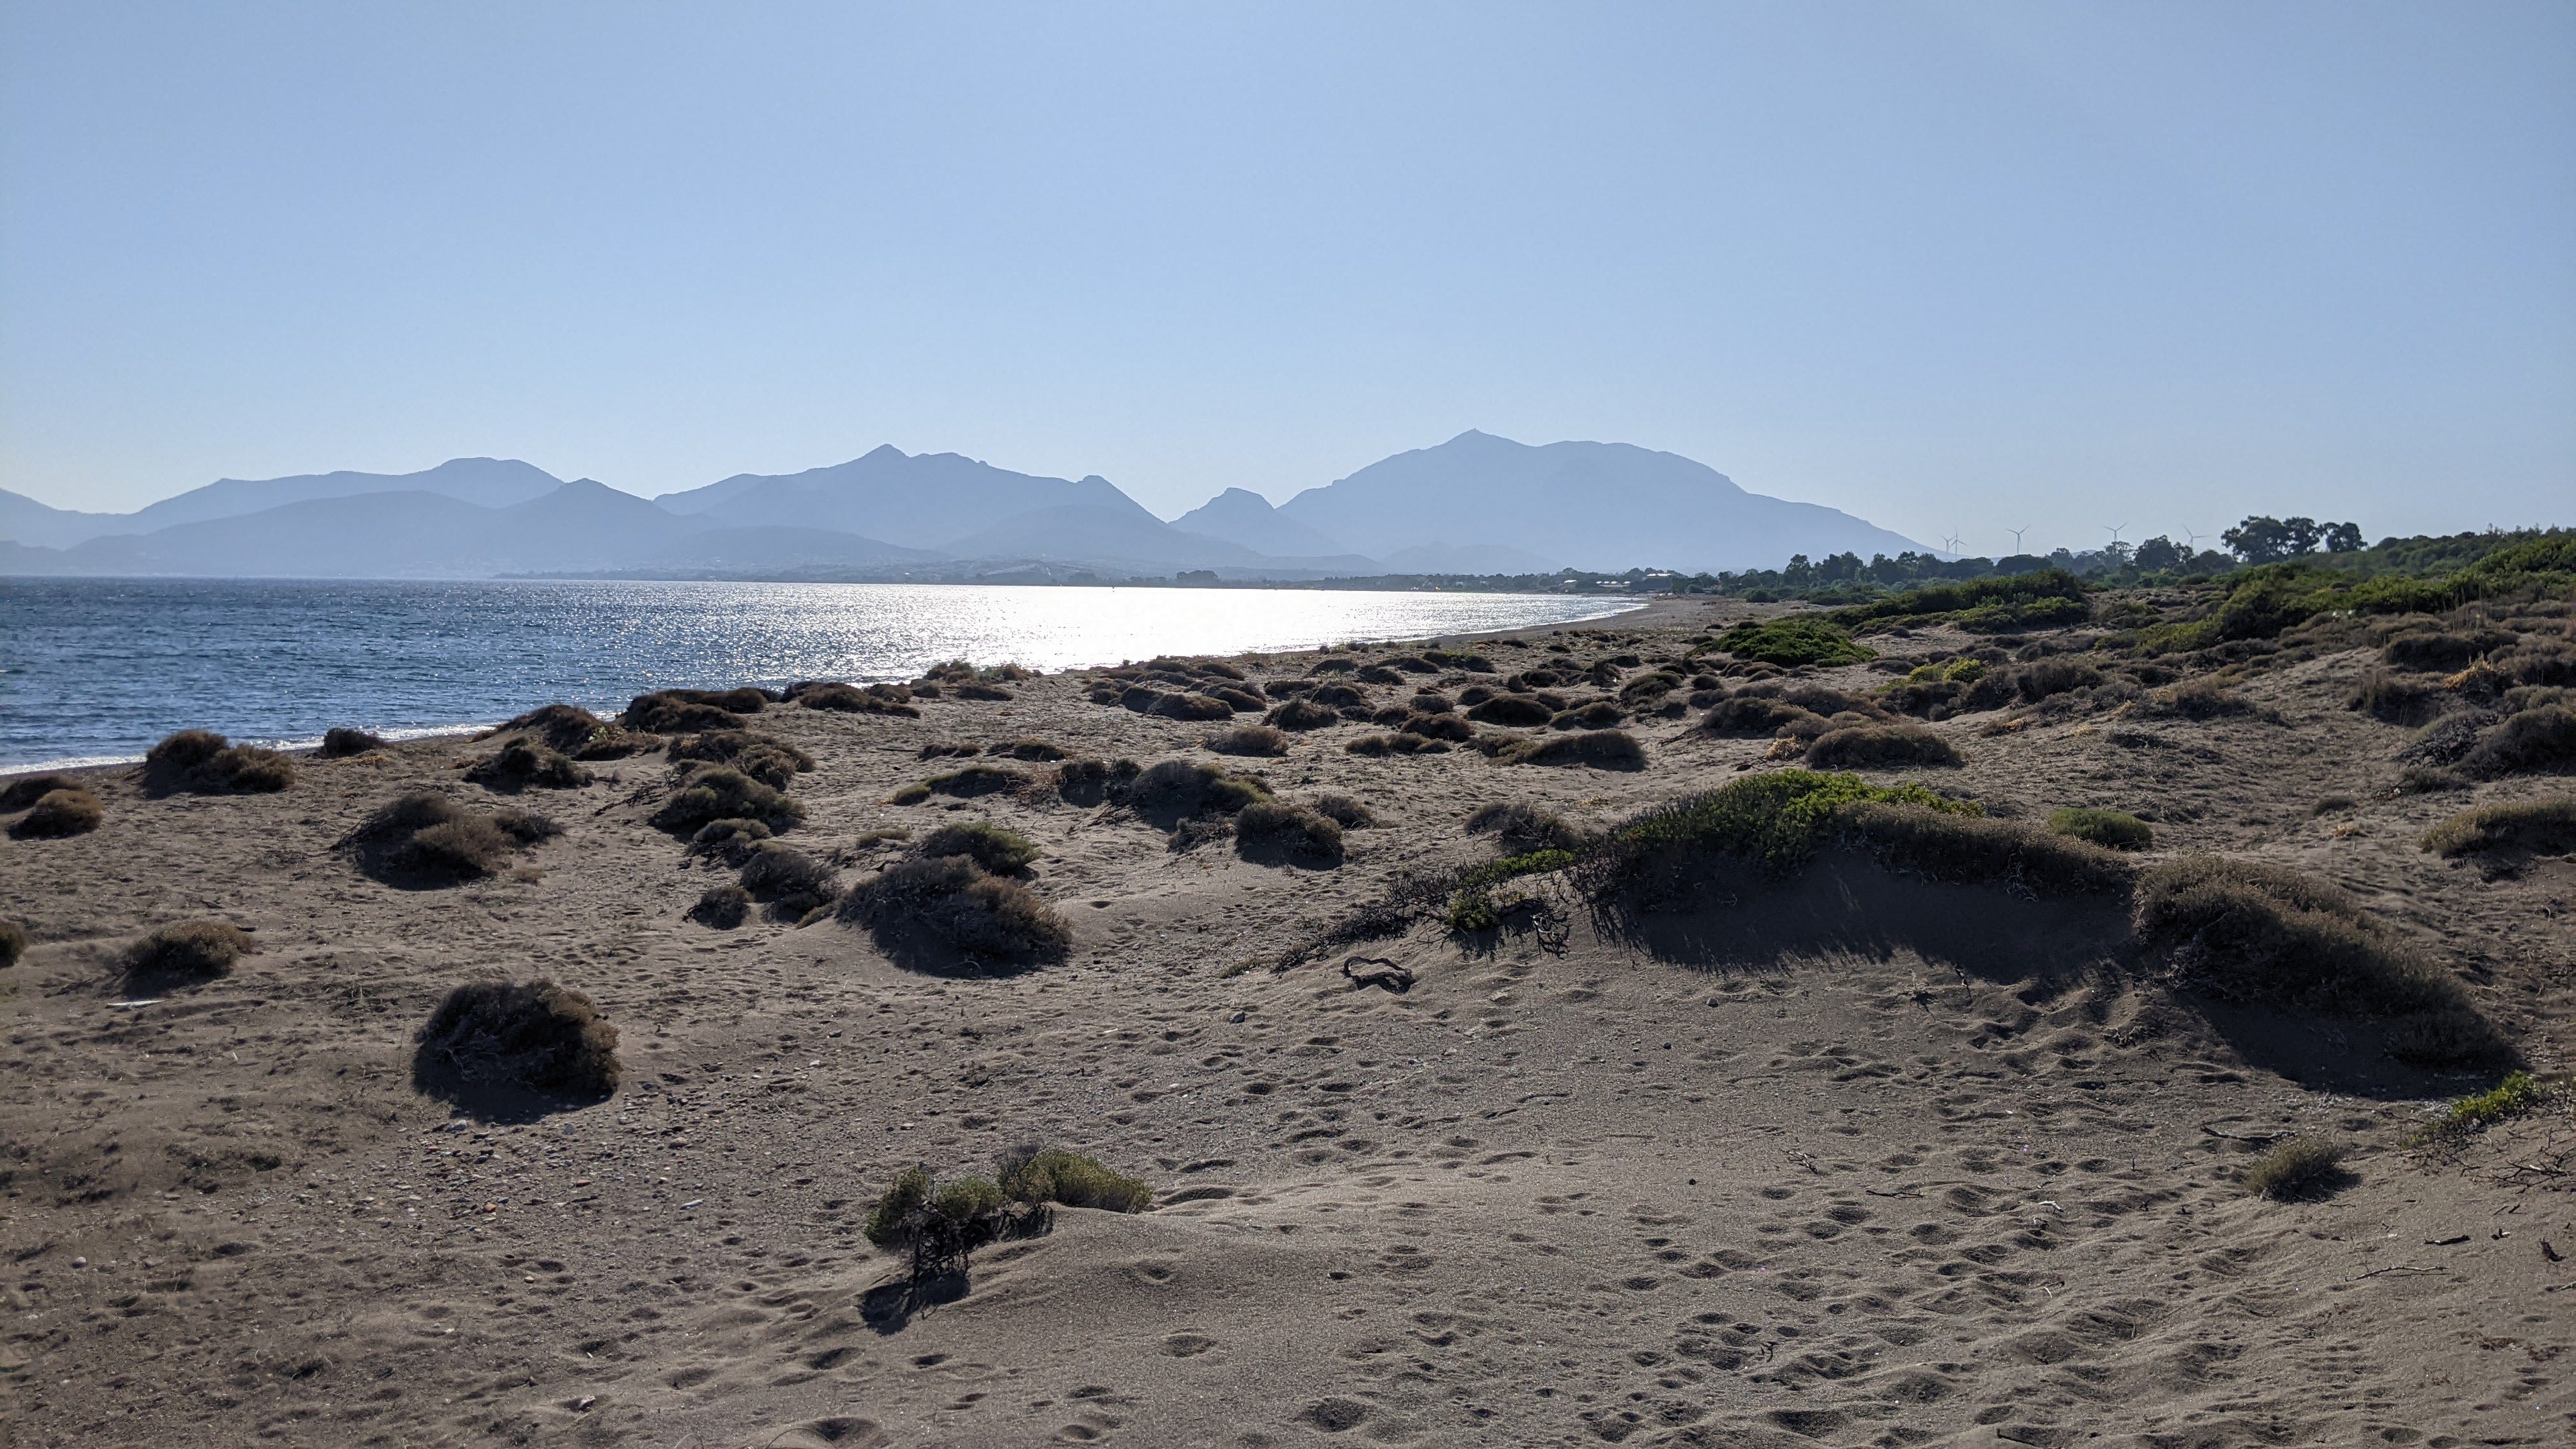
The fossil dunes at Gebekum Tabiat Parkı are very rare and well-preserved and growing within the dunes are a variety of plants and animals, including many rare and endemic species. Xeriscape designers and gardeners will undoubtedly find this area incredibly inspiring both for variety and composition of the species.
Canopy , shrub, herb and ground layers were clearly evident. The canopy layers of Ceratonia siliqua - carob and Quercus coccifera - Kermes Oak were much shorter and more compact then you would usually find, probably as a response to the coastal wind.

After enduring a scorching summer with minimal rainfall, the landscape still bore resemblance to the kind of masterpiece Piet Oudolf would proudly endorse. I can only imagine the sheer magnificence it must possess in spring, and I am certainly determined to return and witness it firsthand someday.
Regenerative Landscape Design - Online Interactive Course
Want to learn how to design, build and manage regenerative landscapes? Join us on our Regenerative Landscape Design - Online Interactive Course. We look forward to providing you with the confidence, inspiration, and opportunity to design, build and manage regenerative landscapes, gardens, and farms that produce food and other resources for humans while enhancing biodiversity.
You can access the course material at anytime and join the live sessions and interactive forums that run from May - Oct every year. All members of the Bloom Room receive a 500 EUR discount. To take up this offer all you have to do is become an annual subscribers to our Substack and register here with the promo code BLOOM.
I look forward to you joining !
Old Town in Datça - Datça Mahallesi
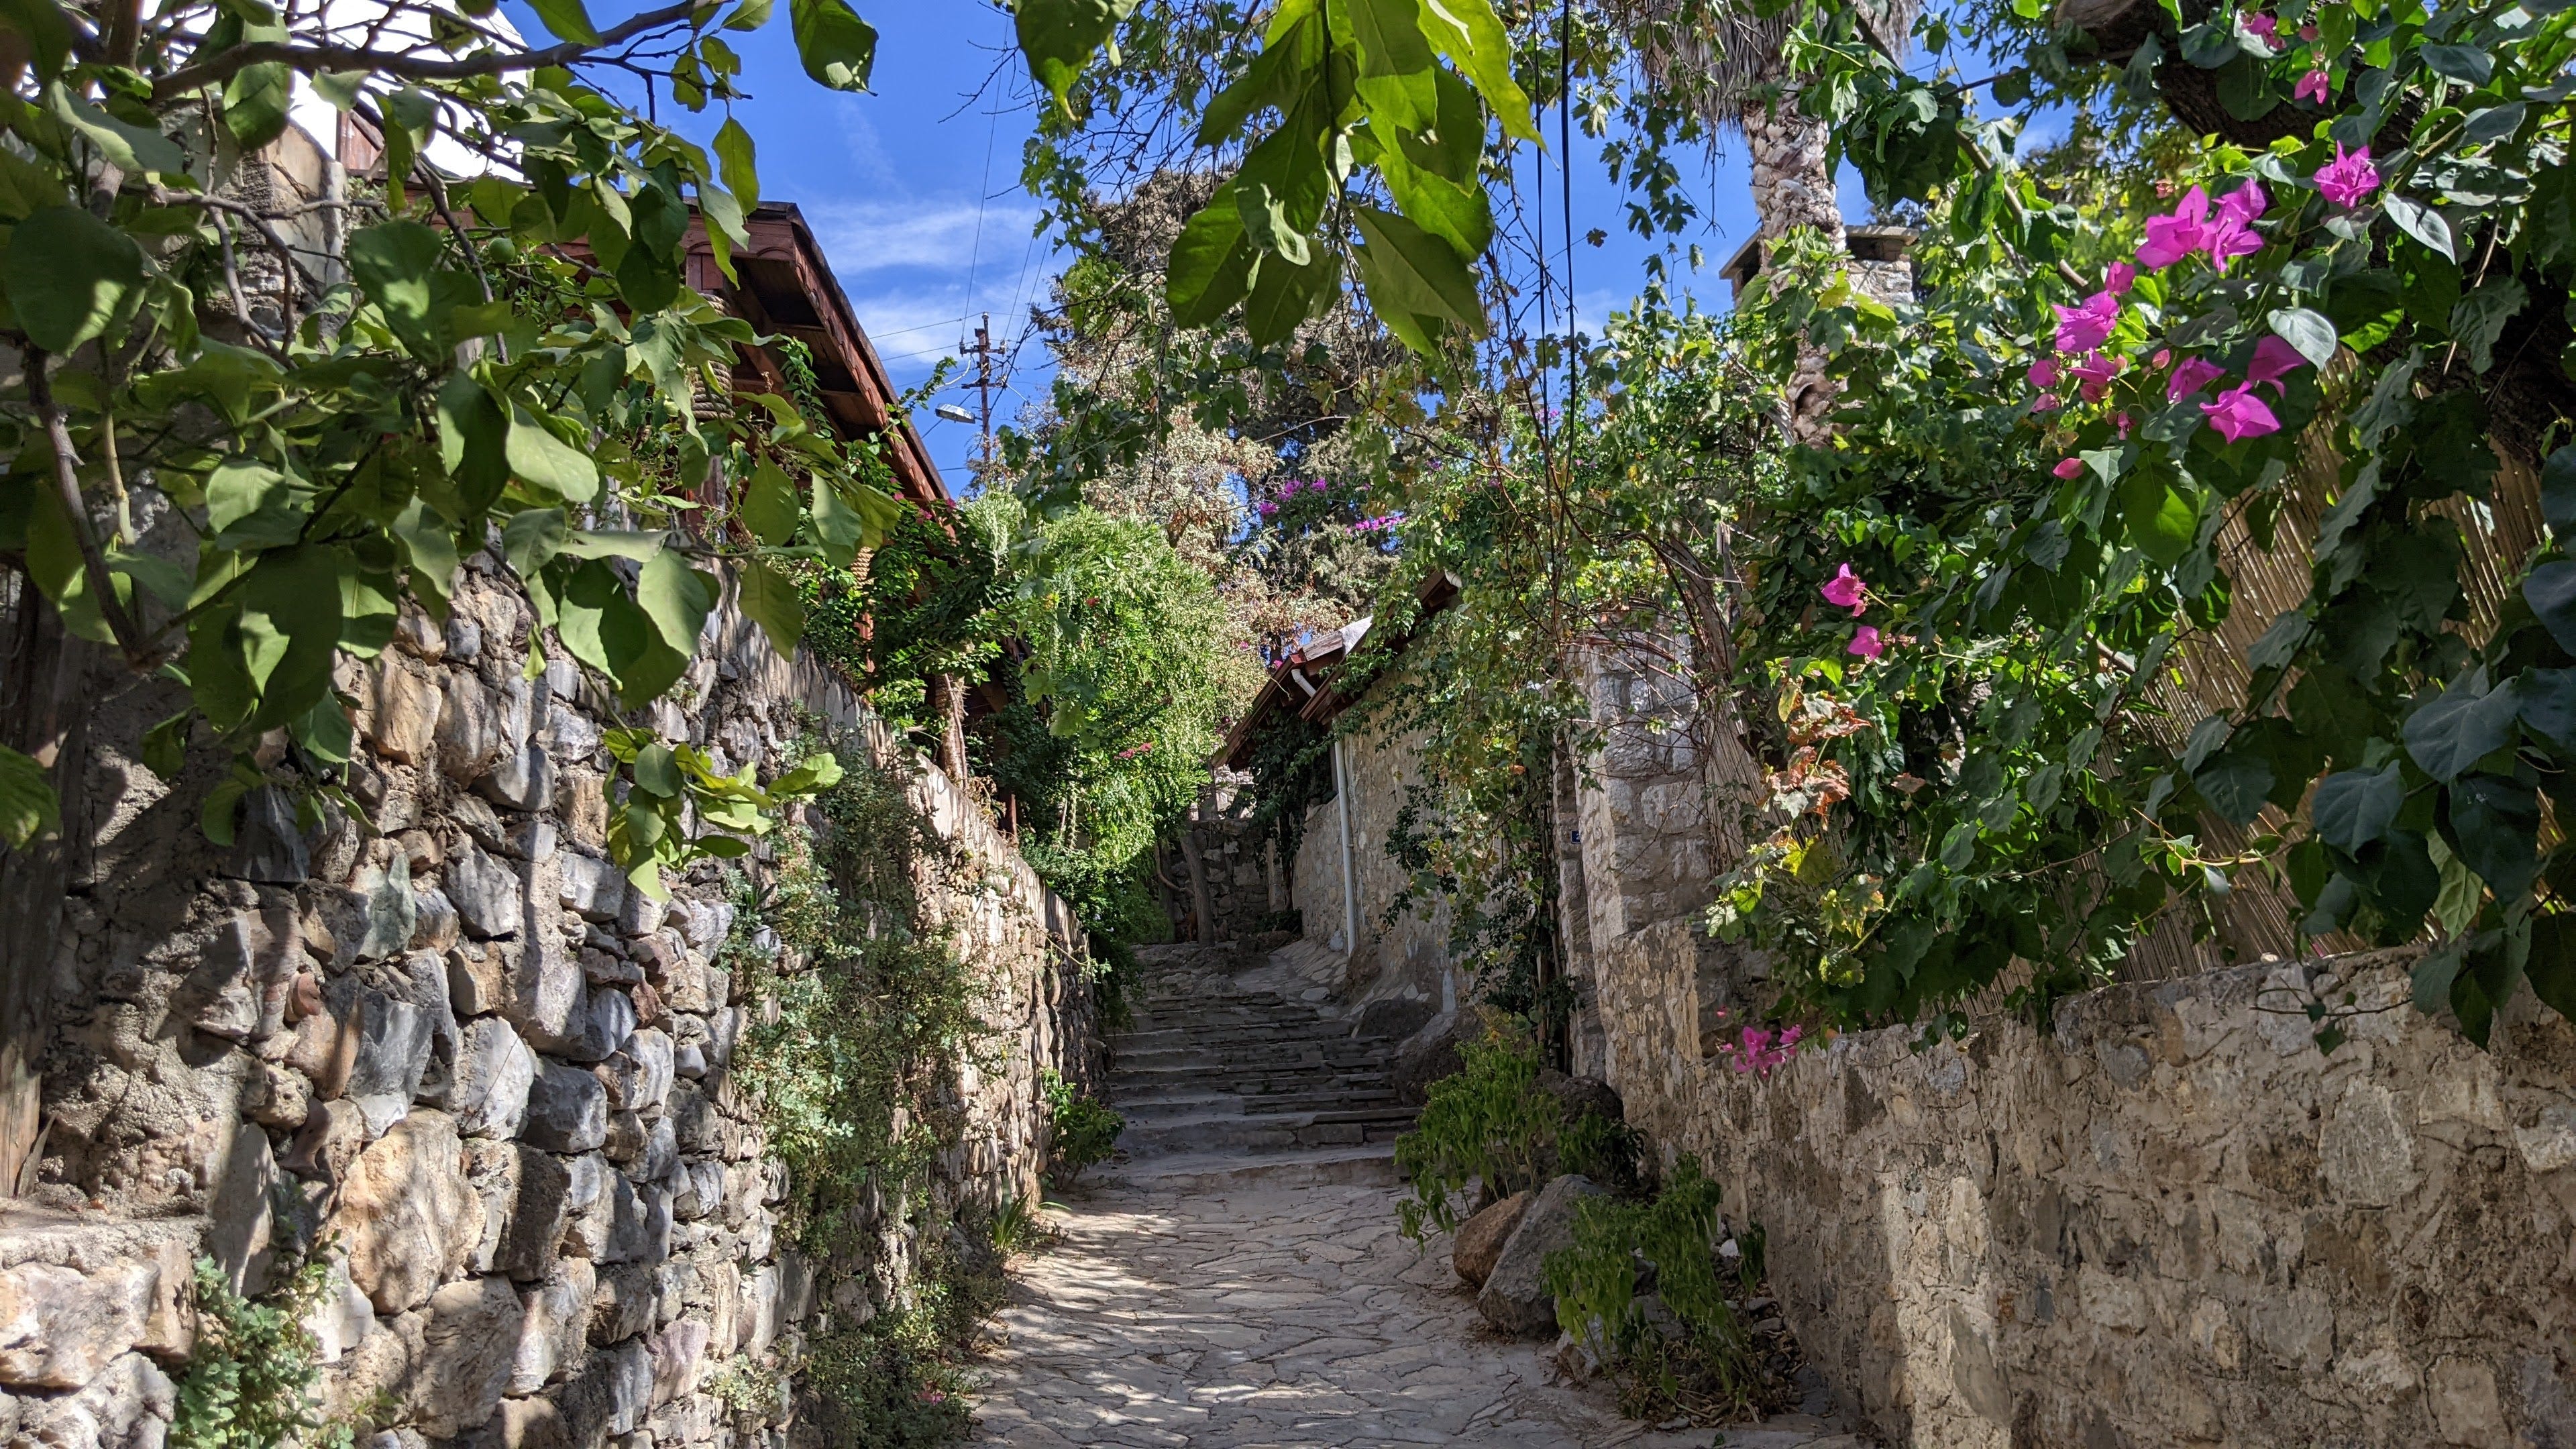
Not far from the town of Datça up on the hills you can find the Old Town - Datça Mahallesi a delightful spot, with narrow, winding streets, traditional whitewashed houses adorned with colorful flowers, and a relaxed atmosphere.
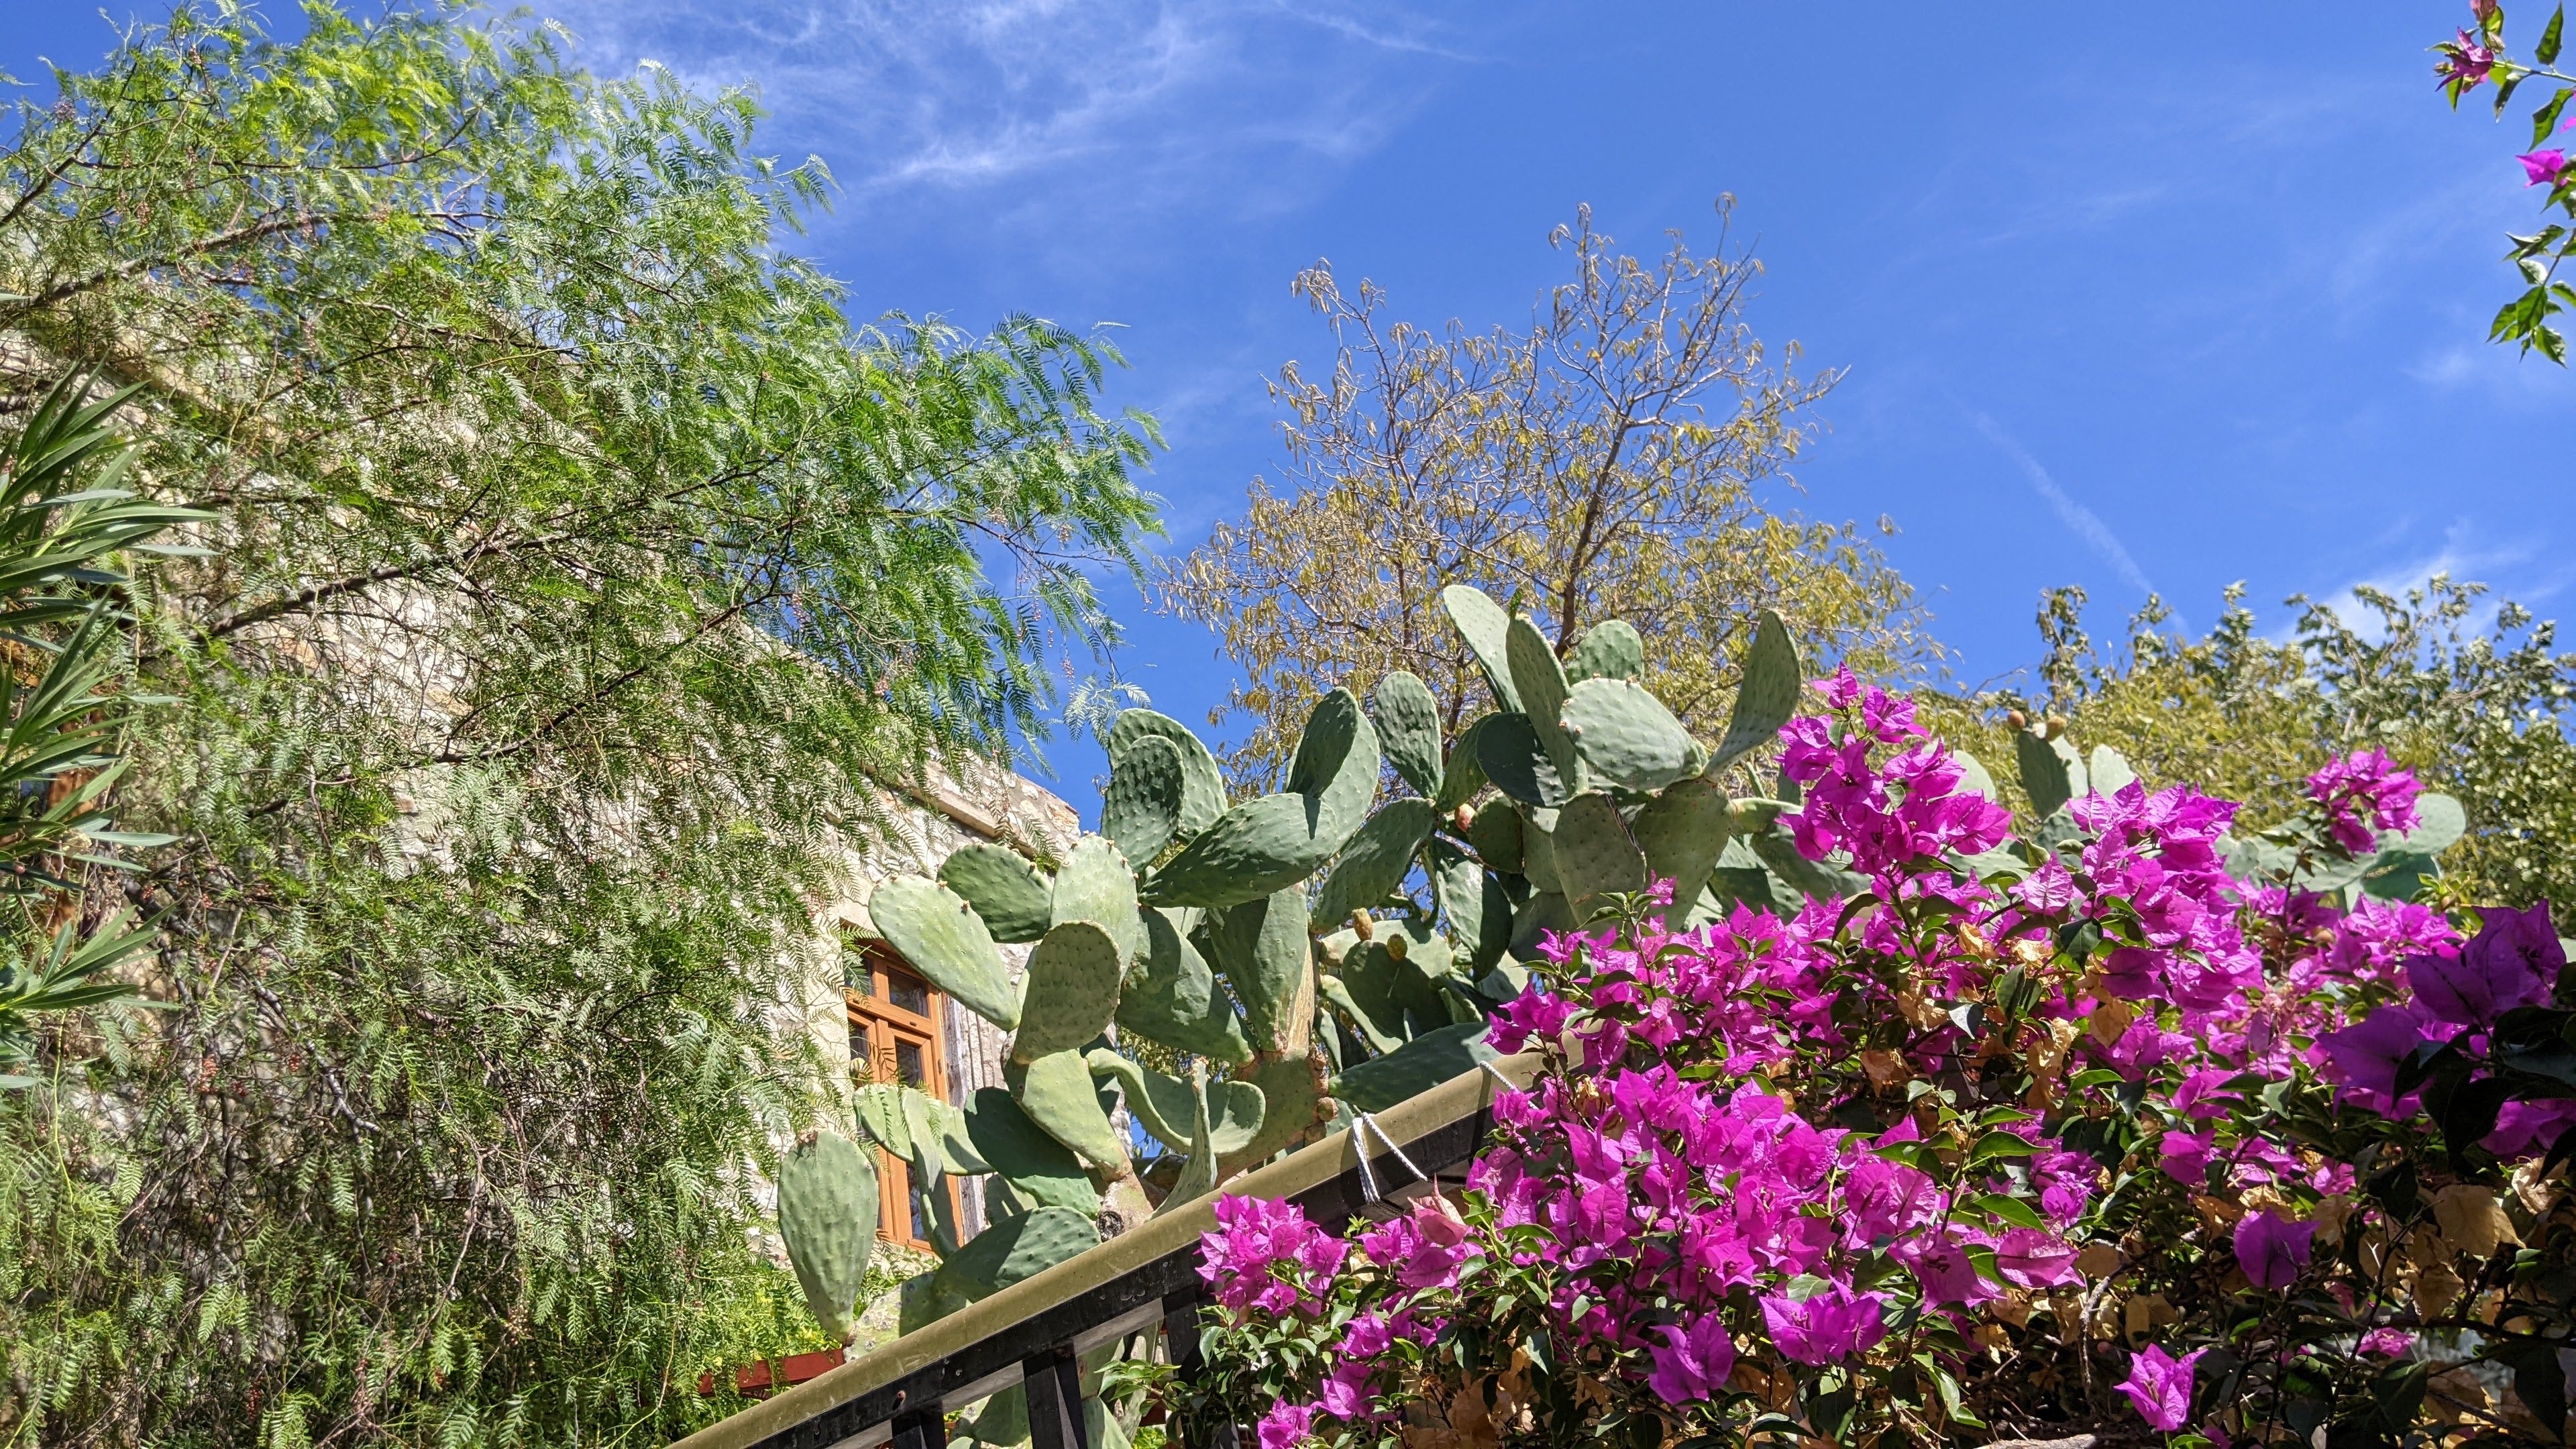
With a lot more ornamental plants than the usual Turkish village in the area you’ll still find plenty of classic Mediterranean fruiting plants and herbs including Passiflora spp.- Passion Flower, Prunus dulcis - Almond, Morus alba - White Mulberry, Vitis vinifera cv. - Wine Grape, Punica granatum - Pomegranate and Opuntia ficus-indica - Barbary fig as well as a range of Citrus spp.
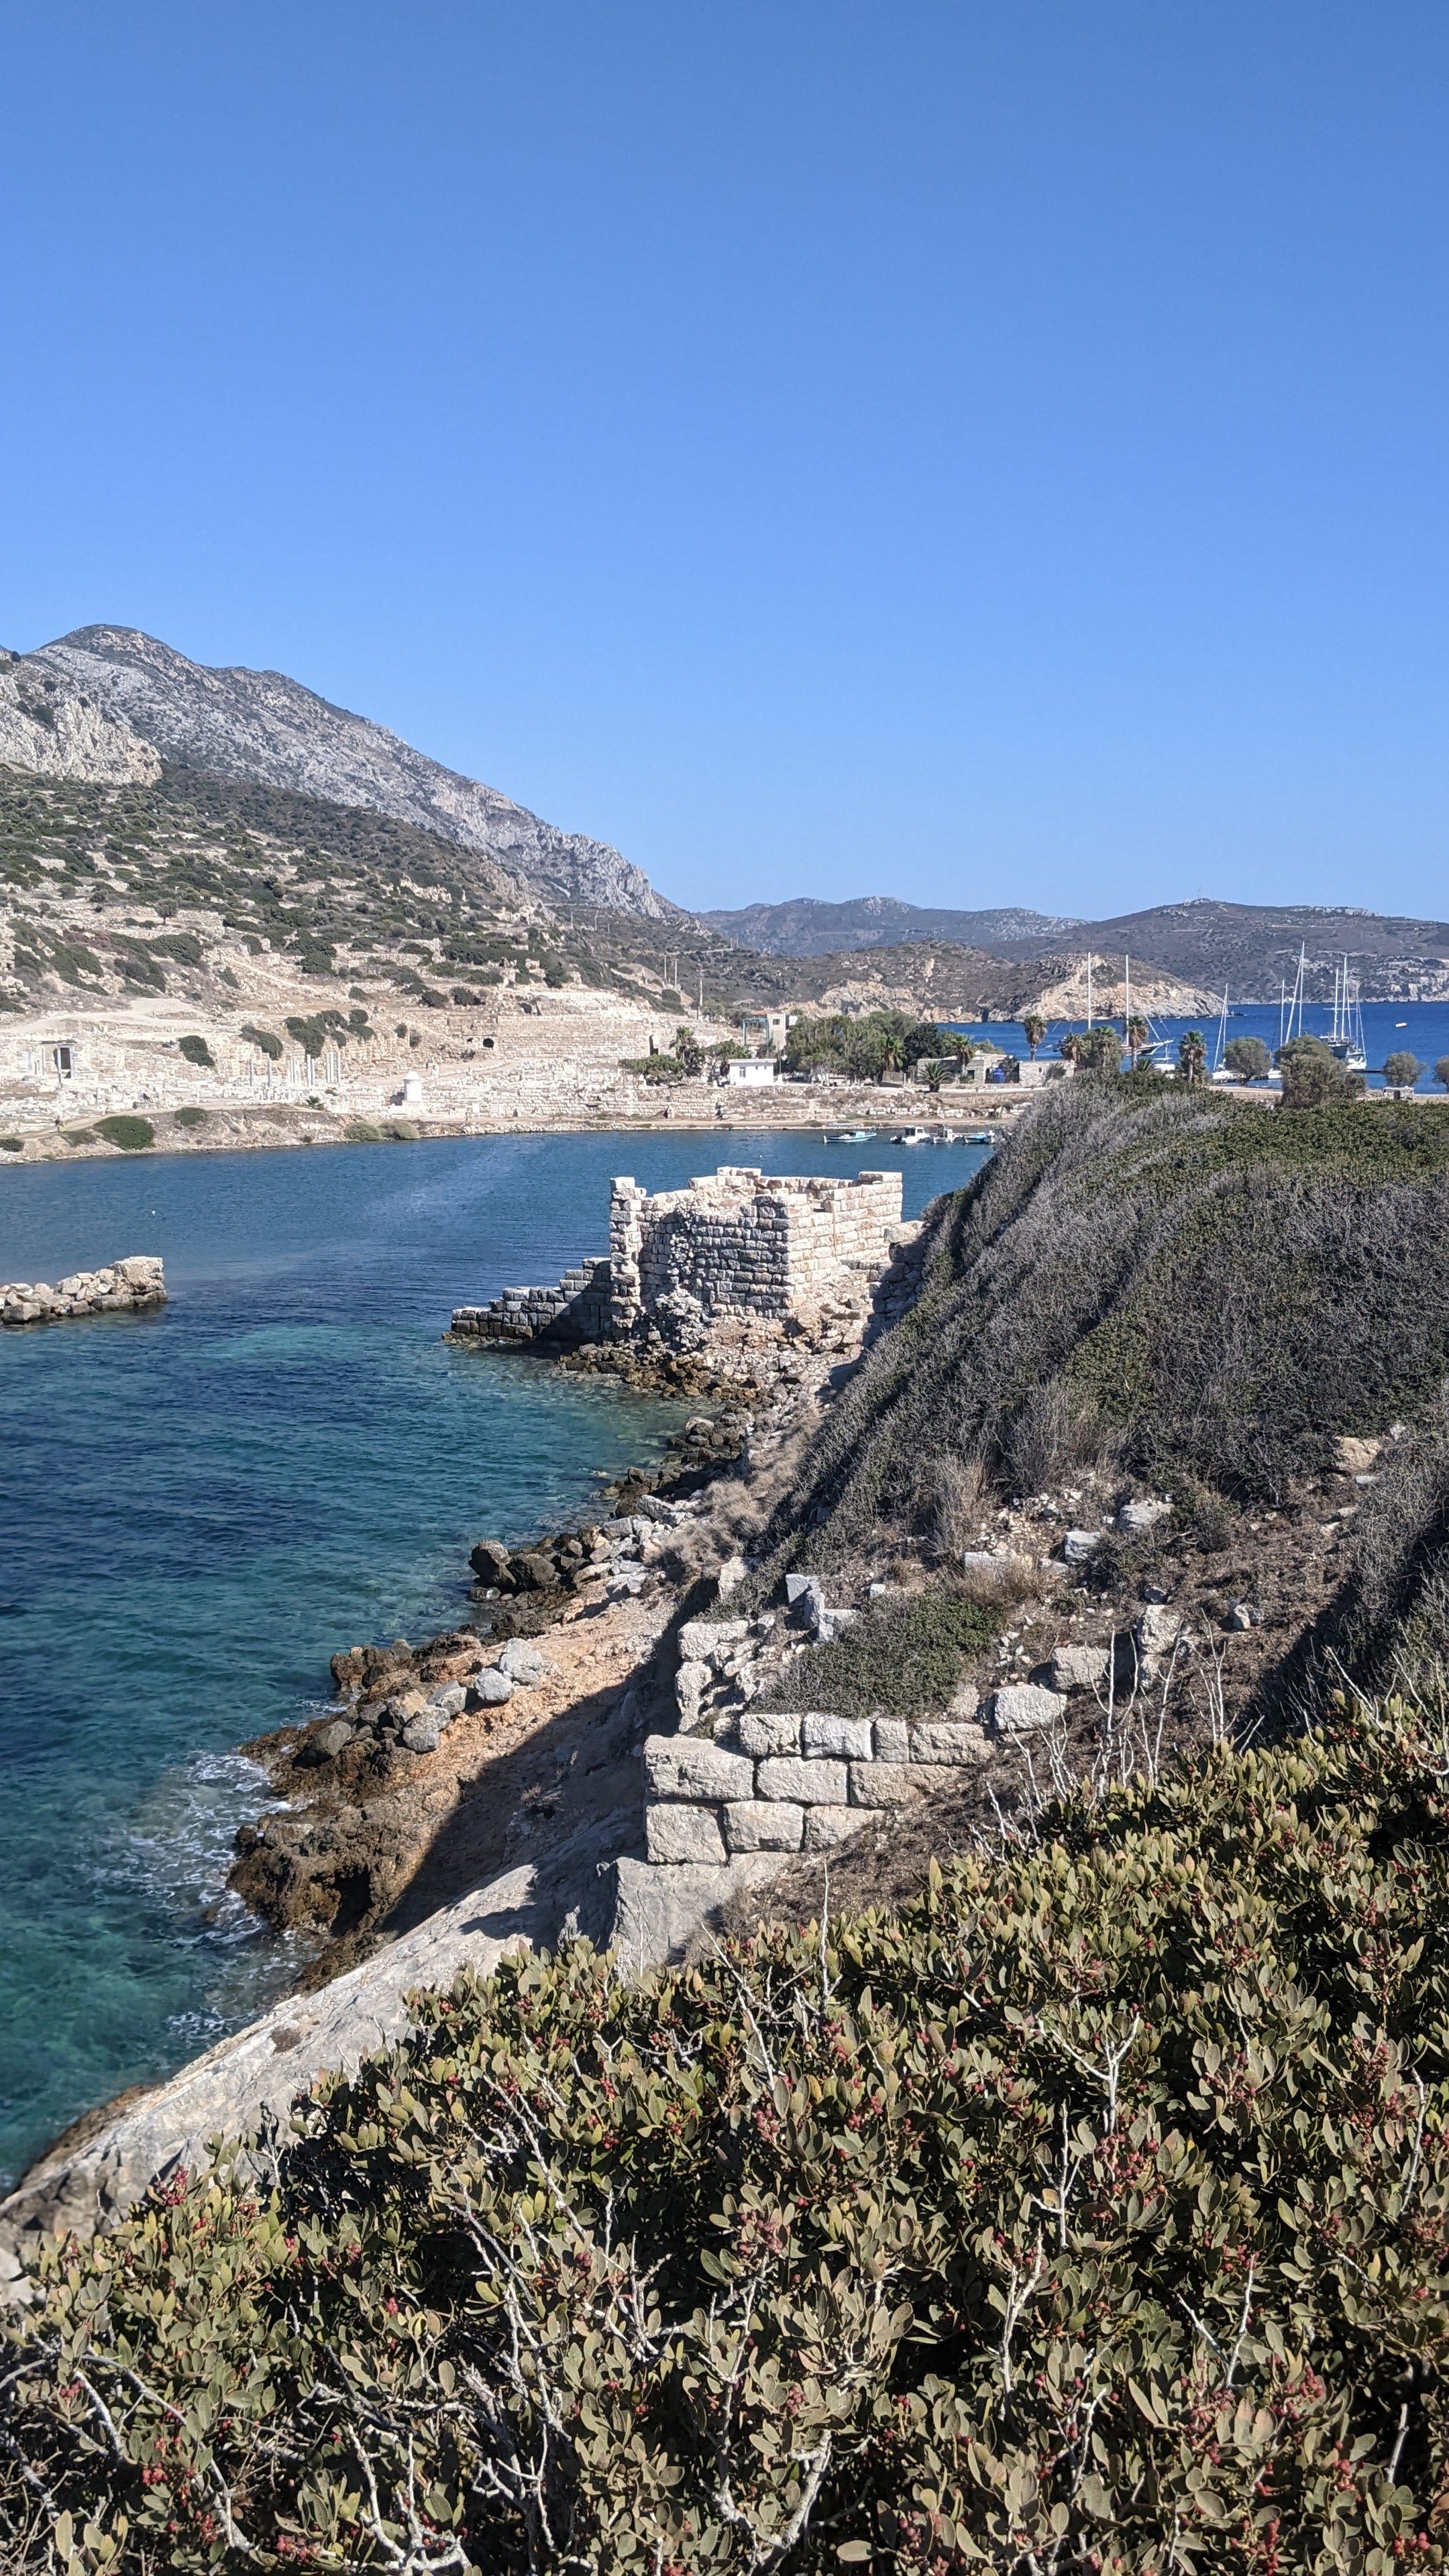
Knidos
The peninsula is probably most well known for Knidos an ancient settlement, that sits on the very tip that archaeologists date back to the first half of 2000 BC
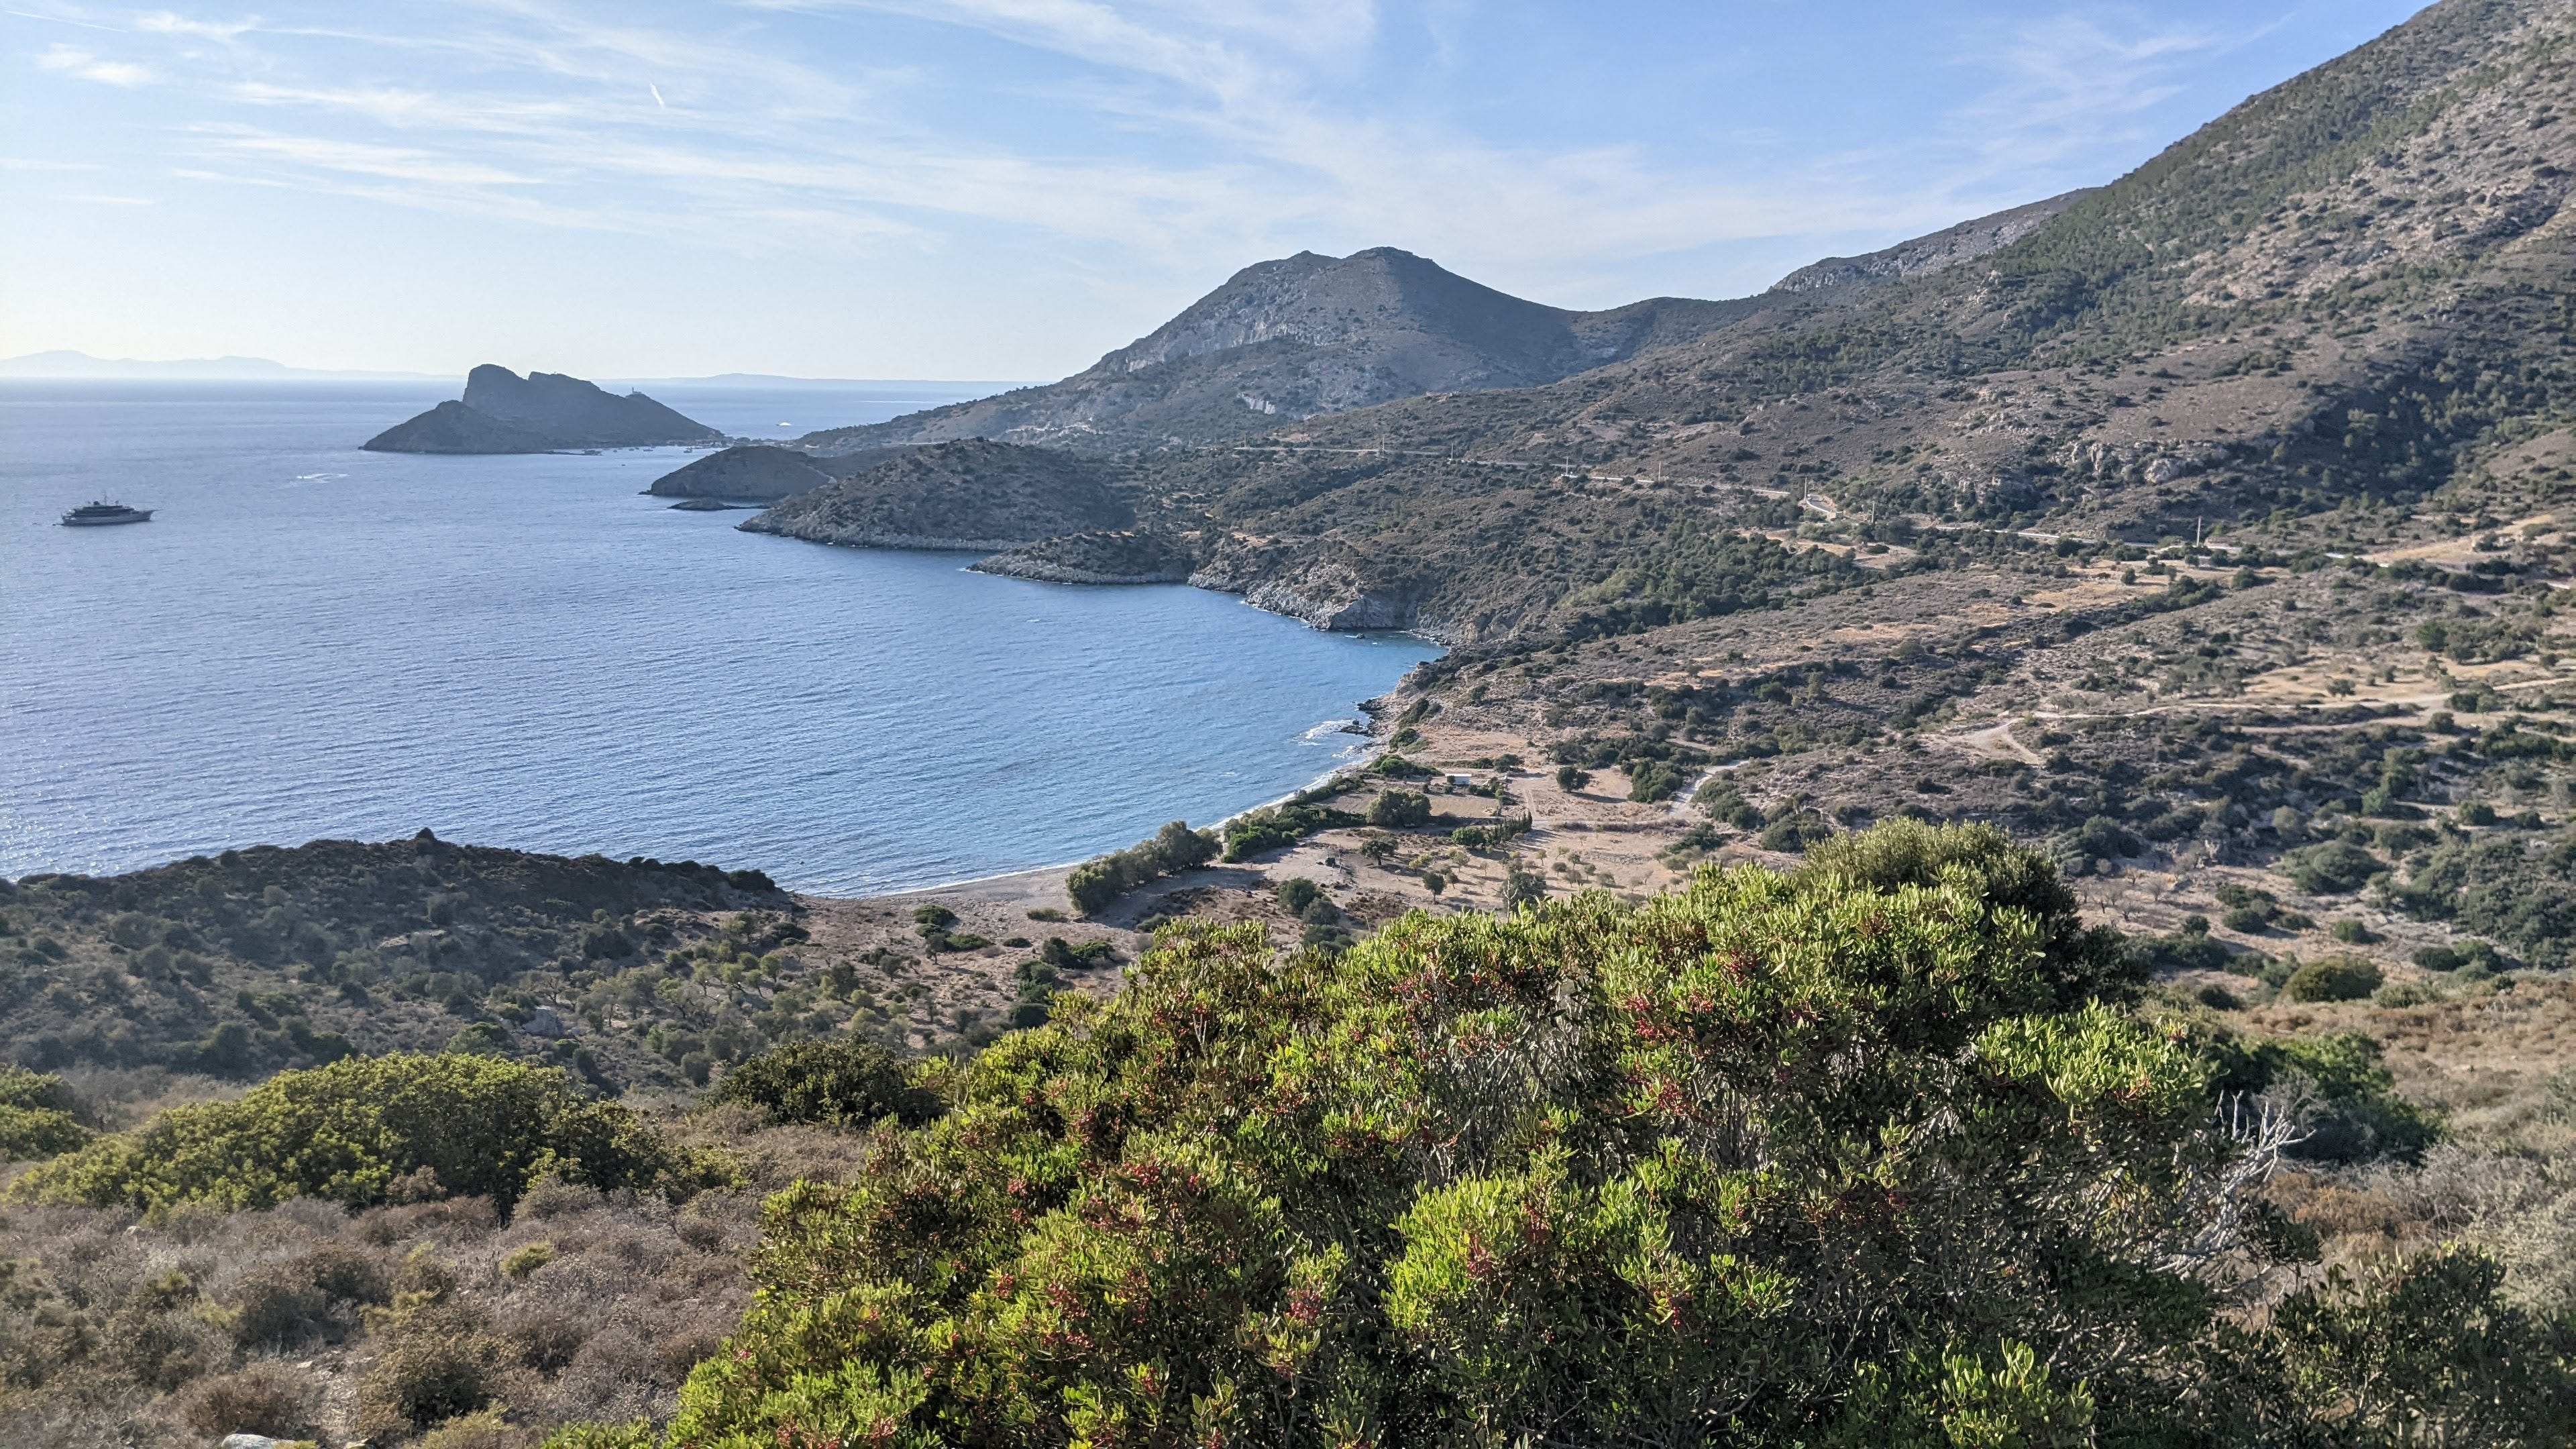
Part of the Carian Trail (the hiking route that runs around the Datça peninsulu) and mostly visited by mariners that sail into the small port, these well-preserved archaeological ruins, include the remnants of ancient temples, theaters, and other structures. The ruins are pretty average compared to other sites in Turkey and around the Med but the views from the surrounding peaks and swimming in the ancient harbor is something you won’t find elsewhere.
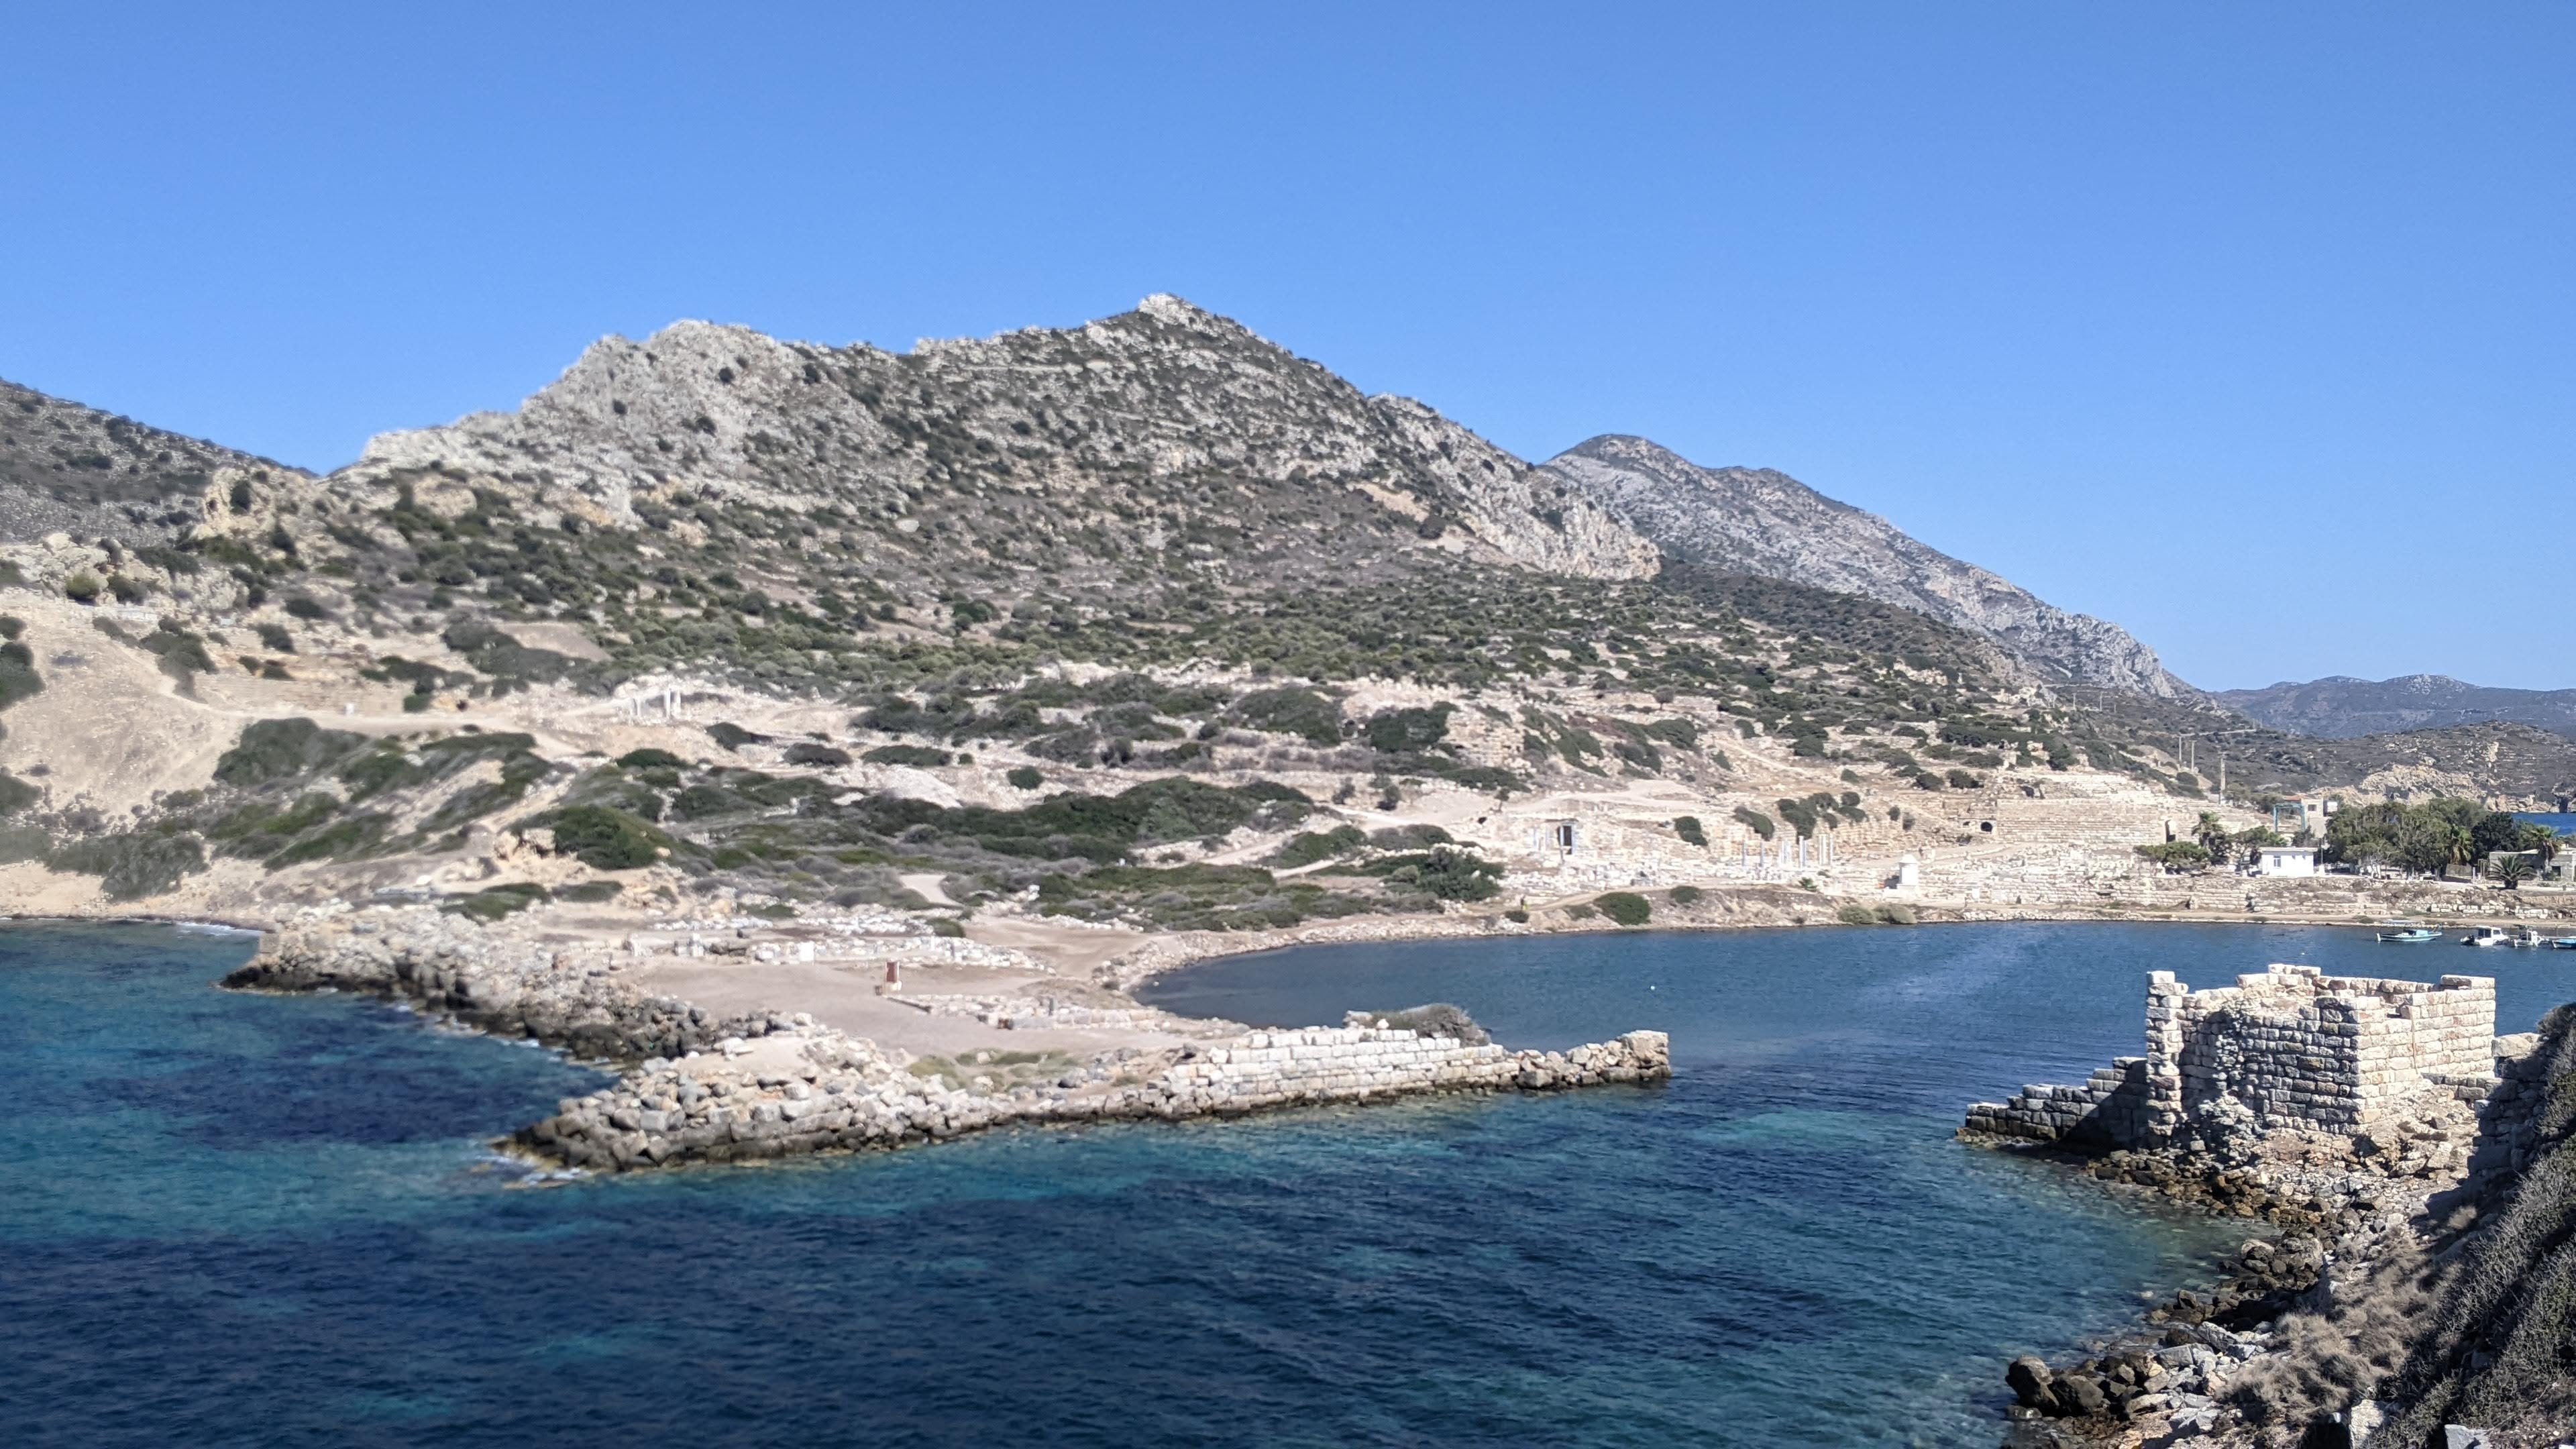
Knidos was once home to one of the earliest known medical schools in the ancient world. The famous ancient Greek physician Hippocrates, often referred to as the "Father of Medicine," is believed to have received his education and practiced medicine in Knidos.
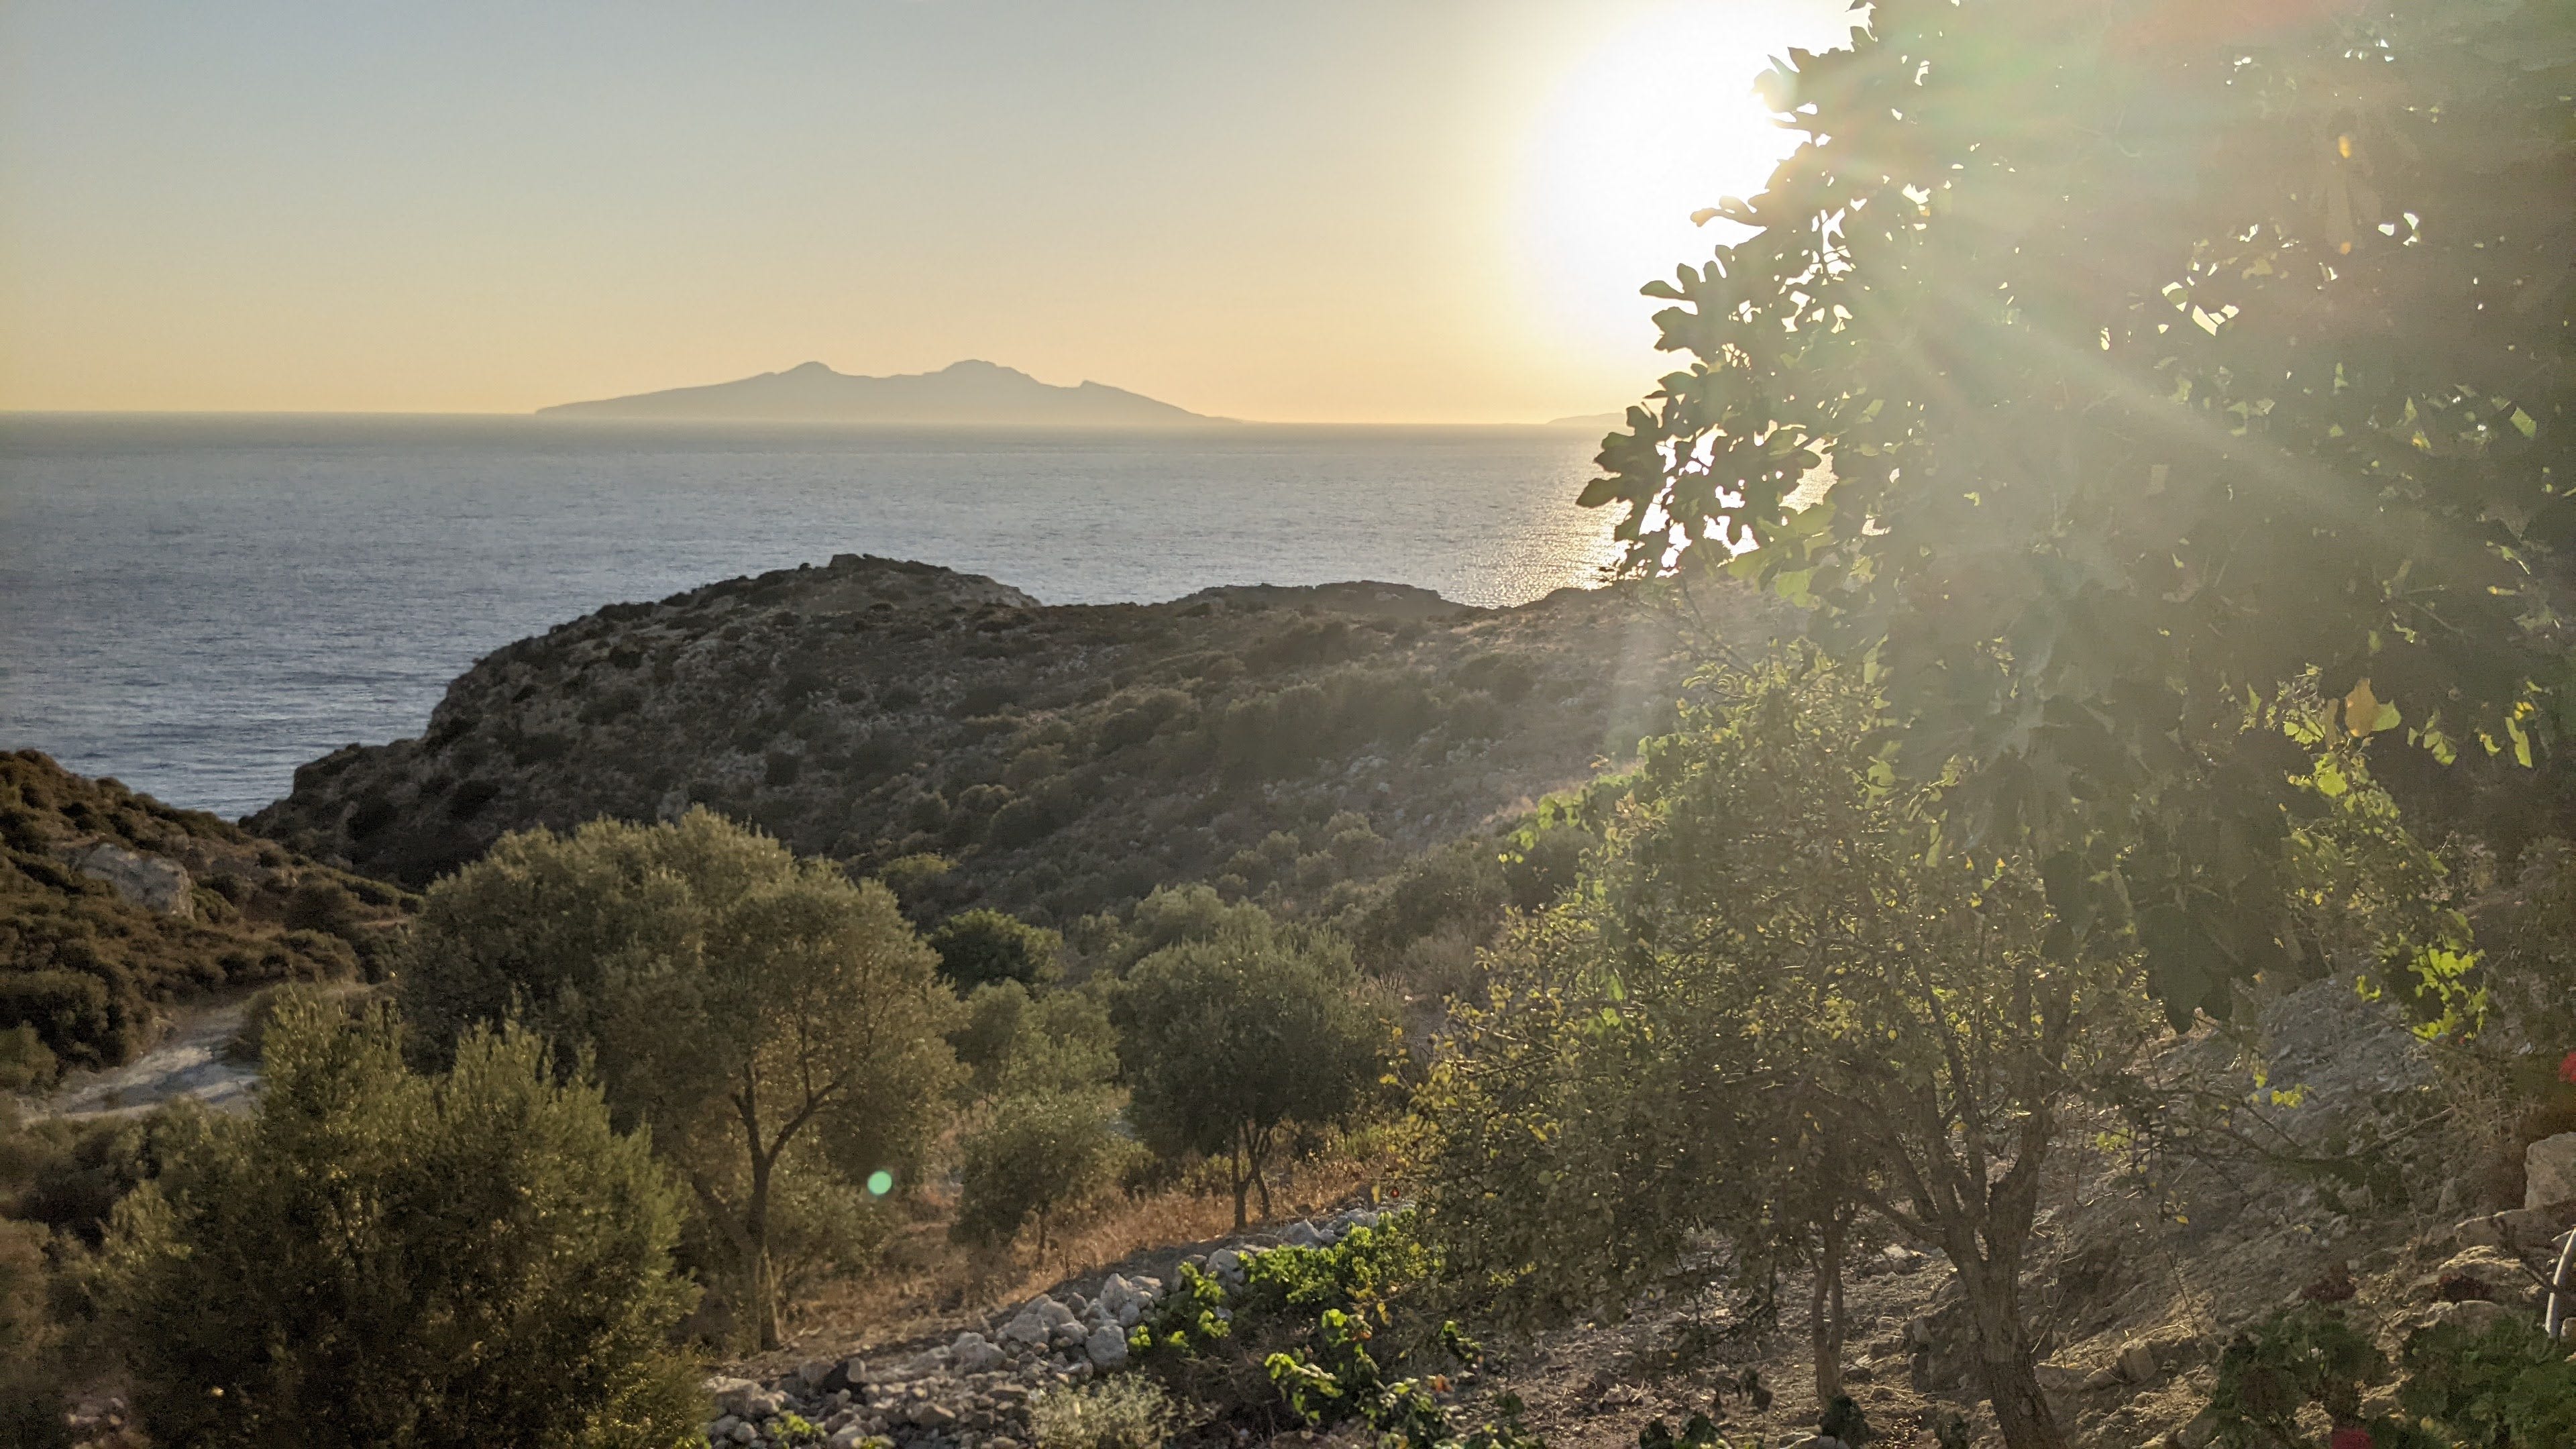
Goknar Knidos Nature Hotel - On the way back from Knidos I stopped off at Goknar Knidos Nature Hotel for a bite to eat and was delighted to find a beautiful garden surrounding the property with awesome views of the coastline and surrounding area, a perfect place to enjoy the sunsetting.
The species and cultivar selection in the garden has obviously been guided by a knowledgeable and loving hand over many decades and some great examples of Mediterranean polyculture can be found around the property , providing a bounty of food for the garden and support to wildlife. The dry stone walls around the plantings provide the perfect habitat for reptiles, small mammals and invertebrates.
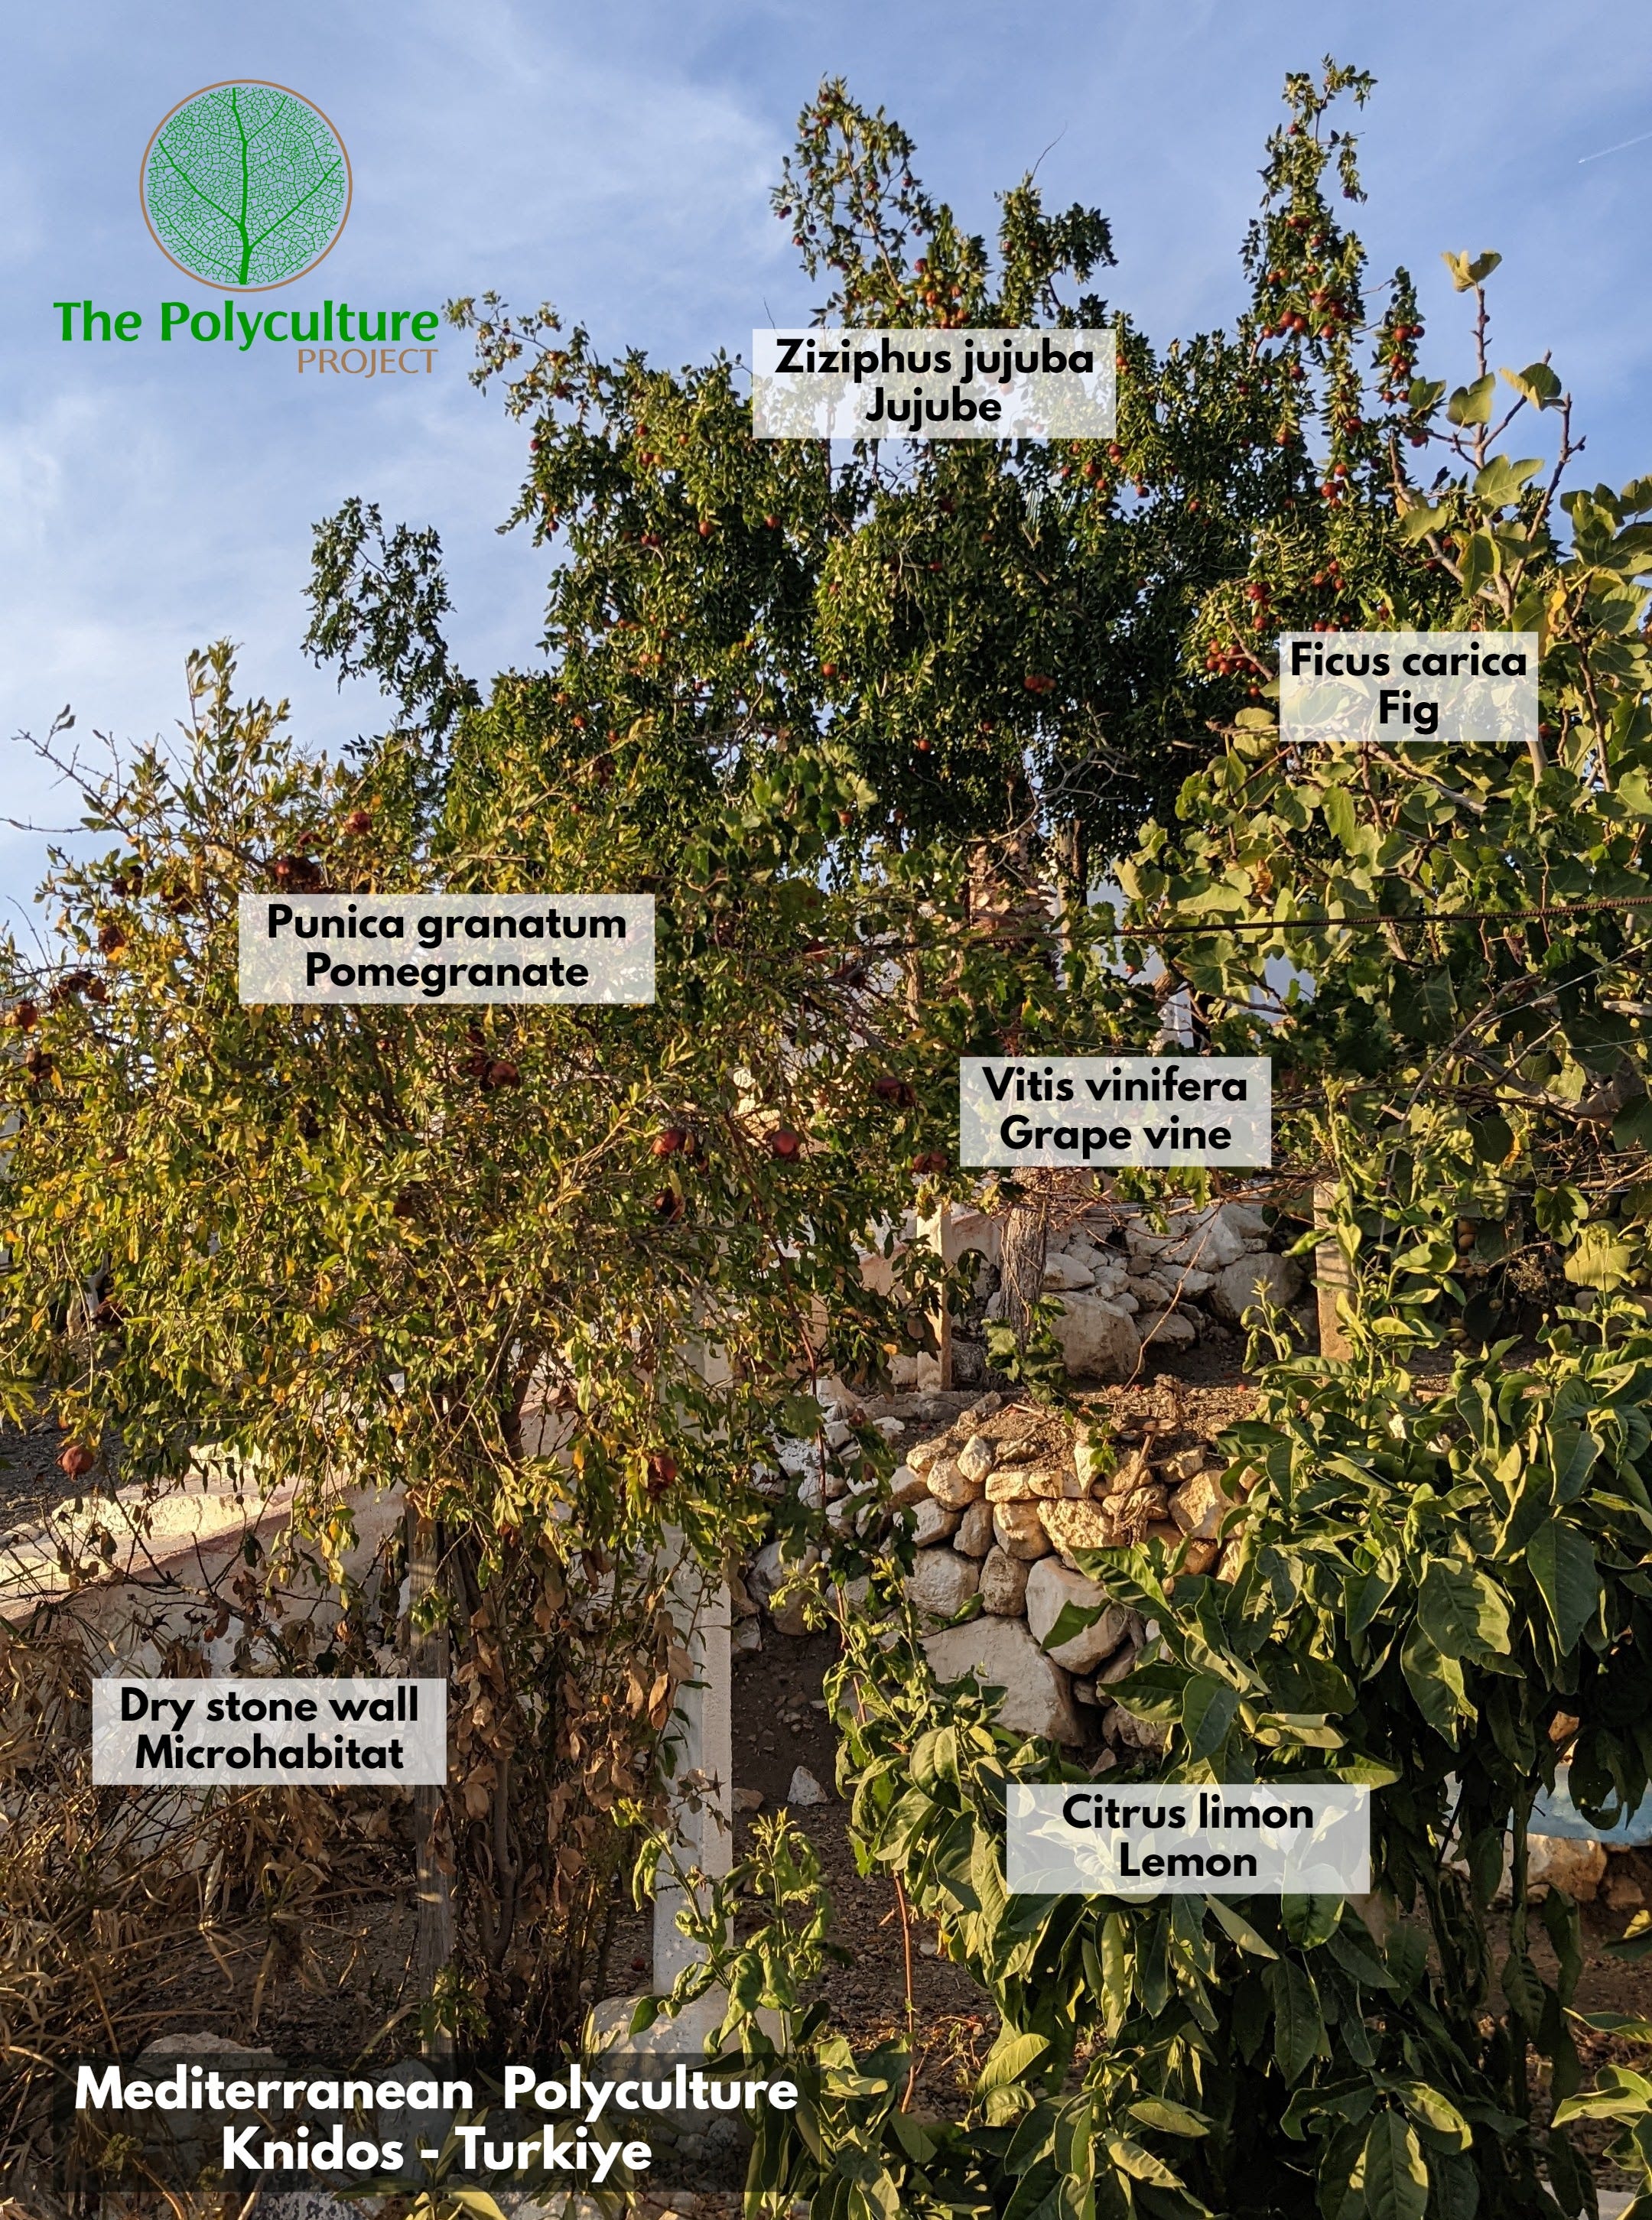
Plant profiles here - Ziziphus jujuba - Jujube, Prunus dulcis cv. - Almond, Morus alba - White Mulberry, Vitis vinifera cv. - Wine Grape, Punica granatum - Pomegranate and you can find various hardy cultivars of these plants, available from our nursery here.
Wild Plant Meetings
The natural pattern of floral succession ensures there are flowers full of nectar and pollen throughout the seasons to sustain the bees and other pollinating insects. Among the dry herb layer that covers the Mediterranean soils this time of year a few flowering plants emerge such as Chamaeleon gummifer - Stemless atractylis, Drimia maritima - Sea Squill, Pancratium maritimum - Sea daffodil and Echinops spp.
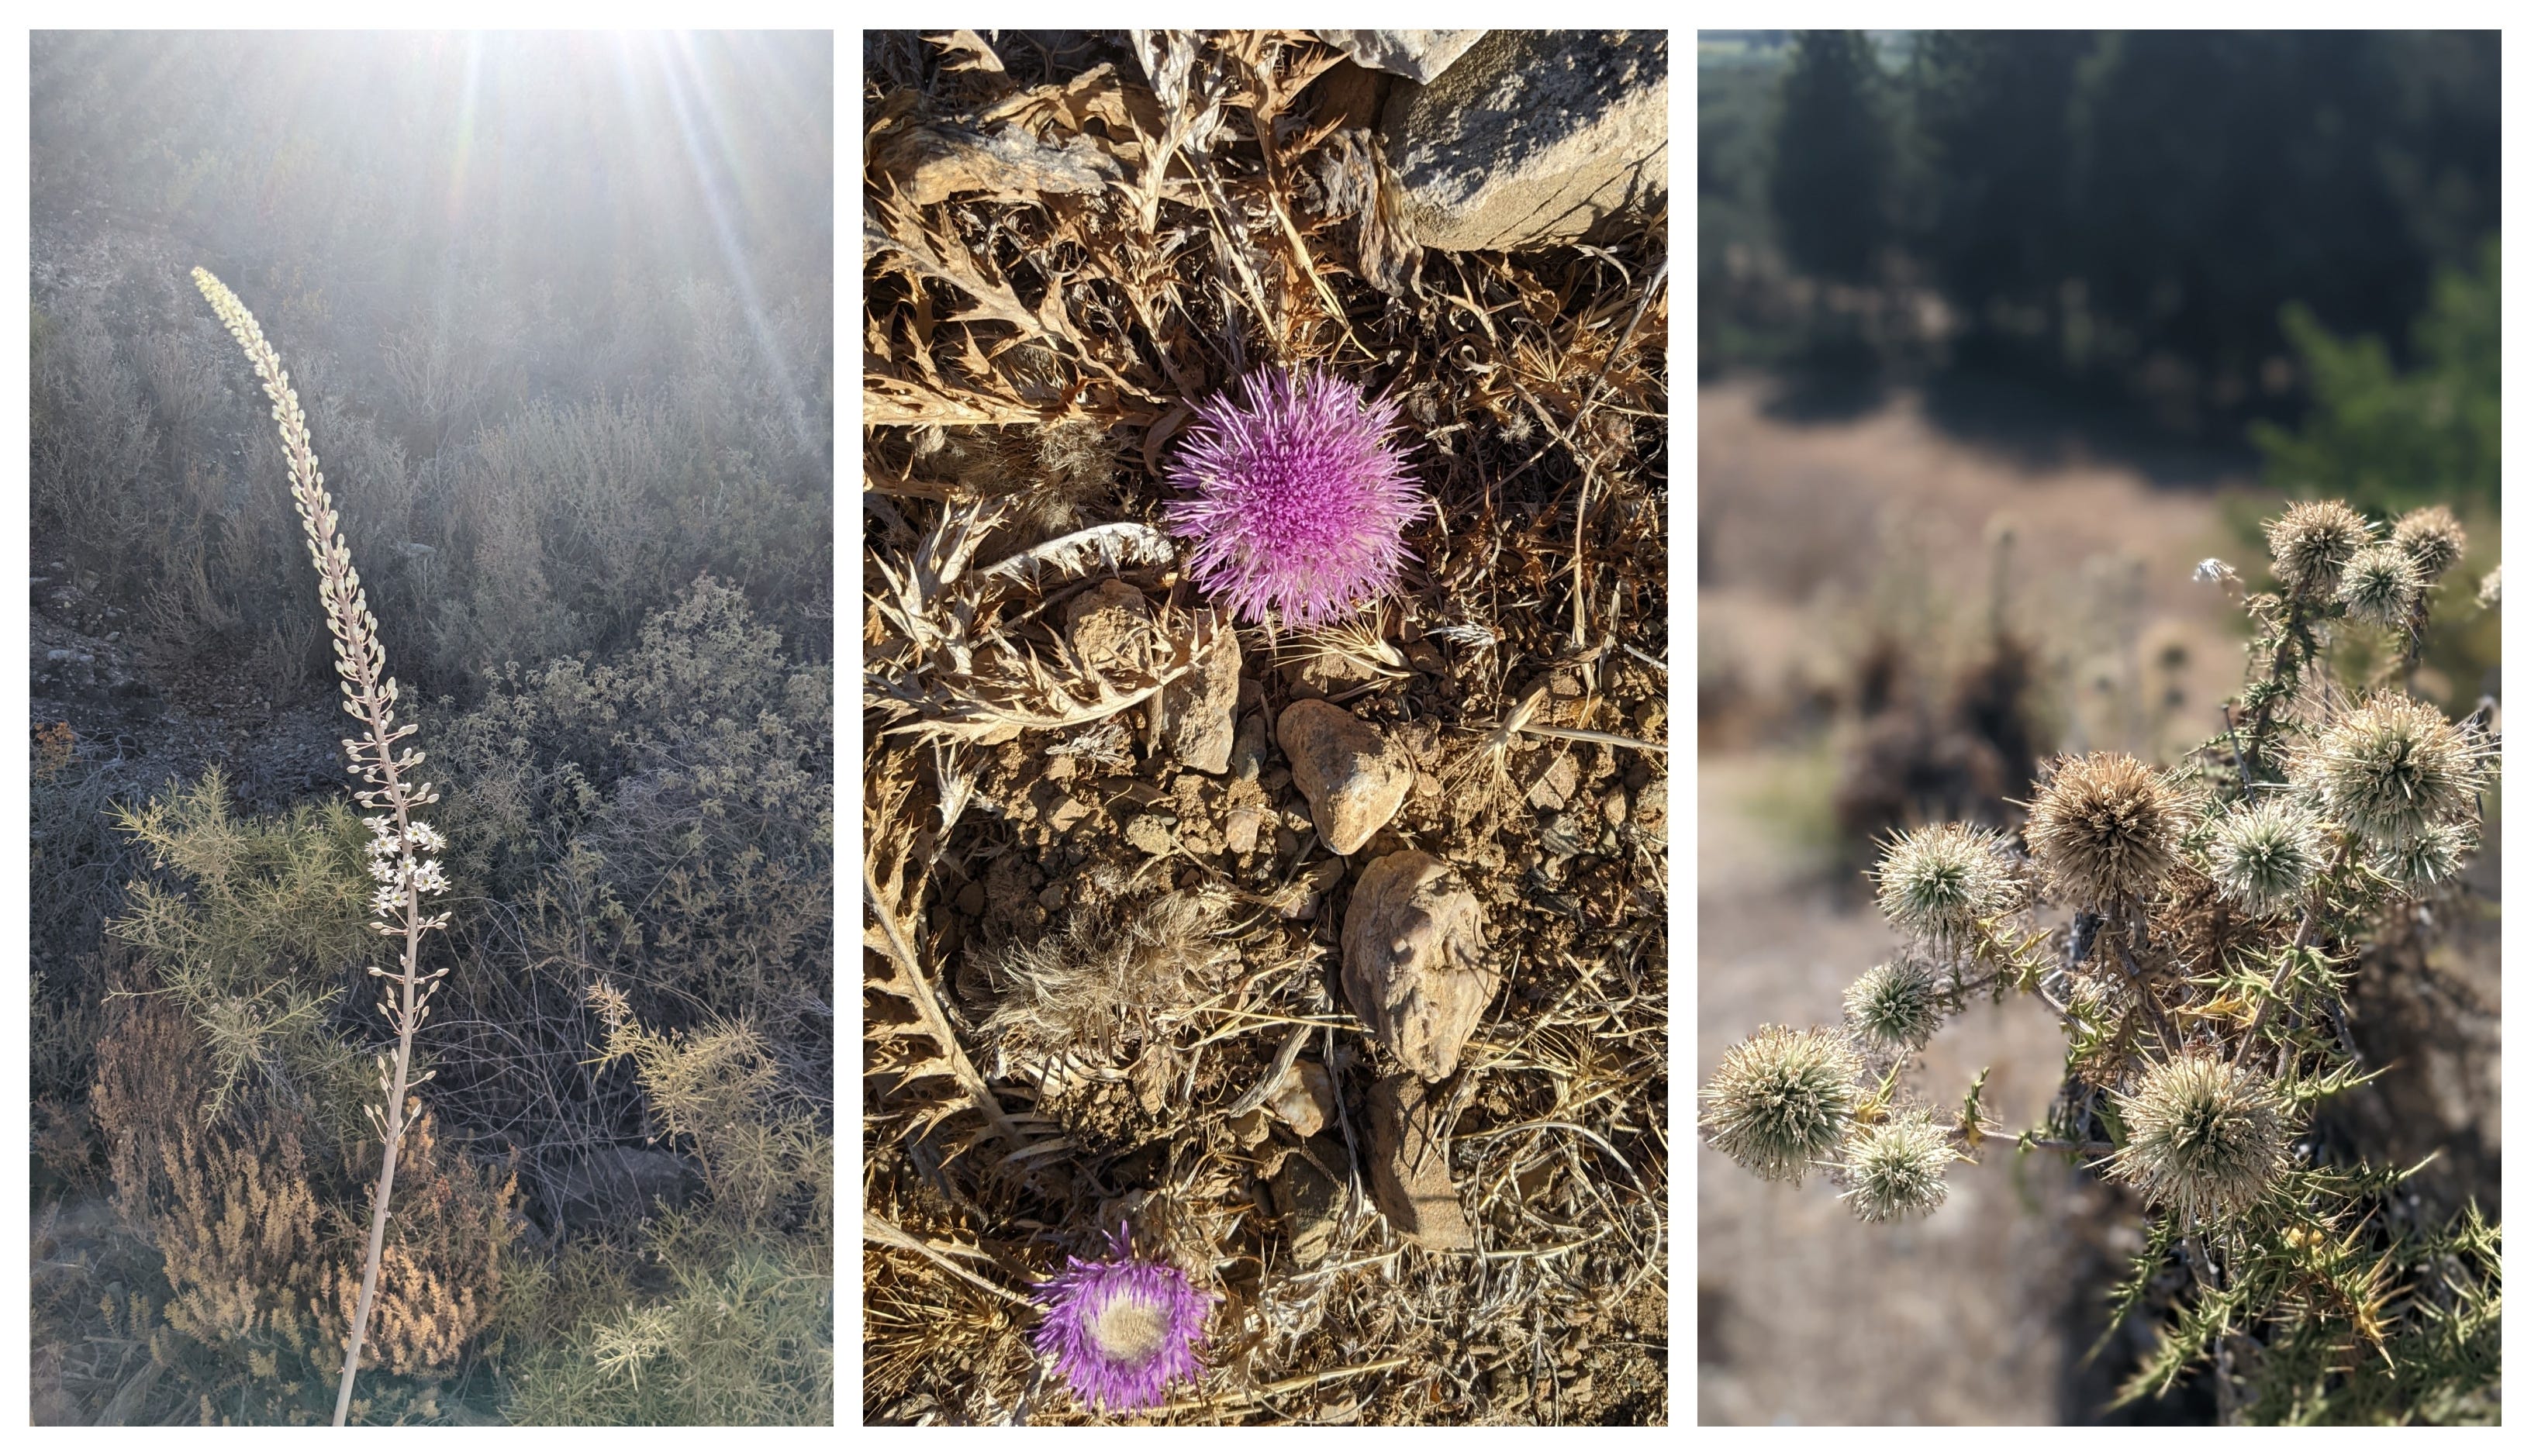
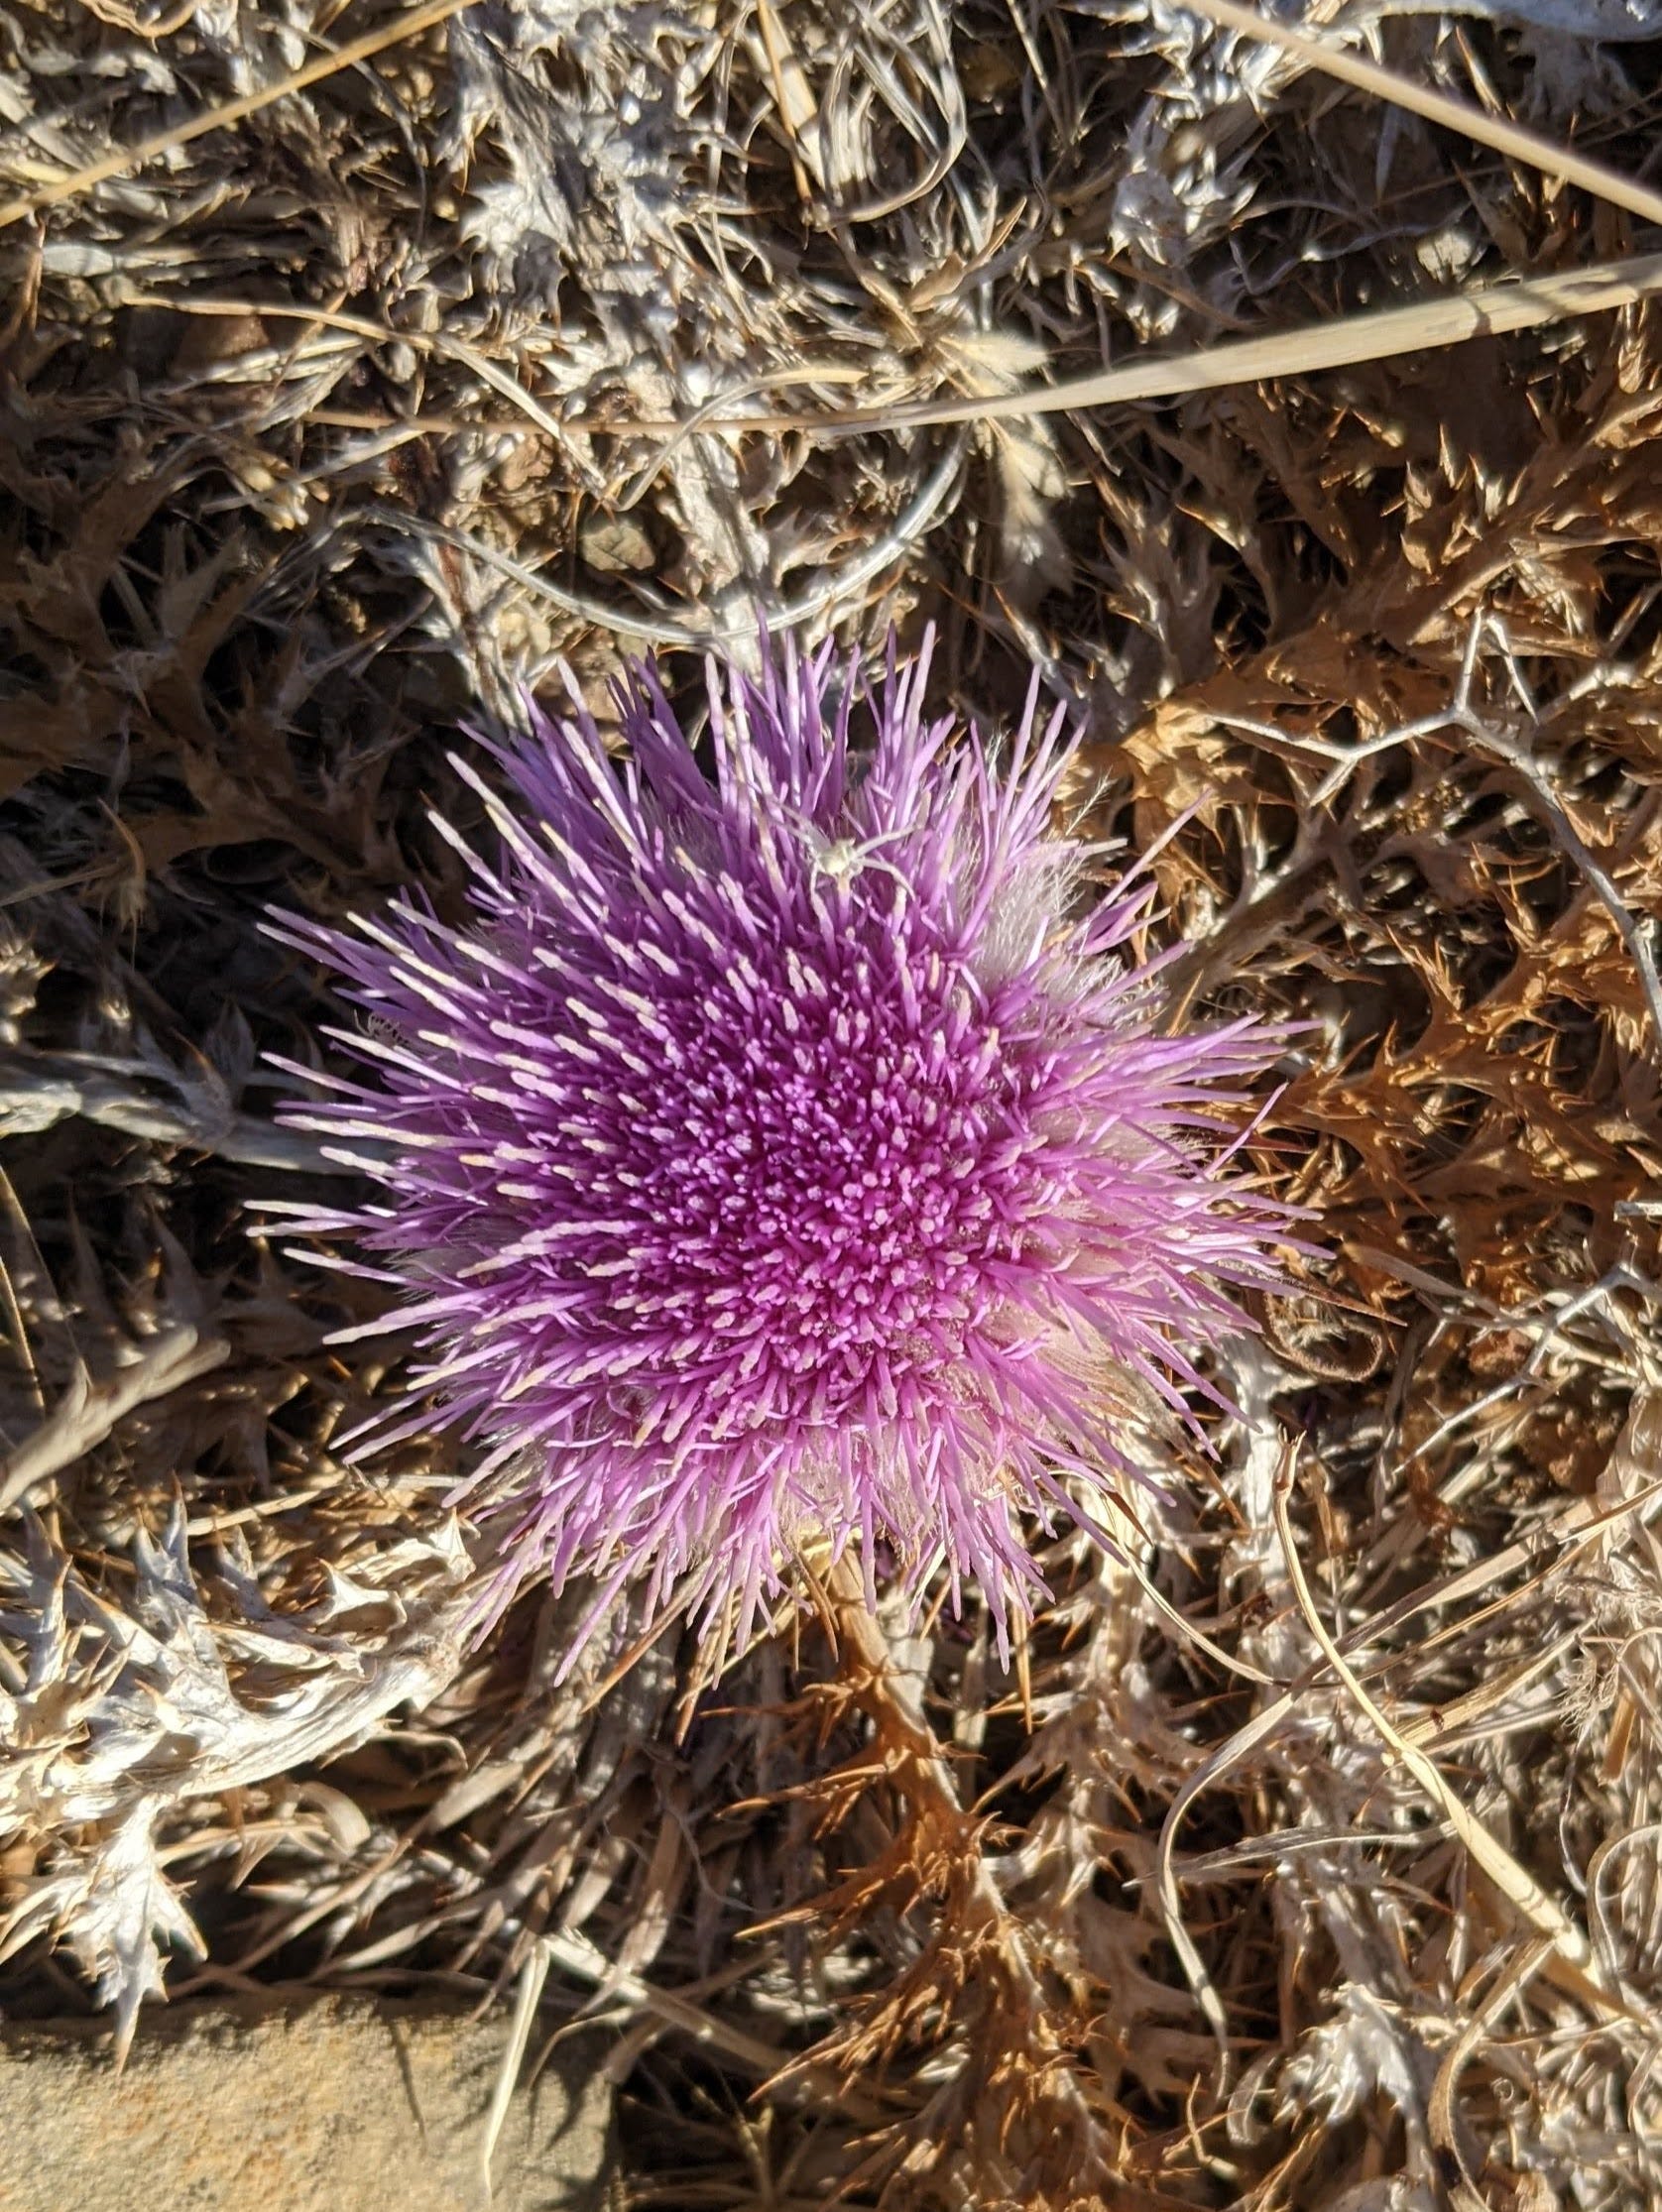
Chamaeleon gummifer - Stemless atractylis is perennial thistle has a pinkish inflorescence that grows directly from the ground, without a stem. The plant produces a white or yellowish gummy latex, which is toxic due to the presence of atractyloside and carboxyatractyloside although the plant has a history of use in folk medicine, it should be handled with caution due to its toxicity.
Drimia maritima - Sea Squill appears to be quite common on the Datca peninsula. According to Sefa Akbulut in a great paper I found online titled Ethnobotanical knowledge on the plants used by people on the Datça Peninsula -Muğla, Turkey, the plant has a history of use for the following.
bulbs used externally for rheumatism pain
It is applied to the body against colds (caustic).
Glue is made from the bulb.
Used as an amulet.
Olive oil is rubbed on the heated leaves and wrapped in the ear to treat mumps.
You will often see the inflorescence standing tall alone but sometimes you can find clumps of 3 or 4 bulbs as in the below video taken from the hill tops around Karakoy.
Pancratium maritimum - Sea daffodil - I'm constantly amazed by nature's remarkable ability to not only survive but flourish in some of the most challenging and dynamic environments on Earth. Pancratium maritimum - Sea daffodil, is a prime example of this resilience, thriving in harsh coastal conditions. It withstands salt spray, high winds, shifting sands, and even submersion in seawater during high tides. Its slender leaves reduce water loss through transpiration, while its extensive root system stabilizes sand dunes, preventing erosion
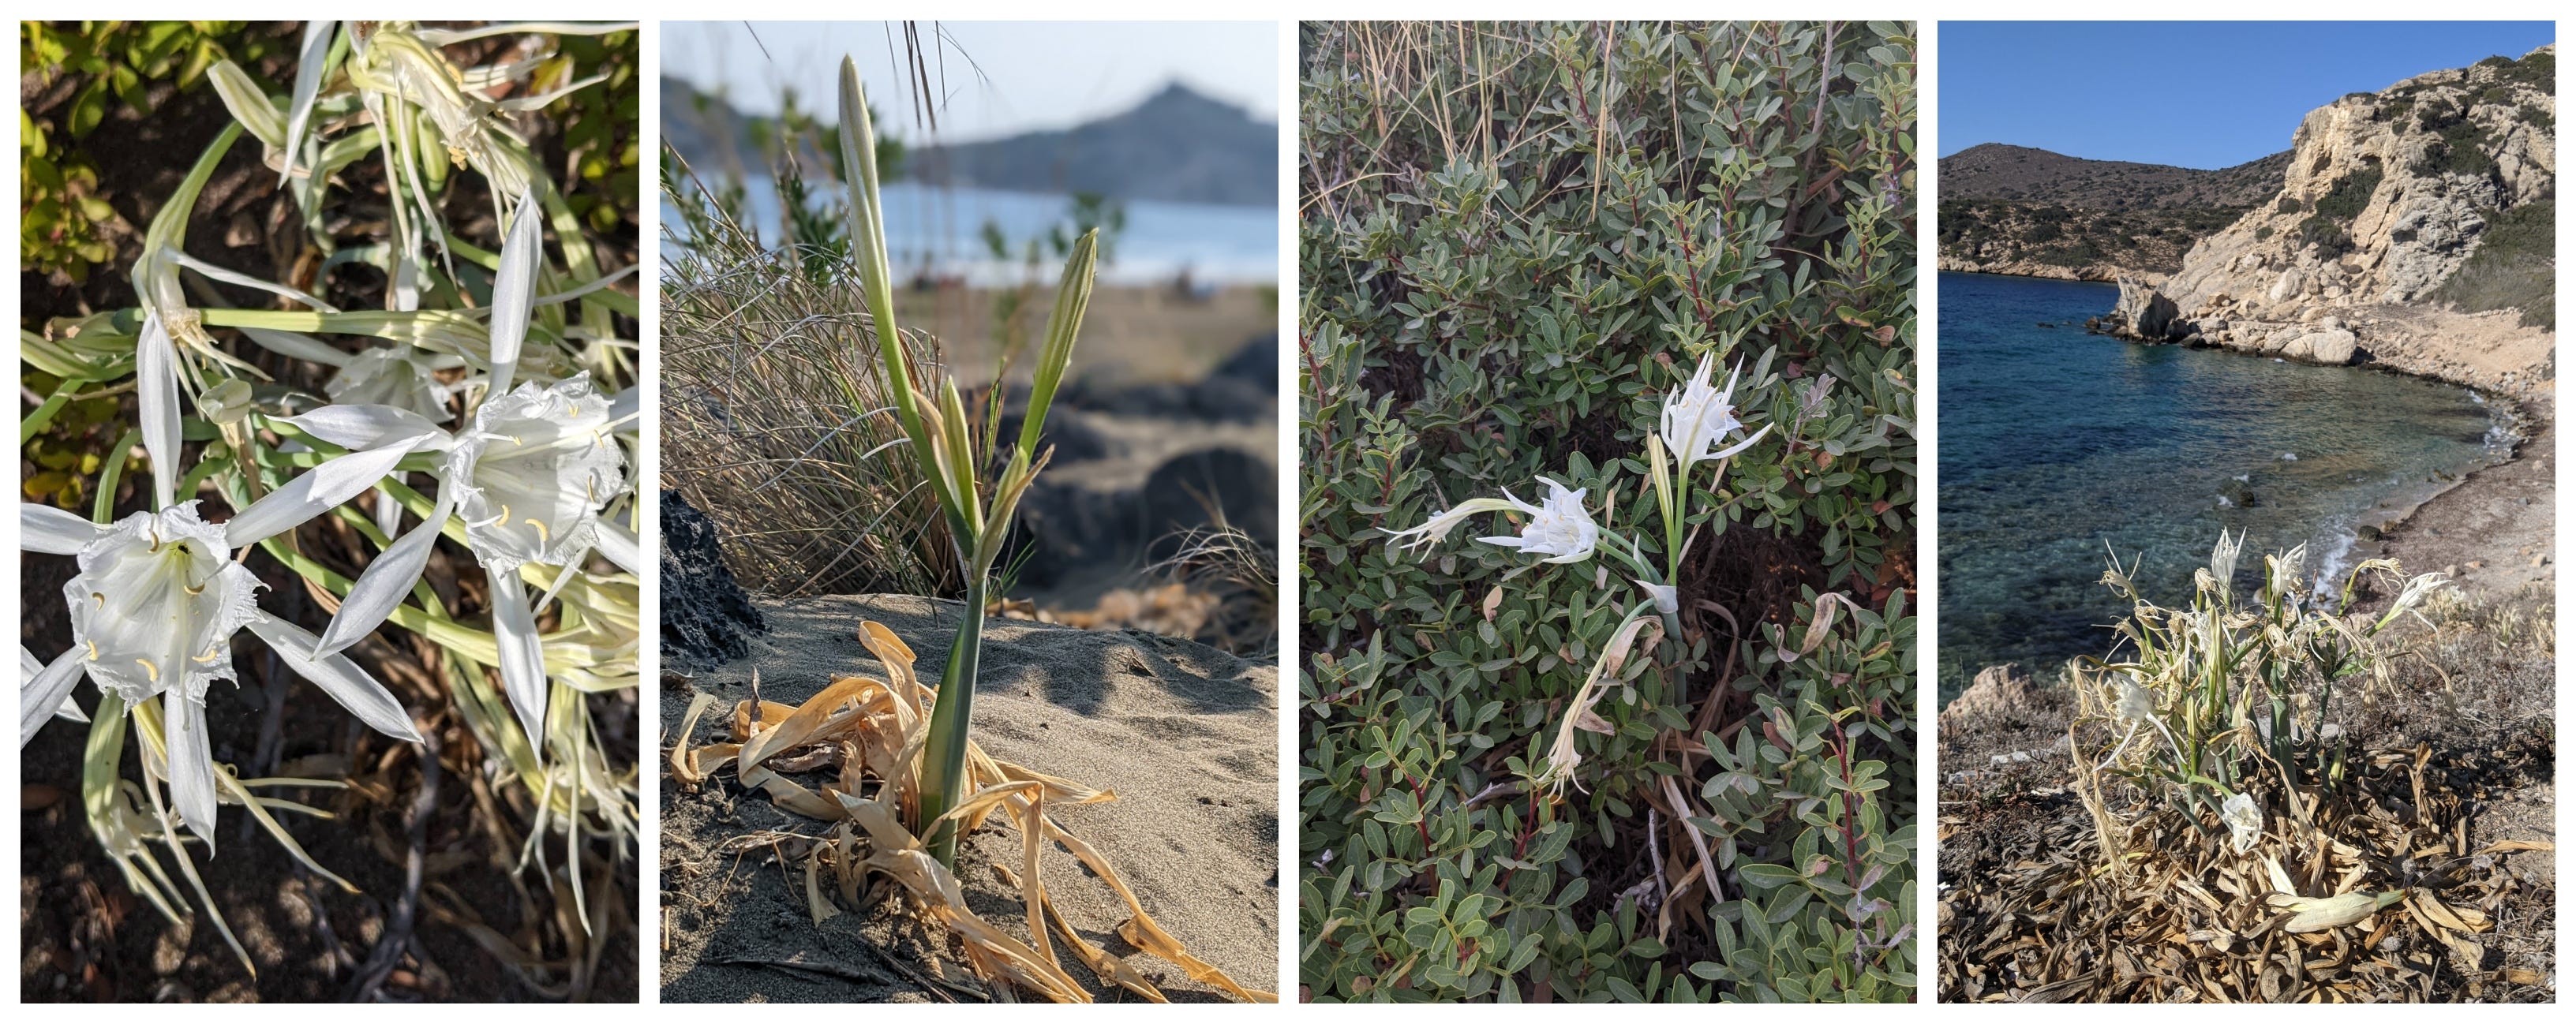
The plants are an important part of coastal ecosystems, providing habitat and food for various wildlife species, including insects and beach-nesting birds. It’s relatively common all over the coast, lowlands and coastal cliffs of the peninsula
Pistacia lentiscus - Mastic Tree serve as excellent evergreen ground cover to the thin soils of the rocky slopes and beaches of the Datça peninsula.
A sweet liquorice-flavoured resin, called 'mastic', is obtained from incisions made into the bark and is used as a flavouring in puddings and sweets including 'Turkish delight'. It is also the basis of a Greek confectionery called 'masticha' and a liqueur called 'mastiche' and an edible oil is obtained from the seed.
The species is dioecious (individual flowers are either male or female, but only one sex is to be found on any one plant) and the majority of the plants are fruitless but often you will see female plants with beautiful bright red berries.
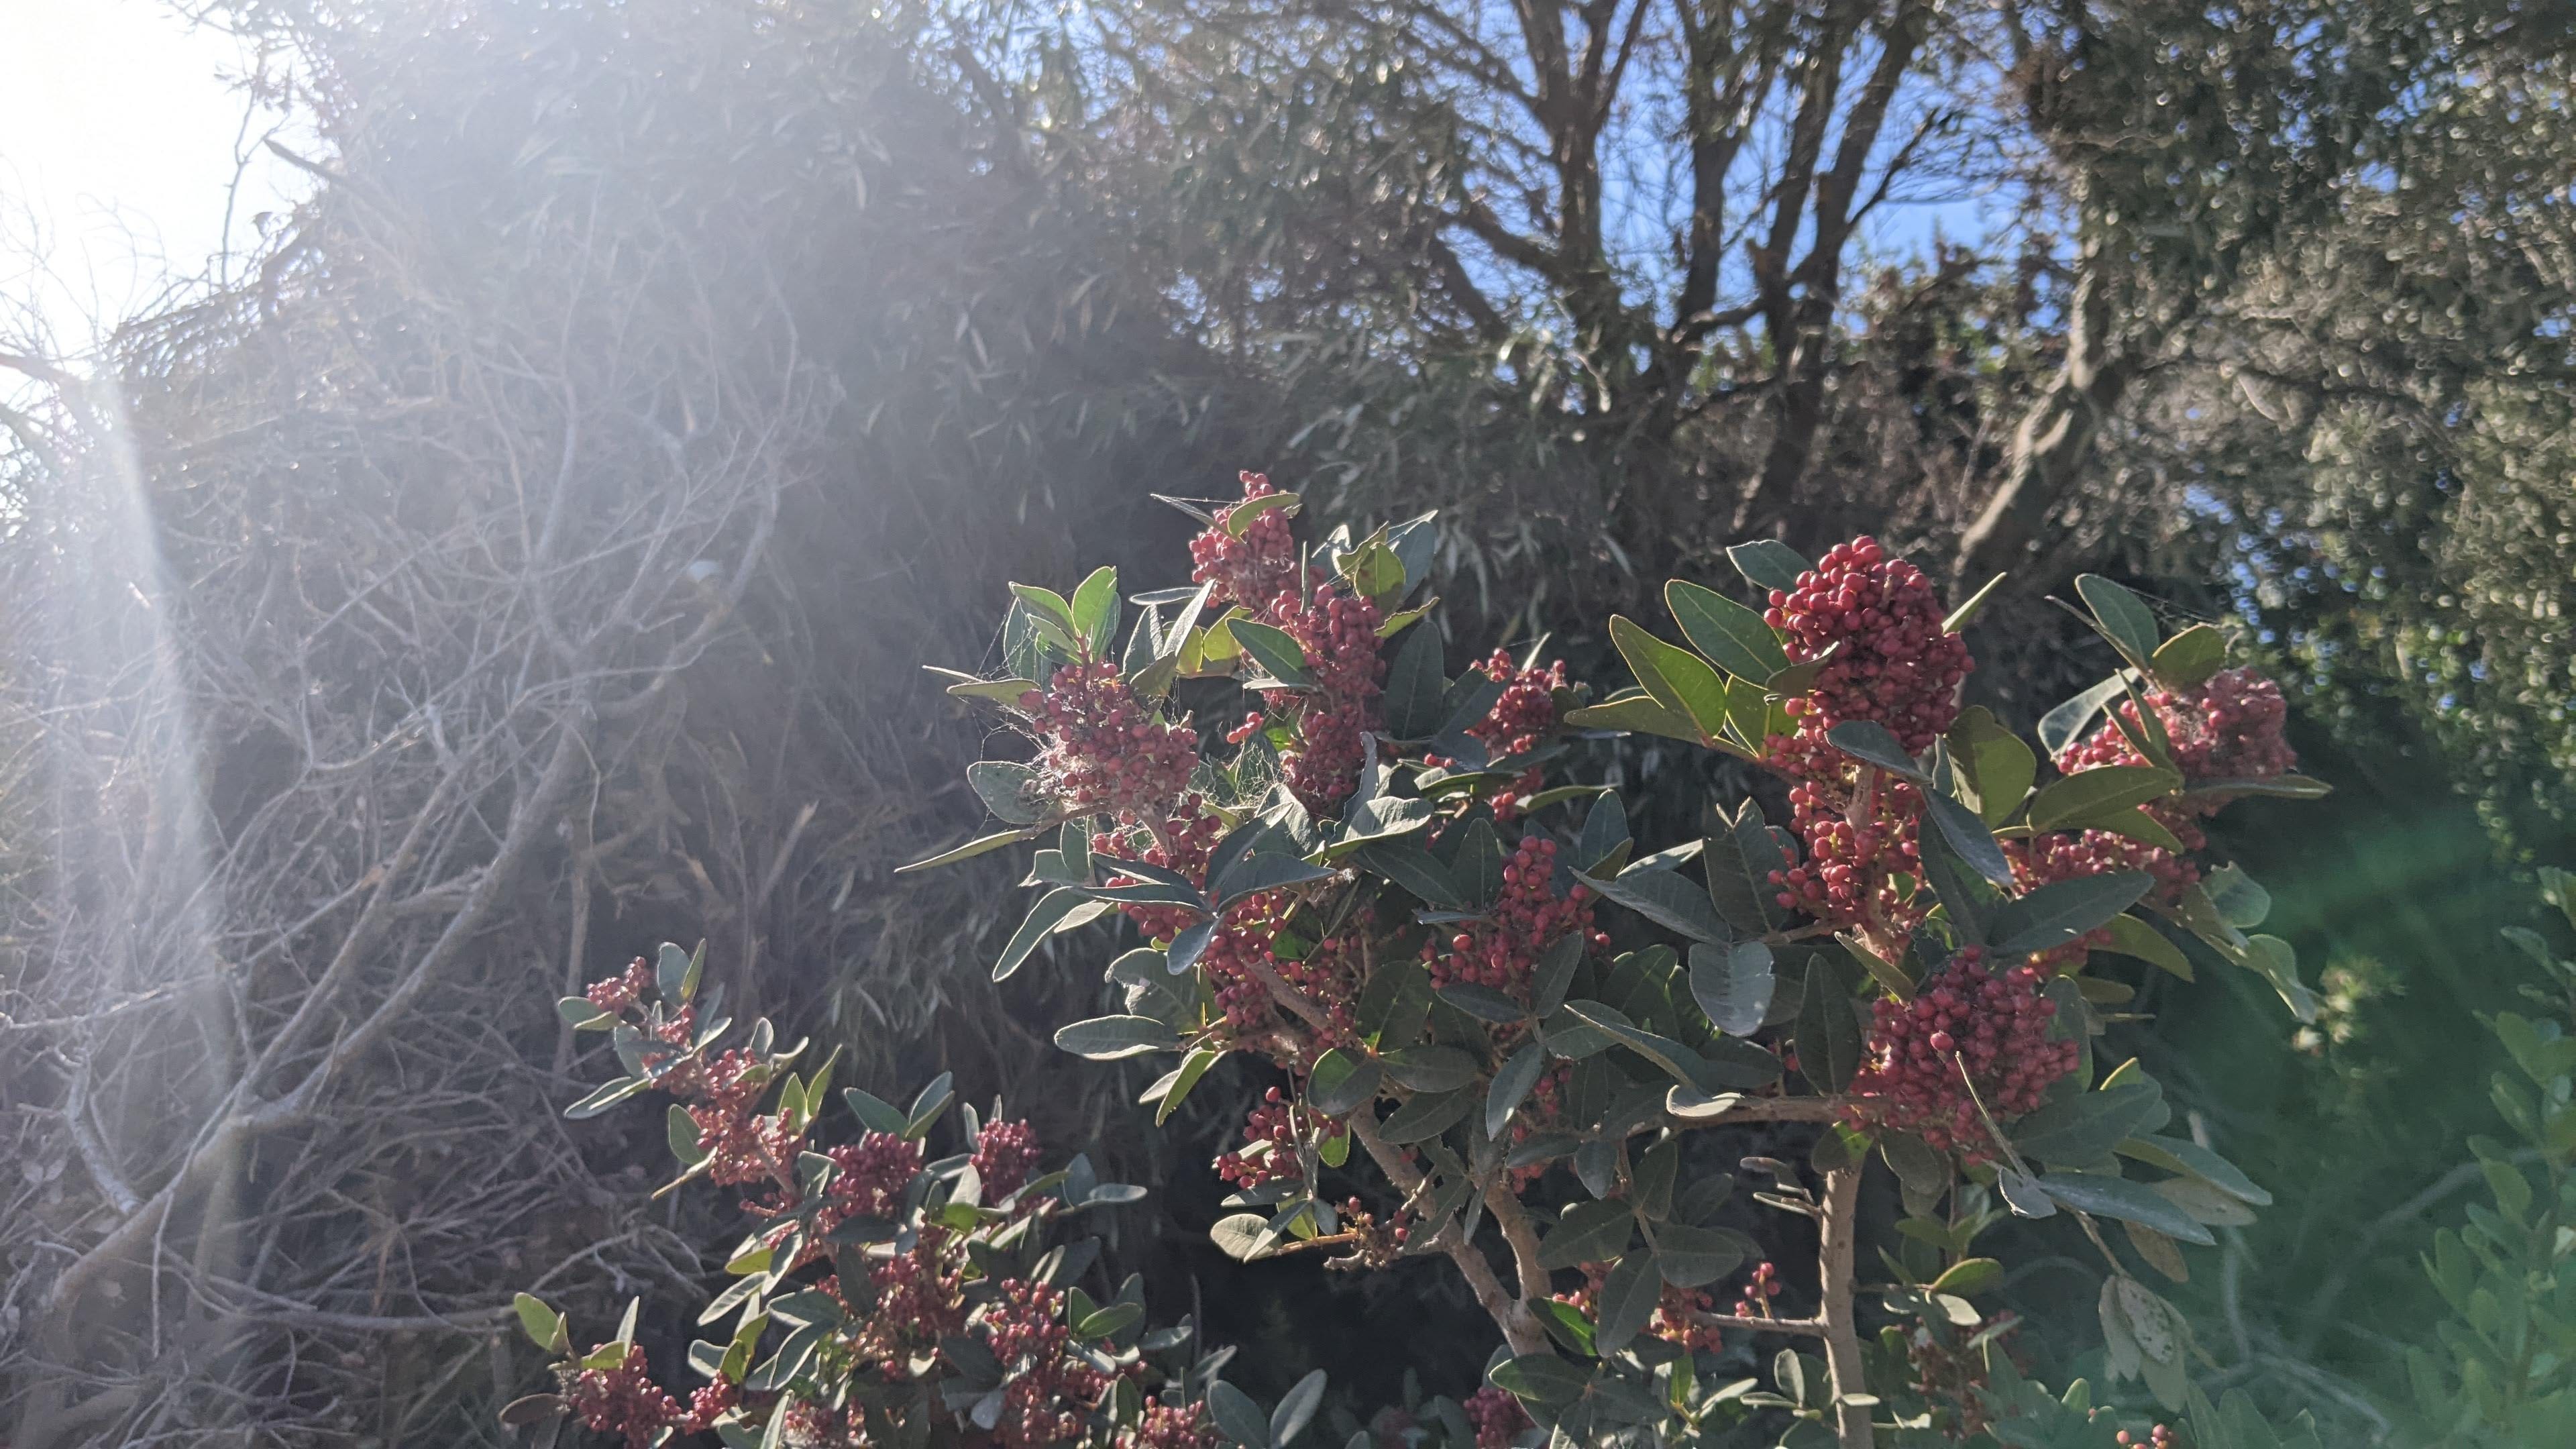
These are very resilient plants and probably excellent biomass producers when managed properly. I came across a few patches that had burnt down, probably this year, and already the green shoots were emerging from the base of the plants. I believe this is due to the plants lignotubers, underground woody structures that allow some plants to survive fire and other disturbances. They contain dormant buds that can resprout new stems if the above-ground part of the plant is killed.

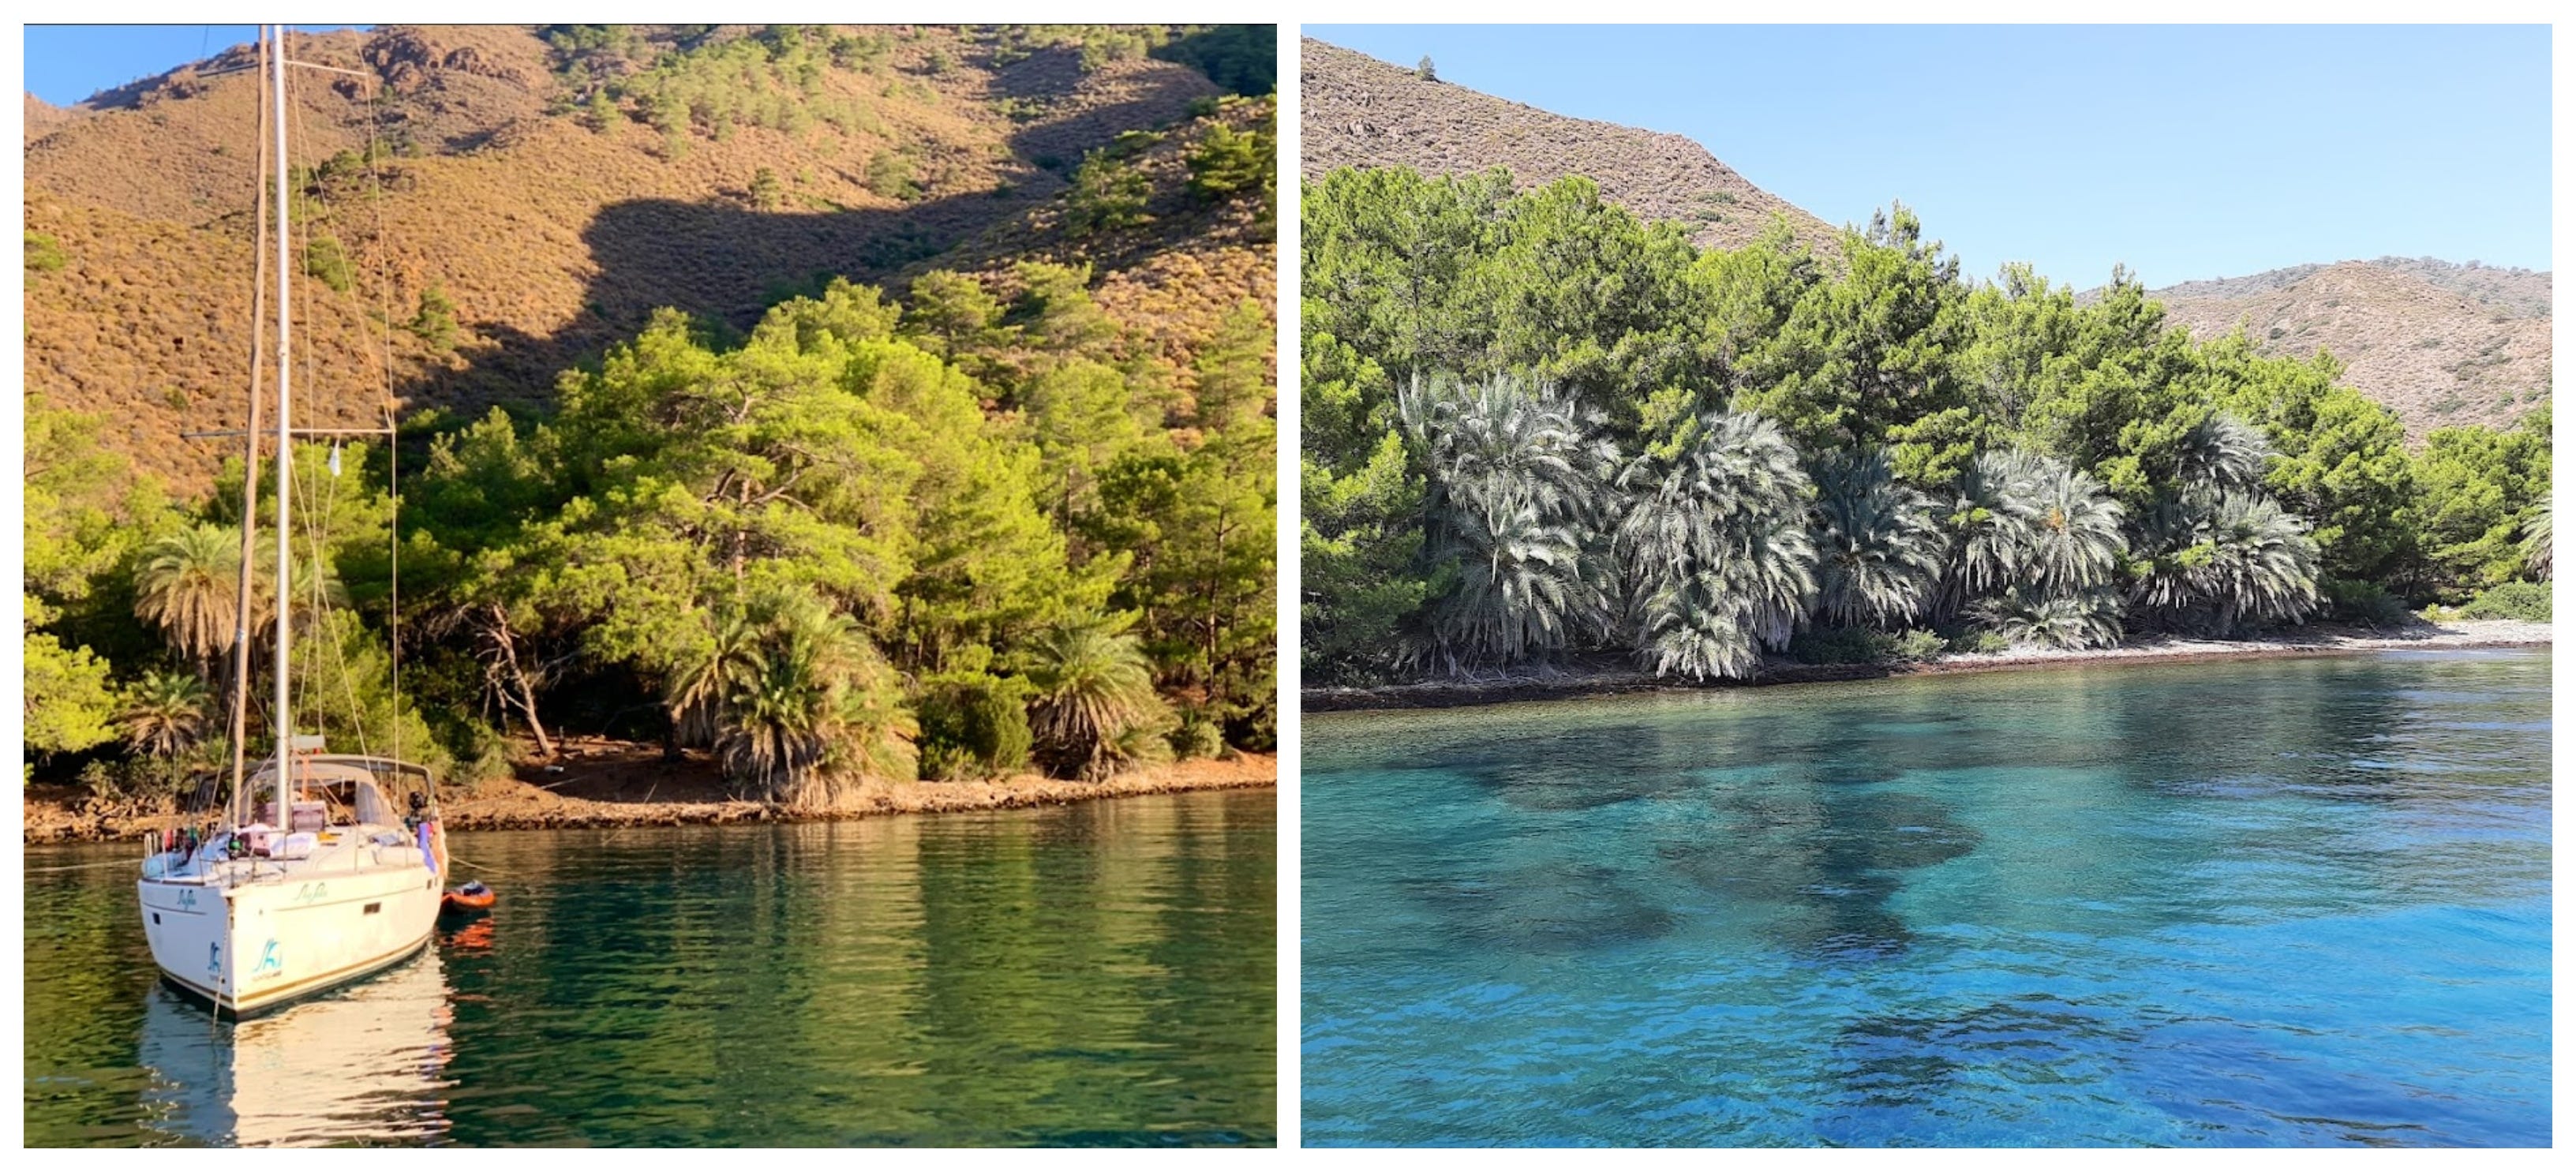
Phoenix theophrasti - Gölköy date palm is a palm native to the eastern Mediterranean, in Greece and Turkey. Along with Chamaerops humilis, these are the only native palm trees in continental Europe and are a threatened species in the wild with just a few scattered stands remaining. There are wild groves at a bay on the South side of the peninsula, called Hurmalı Bük, but like many of the pristine bays around the peninsula, you need a boat to get to it or a long climb through the forested mountain. I found the below photos of the palms on google maps ad hope to visit them another time.
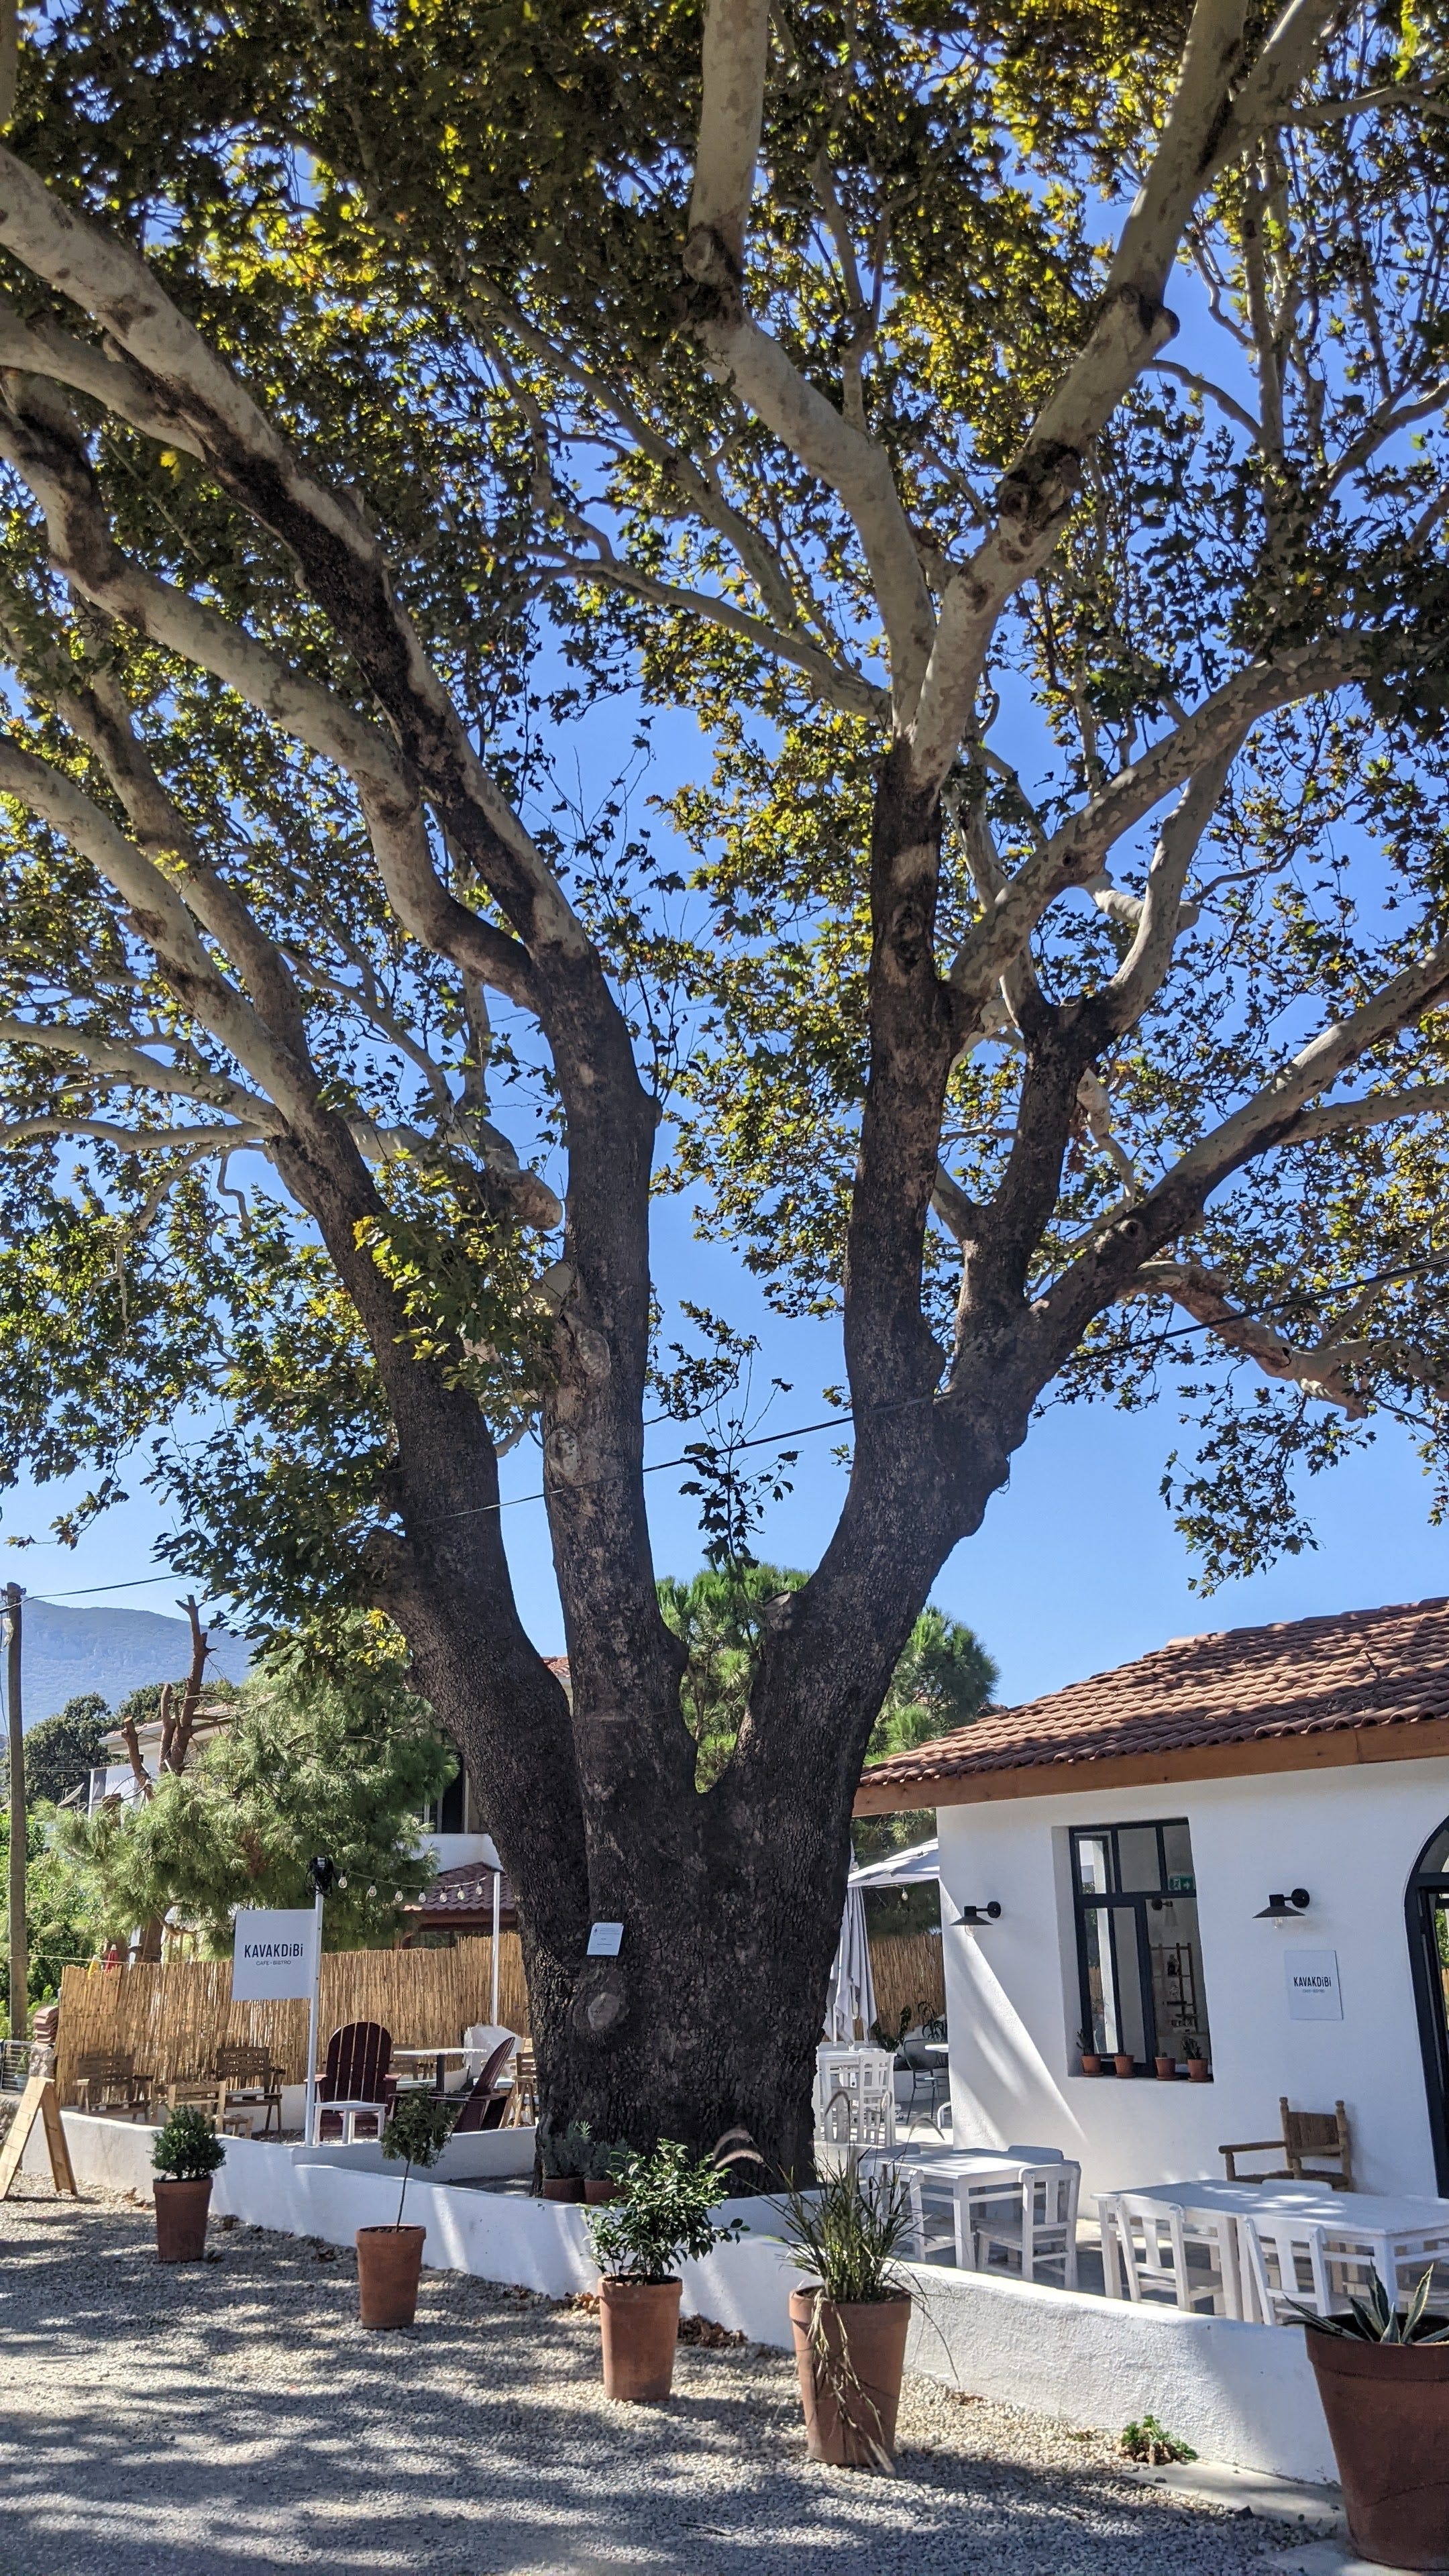
Platanus orientalis - Oriental Plane I fully recommend Kavakdibi Cafe-Bistro not only for the excellent breakfast but to witness the incredibly beautiful 300 year old Platanus orientalis - Oriental Plane that stands proud like a noble guardian to this neighborhood coffee shop. It looks like the tree was pollarded in the distant past resulting in the three huge stems that stretch into the clear blue skies.
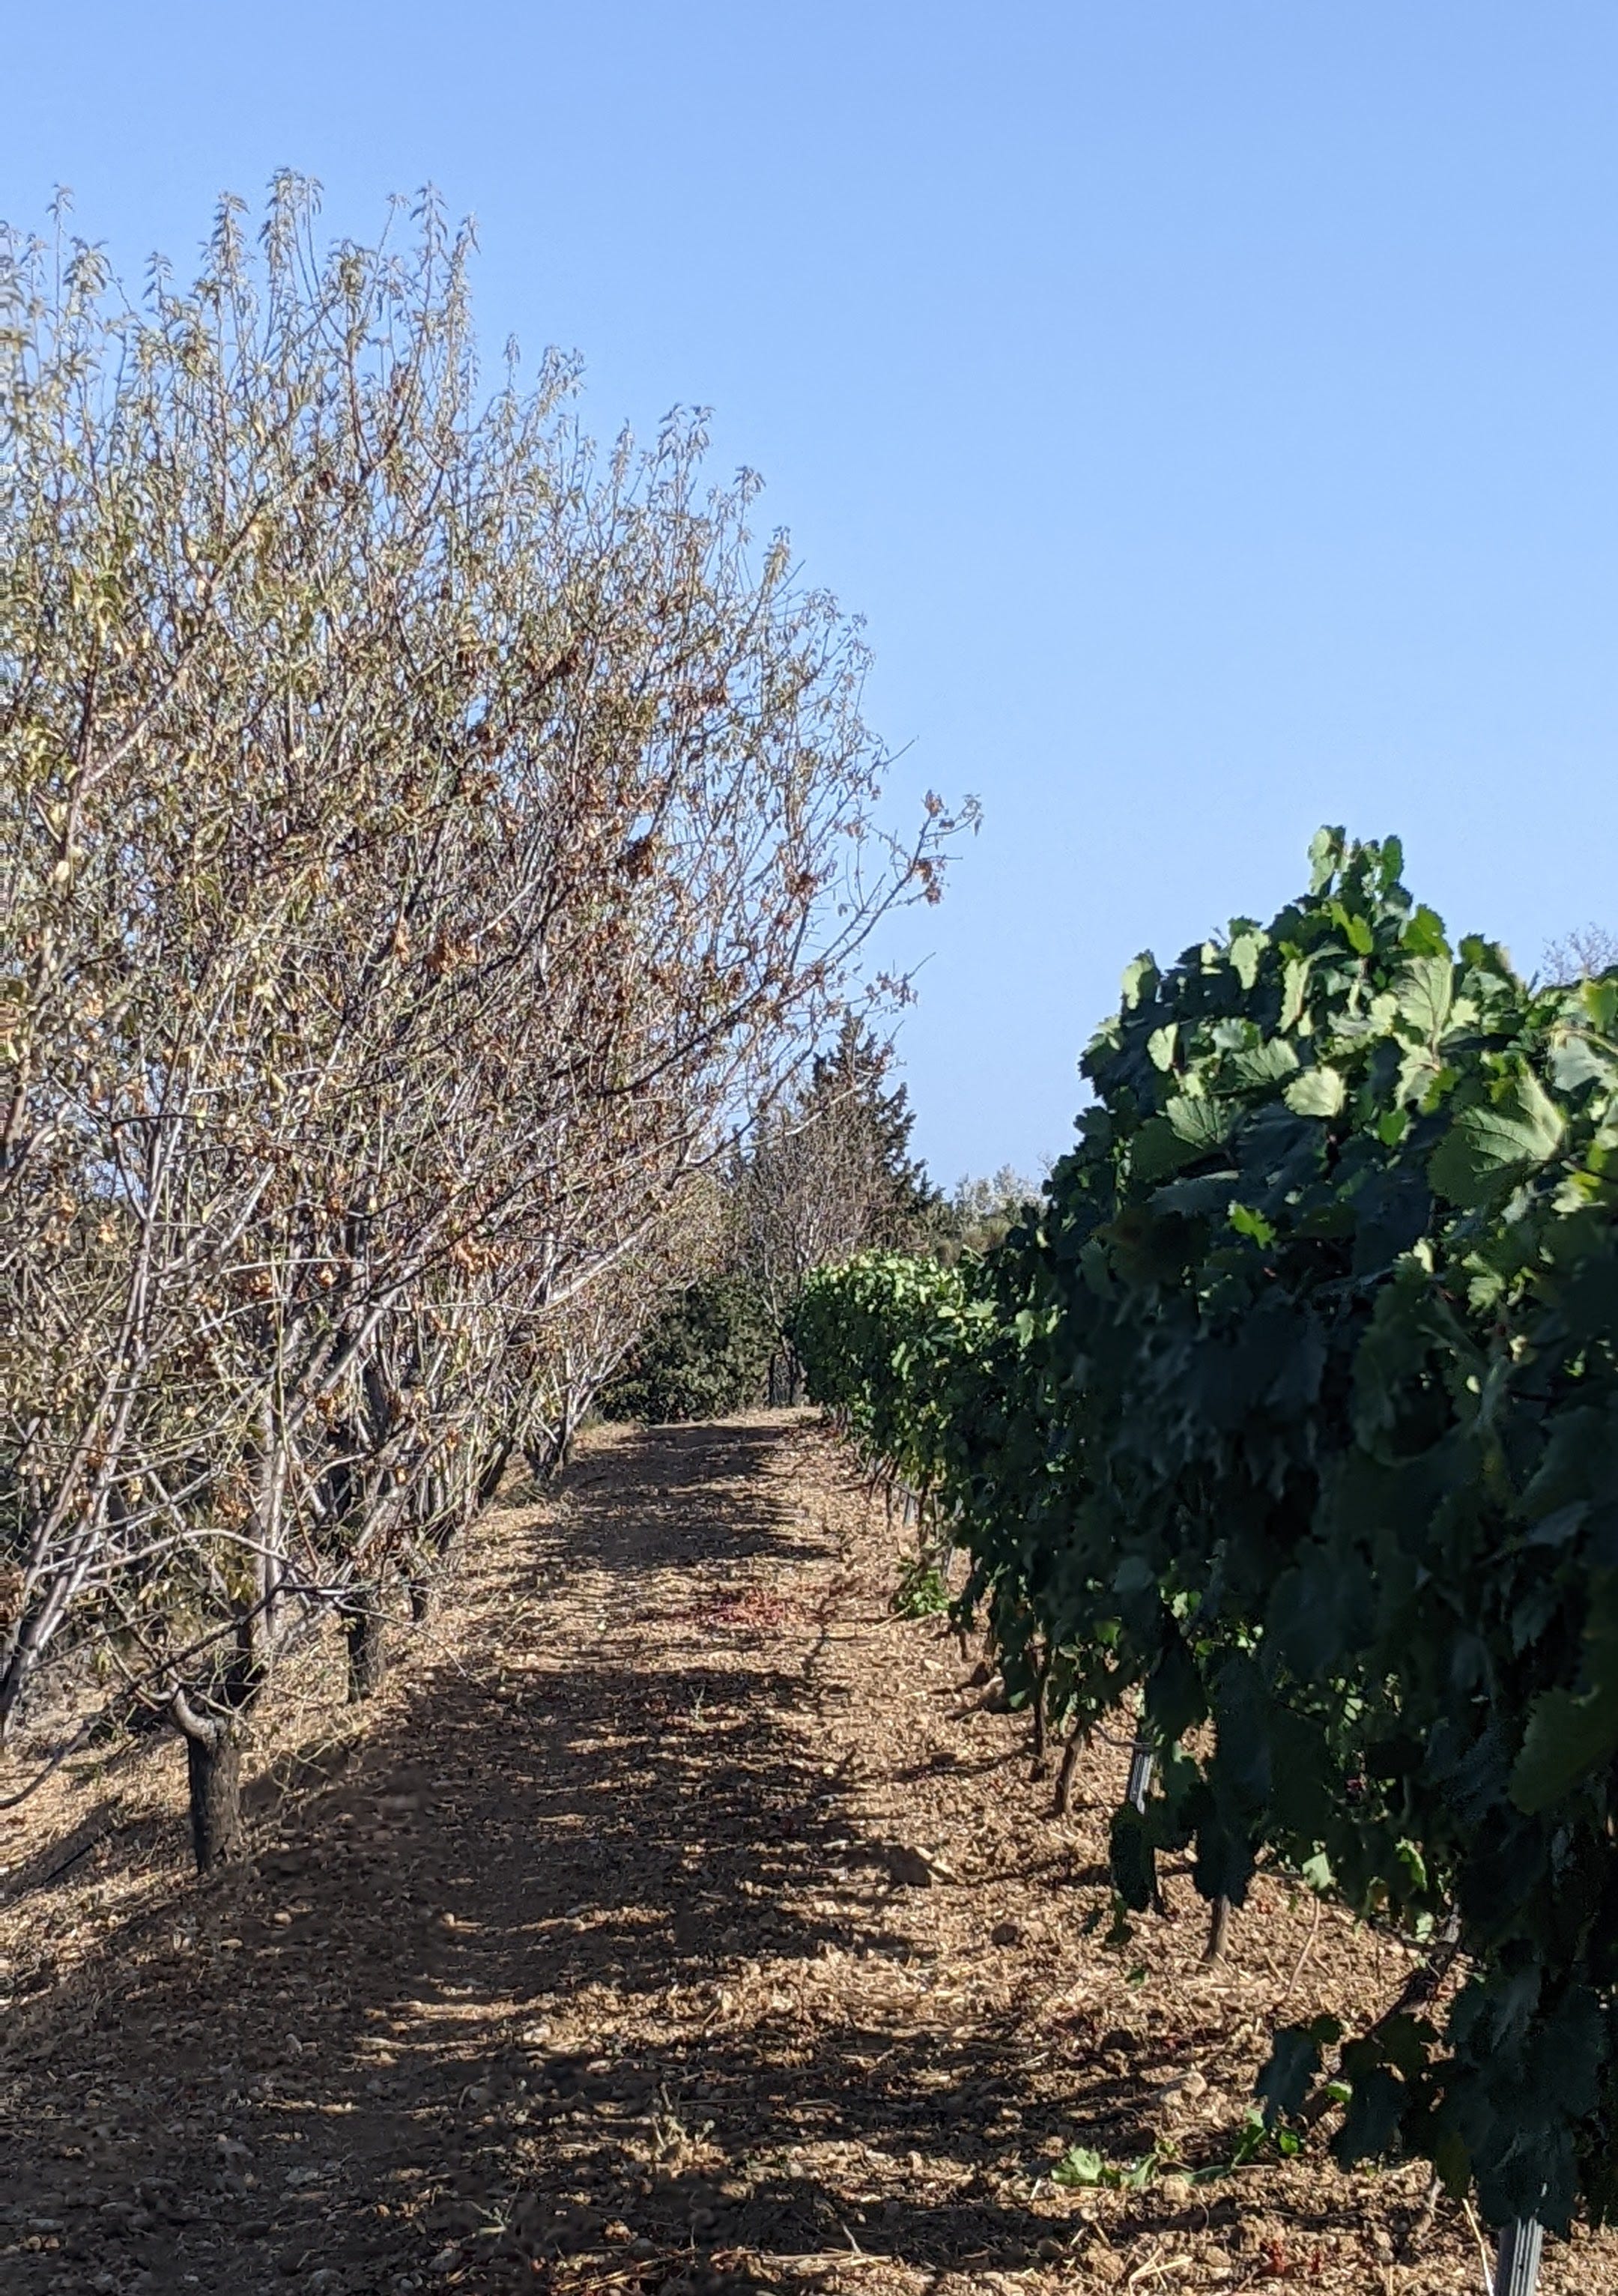
If you head left when you exit the coffee shop onto the off-road track you’ll find your self teleported back in time among almond and olive orchards and some mixed olive, carob, fig and almond orchards.
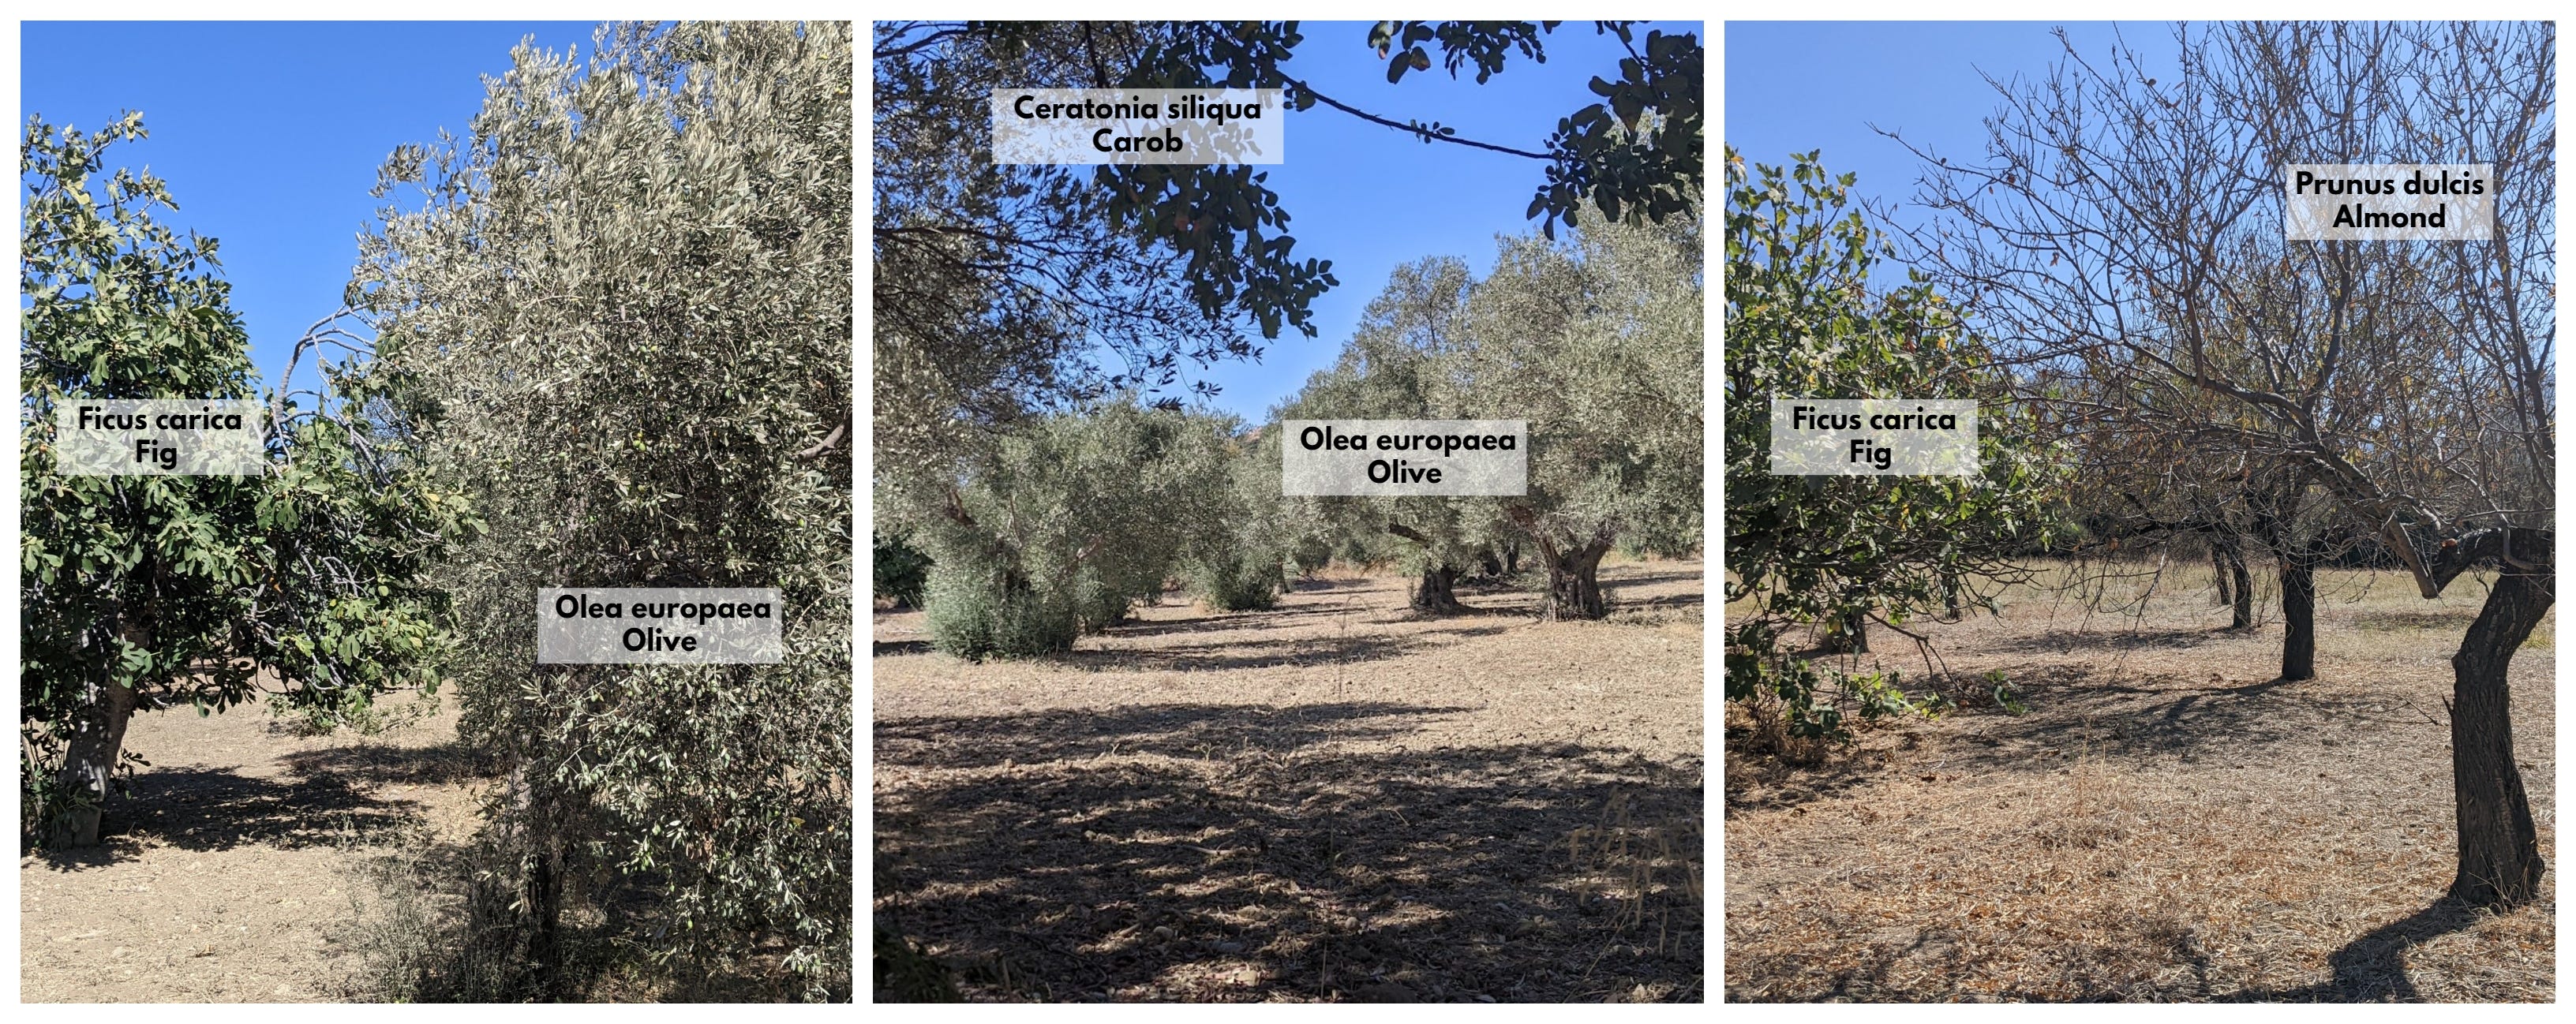
I wandered around this area for quite some time looking for a way to the beach however the lowland that leads to the water is electric fenced to keep the grazing cattle in. Some where in the area I stumbled across possibly the best example of a polyculture orchard I have seen.
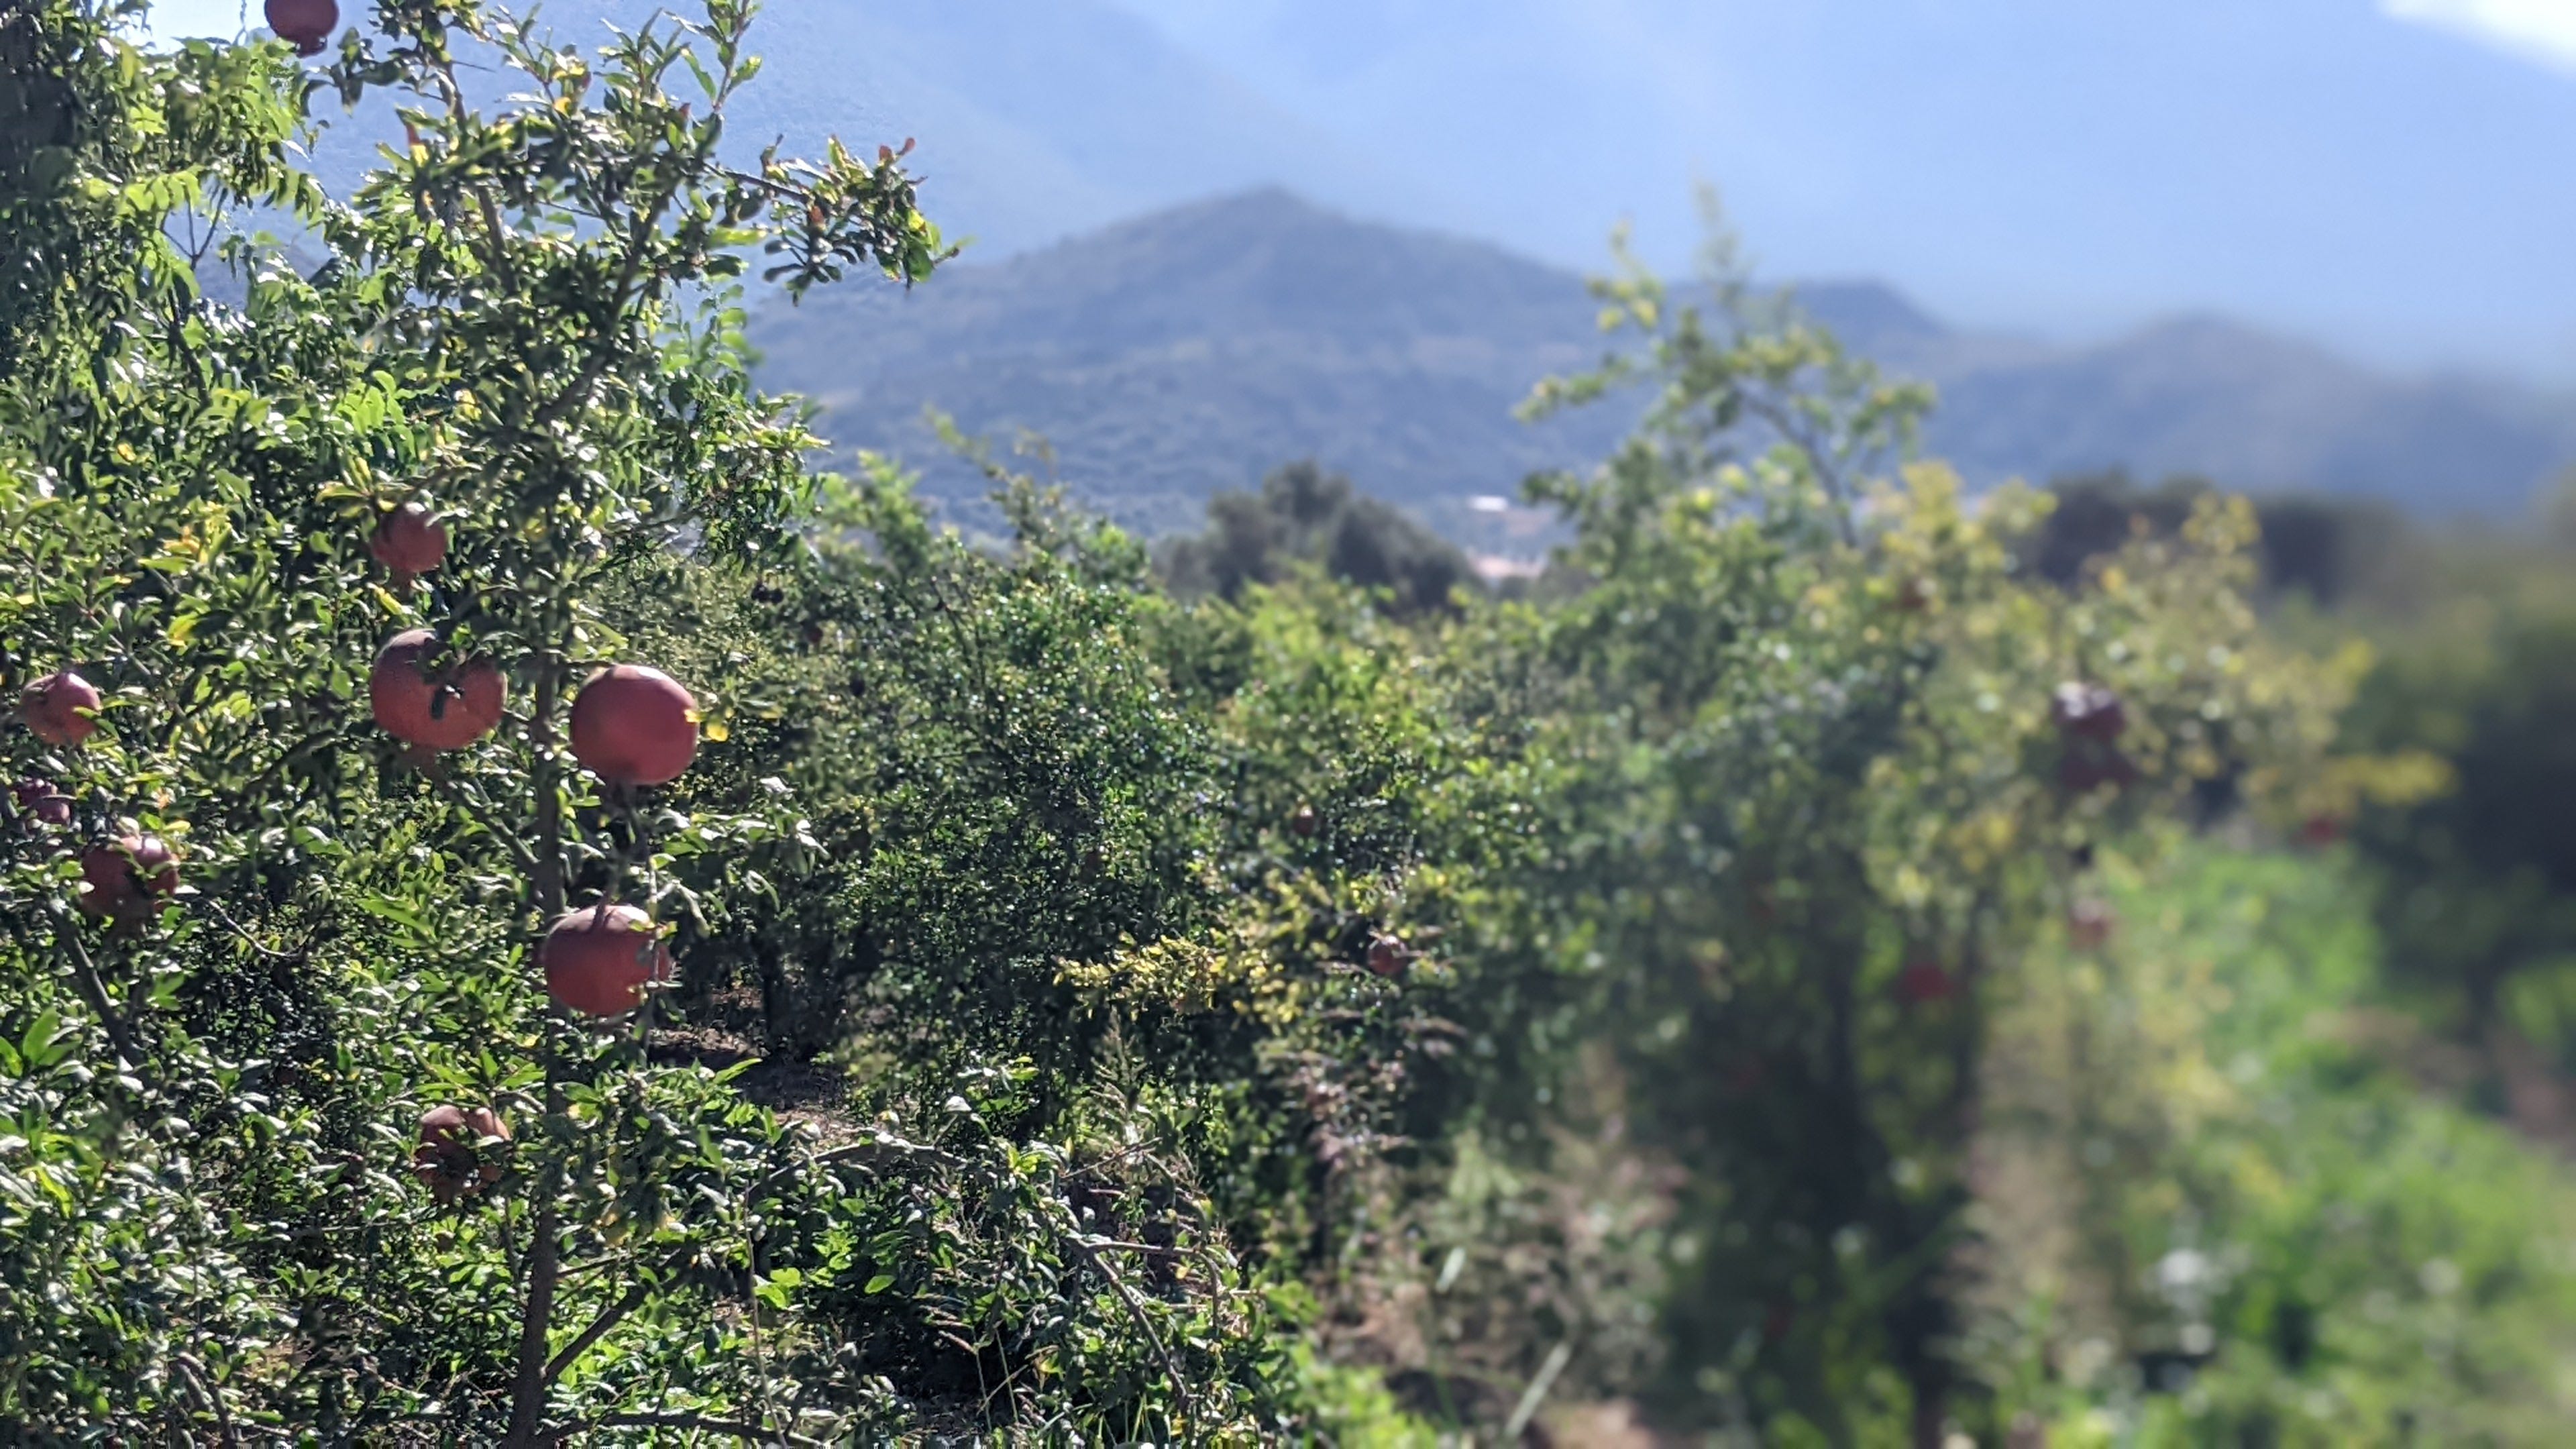
This remarkable orchard showcases the artful integration of multiple crops, with Punica granatum - Pomegranate taking center stage, meticulously planted in rows alongside Phaseolus vulgaris - Dwarf Bean annuals thriving in the alleys. Within the Pomegrantes , probably at a ratio of 40 -1 are Carya illinoinensis - Pecan trees waving high above lower canopy in the wind.
Olea europaea -Olive are planted around the edges at various intervals and a 3m wide margin is left for wild vegetation to grow all surrounded by a dry stone wall that not only delineates the boundary but also serves as a haven for a plethora of reptiles, invertebrates, and small mammals. Here’s a short video from the edge of the orchard.
Knidos Winery
Nestled amidst the tranquil outskirts of Datca, Knidos Winery offers a delightful way to spend an afternoon, savoring tastings of locally crafted wines, artisan cheeses, and plump olives.
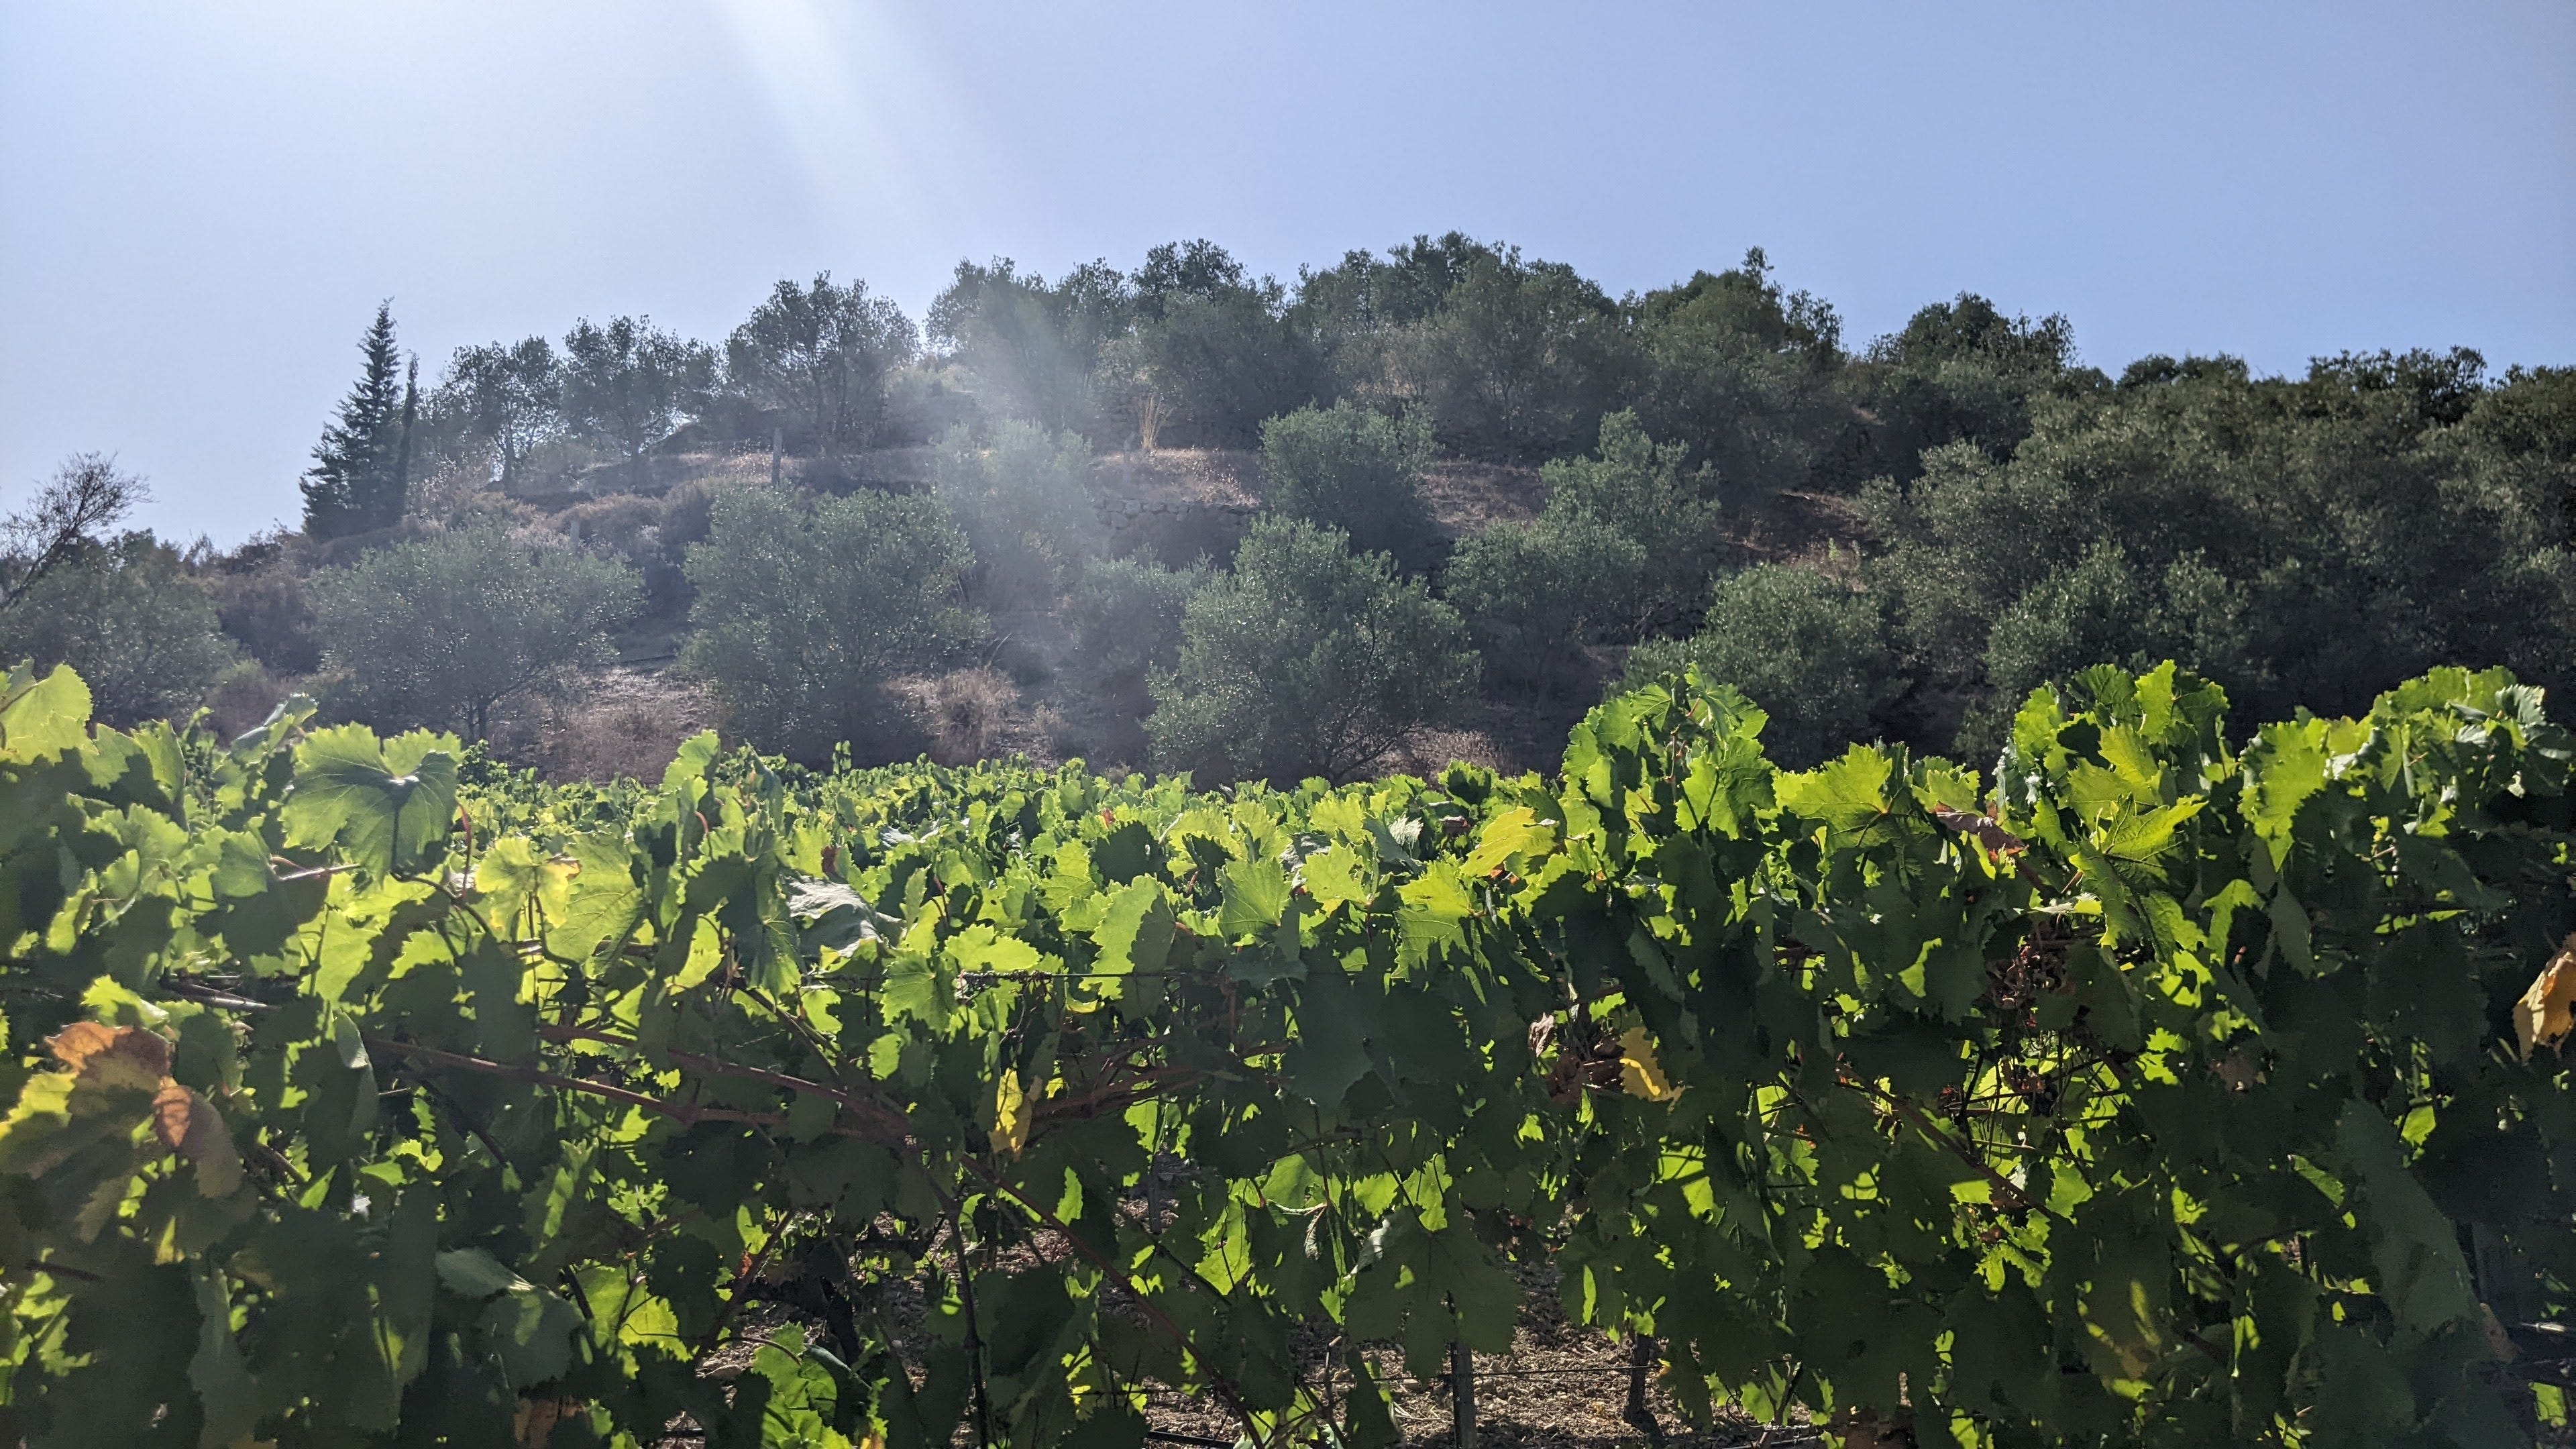
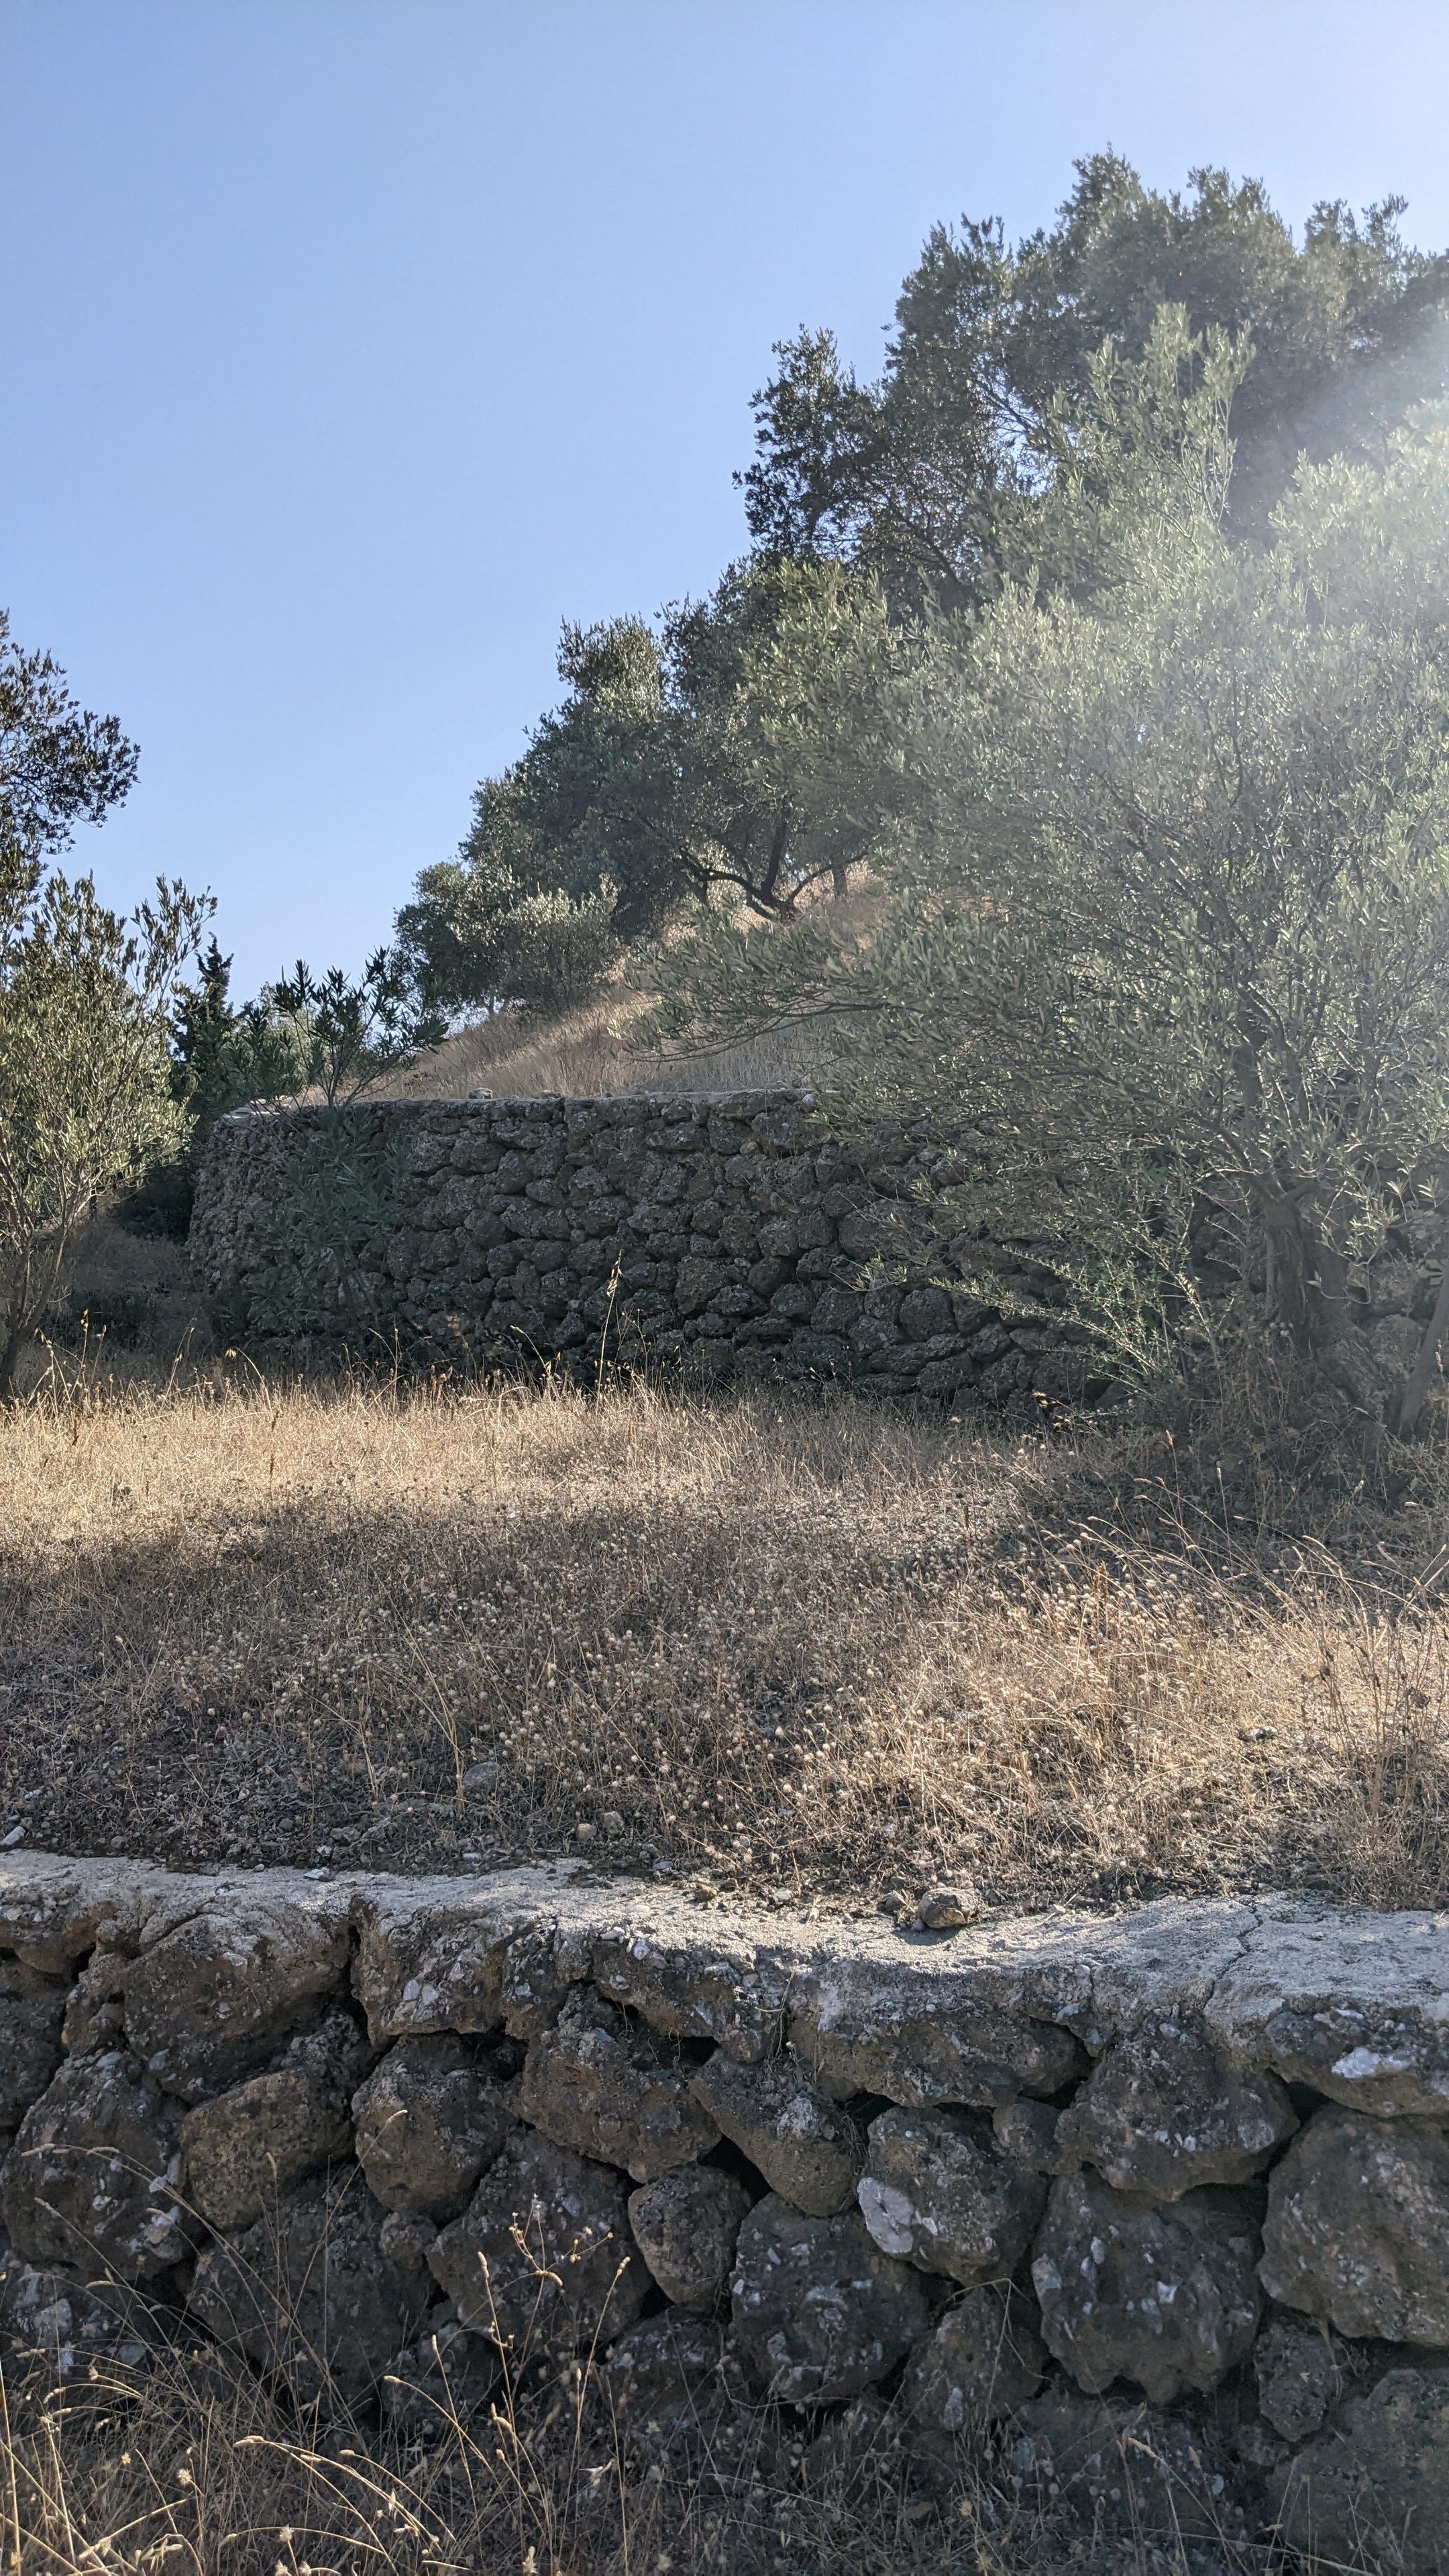
Once you've had the pleasure of sampling these culinary delights, you are welcome to wander through the enchanting grounds. Here, you'll not only encounter a meticulously tended vineyard but also stumble upon an ancient olive grove nestled within terraced landscapes that evoke a profound connection to millennia past.
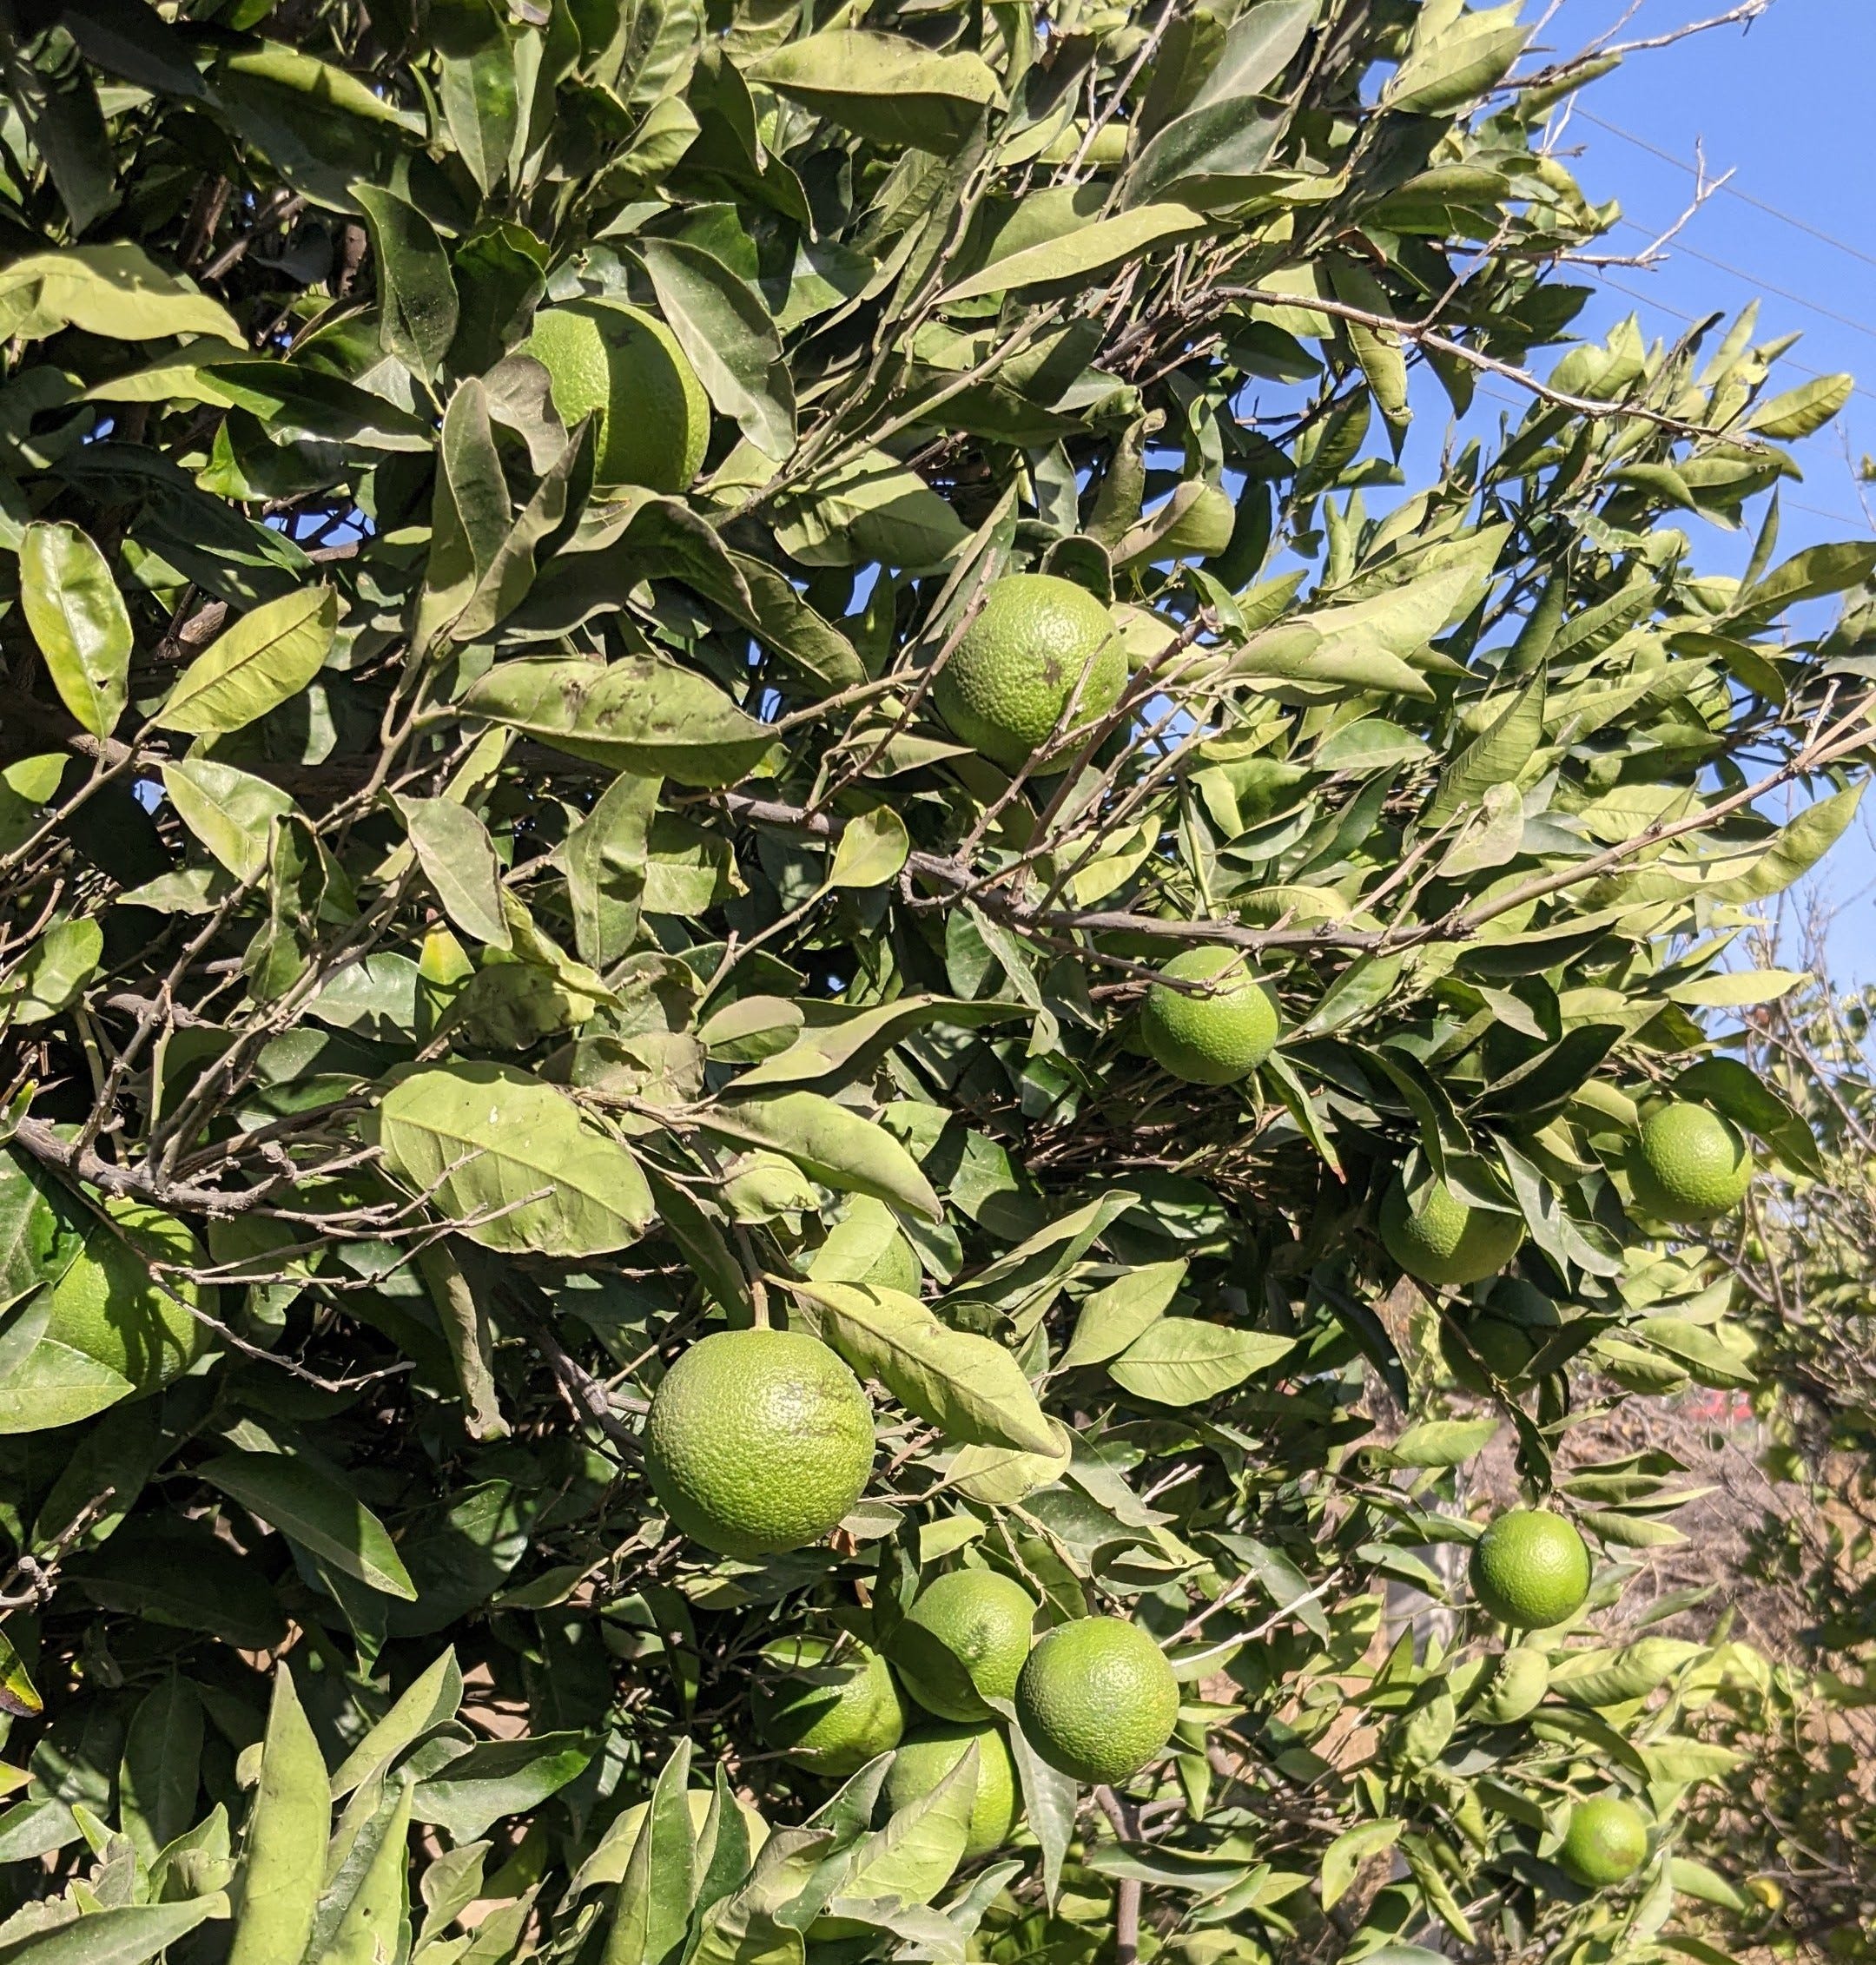
It is obvious the owners are plant people with every niche of the property planted with well suited fruit, nuts and herbs. Citrus spp. including oranges, mandarins, grapefruits, lemons and limes are grown around the lower boundary of the orchard with Helichrysum italicum - Curry Plant and Origanum majorana - Sweet Marjoram planted in-between and below the trees.
Prunus dulcis cv. - Almond are planted on the edge of the upper terrace alongside rows of grapevines
Other fruit trees around the property include Prunus domestica - Plum, Prunus cerasus - Wild Sour Cherry, Morus alba - White Mulberry, Cydonia oblonga - Quince, Ziziphus jujuba - Jujube and Punica granatum - Pomegranate and Persea americana - Avocado Pear
The wild margins of the orchard comprised a diverse tree and shrub layer including Styrax officinalis - Storax and Quercus coccifera - Kermes oak. Styrax officinalis - Storax, a slow growing medium sized deciduous shrub native to the eastern Mediterranean region, produces a fragrant resin that was highly valued by ancient Egyptians, Greeks, and Romans The resin can be extracted from the tree's bark and was used in perfumery, incense production, and traditional medicine.
The Kermes oak is also historically renowned for its role in the production of a valuable and ancient red dye called "kermes." The dye was derived from the dried bodies of a scale insect, Kermes vermilio, which feeds on the sap of the Kermes oak. The dried females filled with their unborn larvae were crushed and processed, yielding a deep red pigment that was particularly prized by European royalty and nobility. Both of these plants have fallen out of use in recent times with Styrax officinalis becoming some what of a rarity so it’s great to see them around the Knidos Vineyard
Reluctant to leave the Datca peninsula, on my last day I could not resist a return trip to probably my favorite beach on the planet.
Iztuzu Plaji - Dalyan
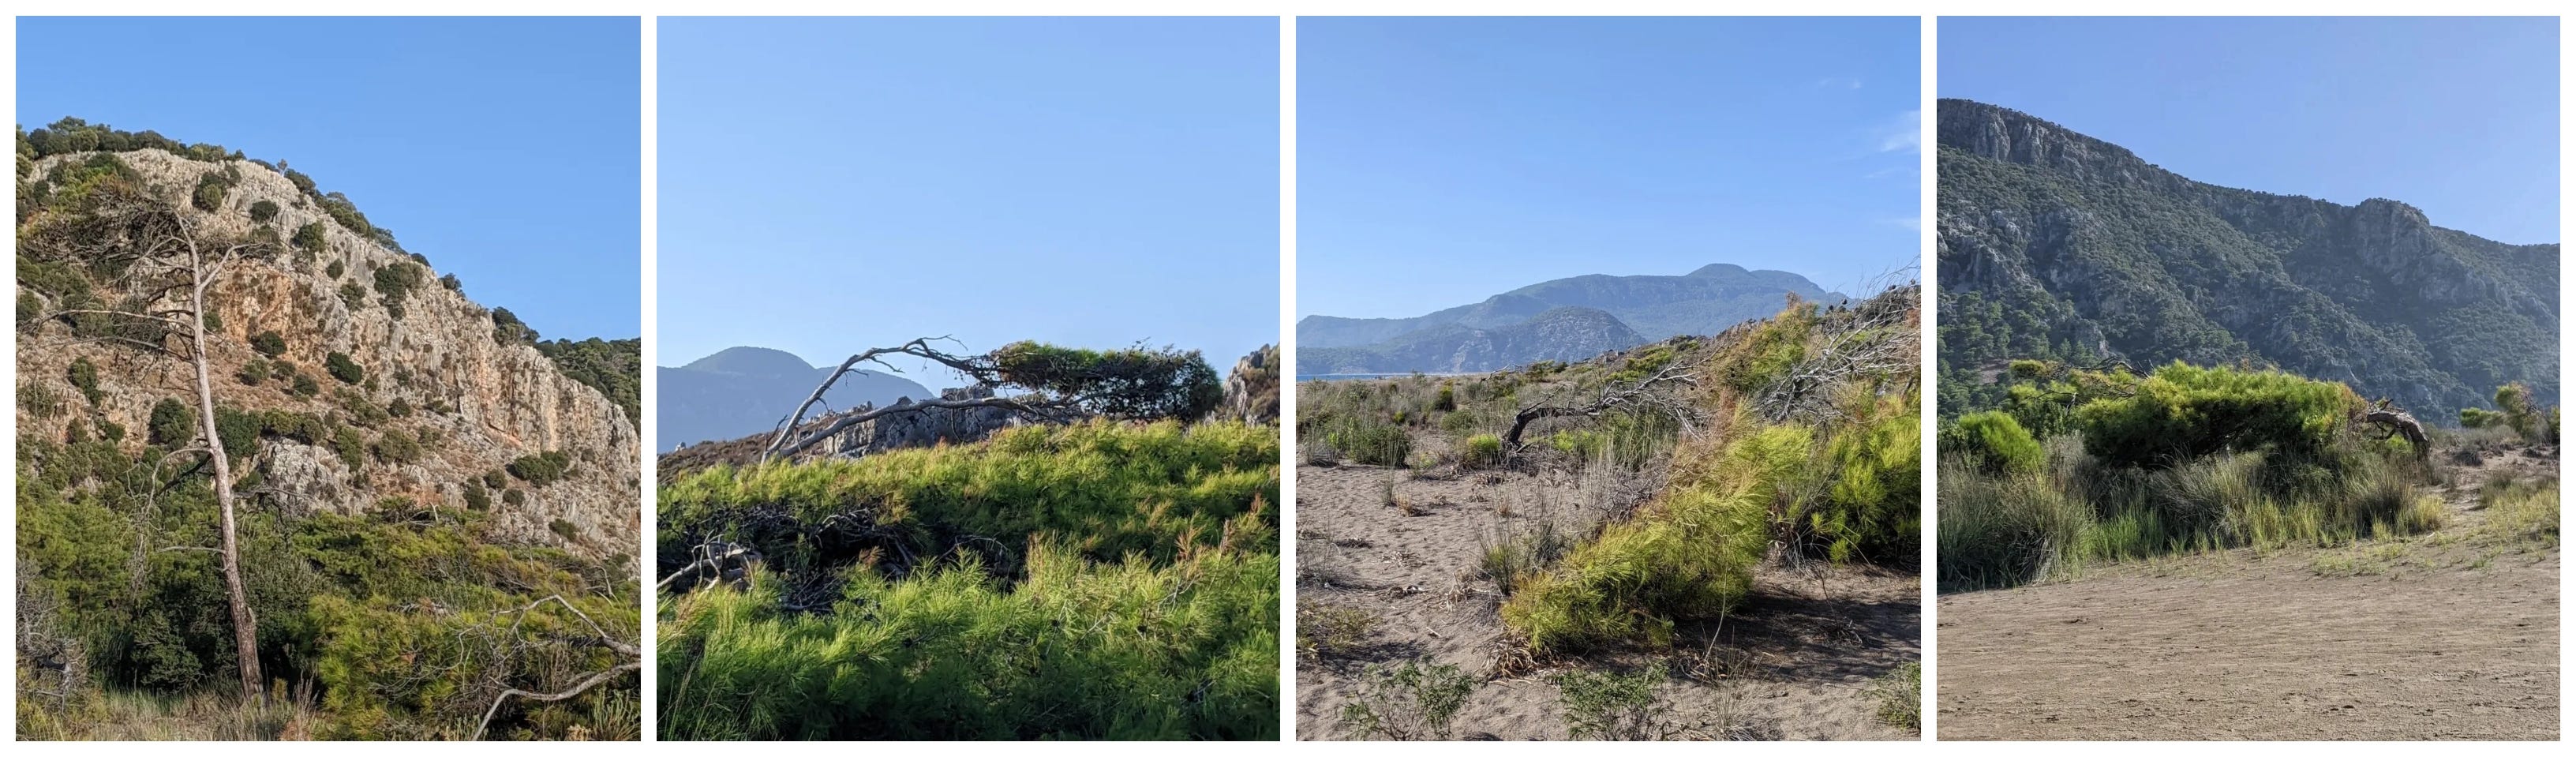
About a 2hr 20 min drive from Datca, Iztuzu Beach is a pristine and enchanting coastal gem that is sure to captivate with its natural beauty, rich biodiversity and fine golden sands that stretch for nearly five kilometers.
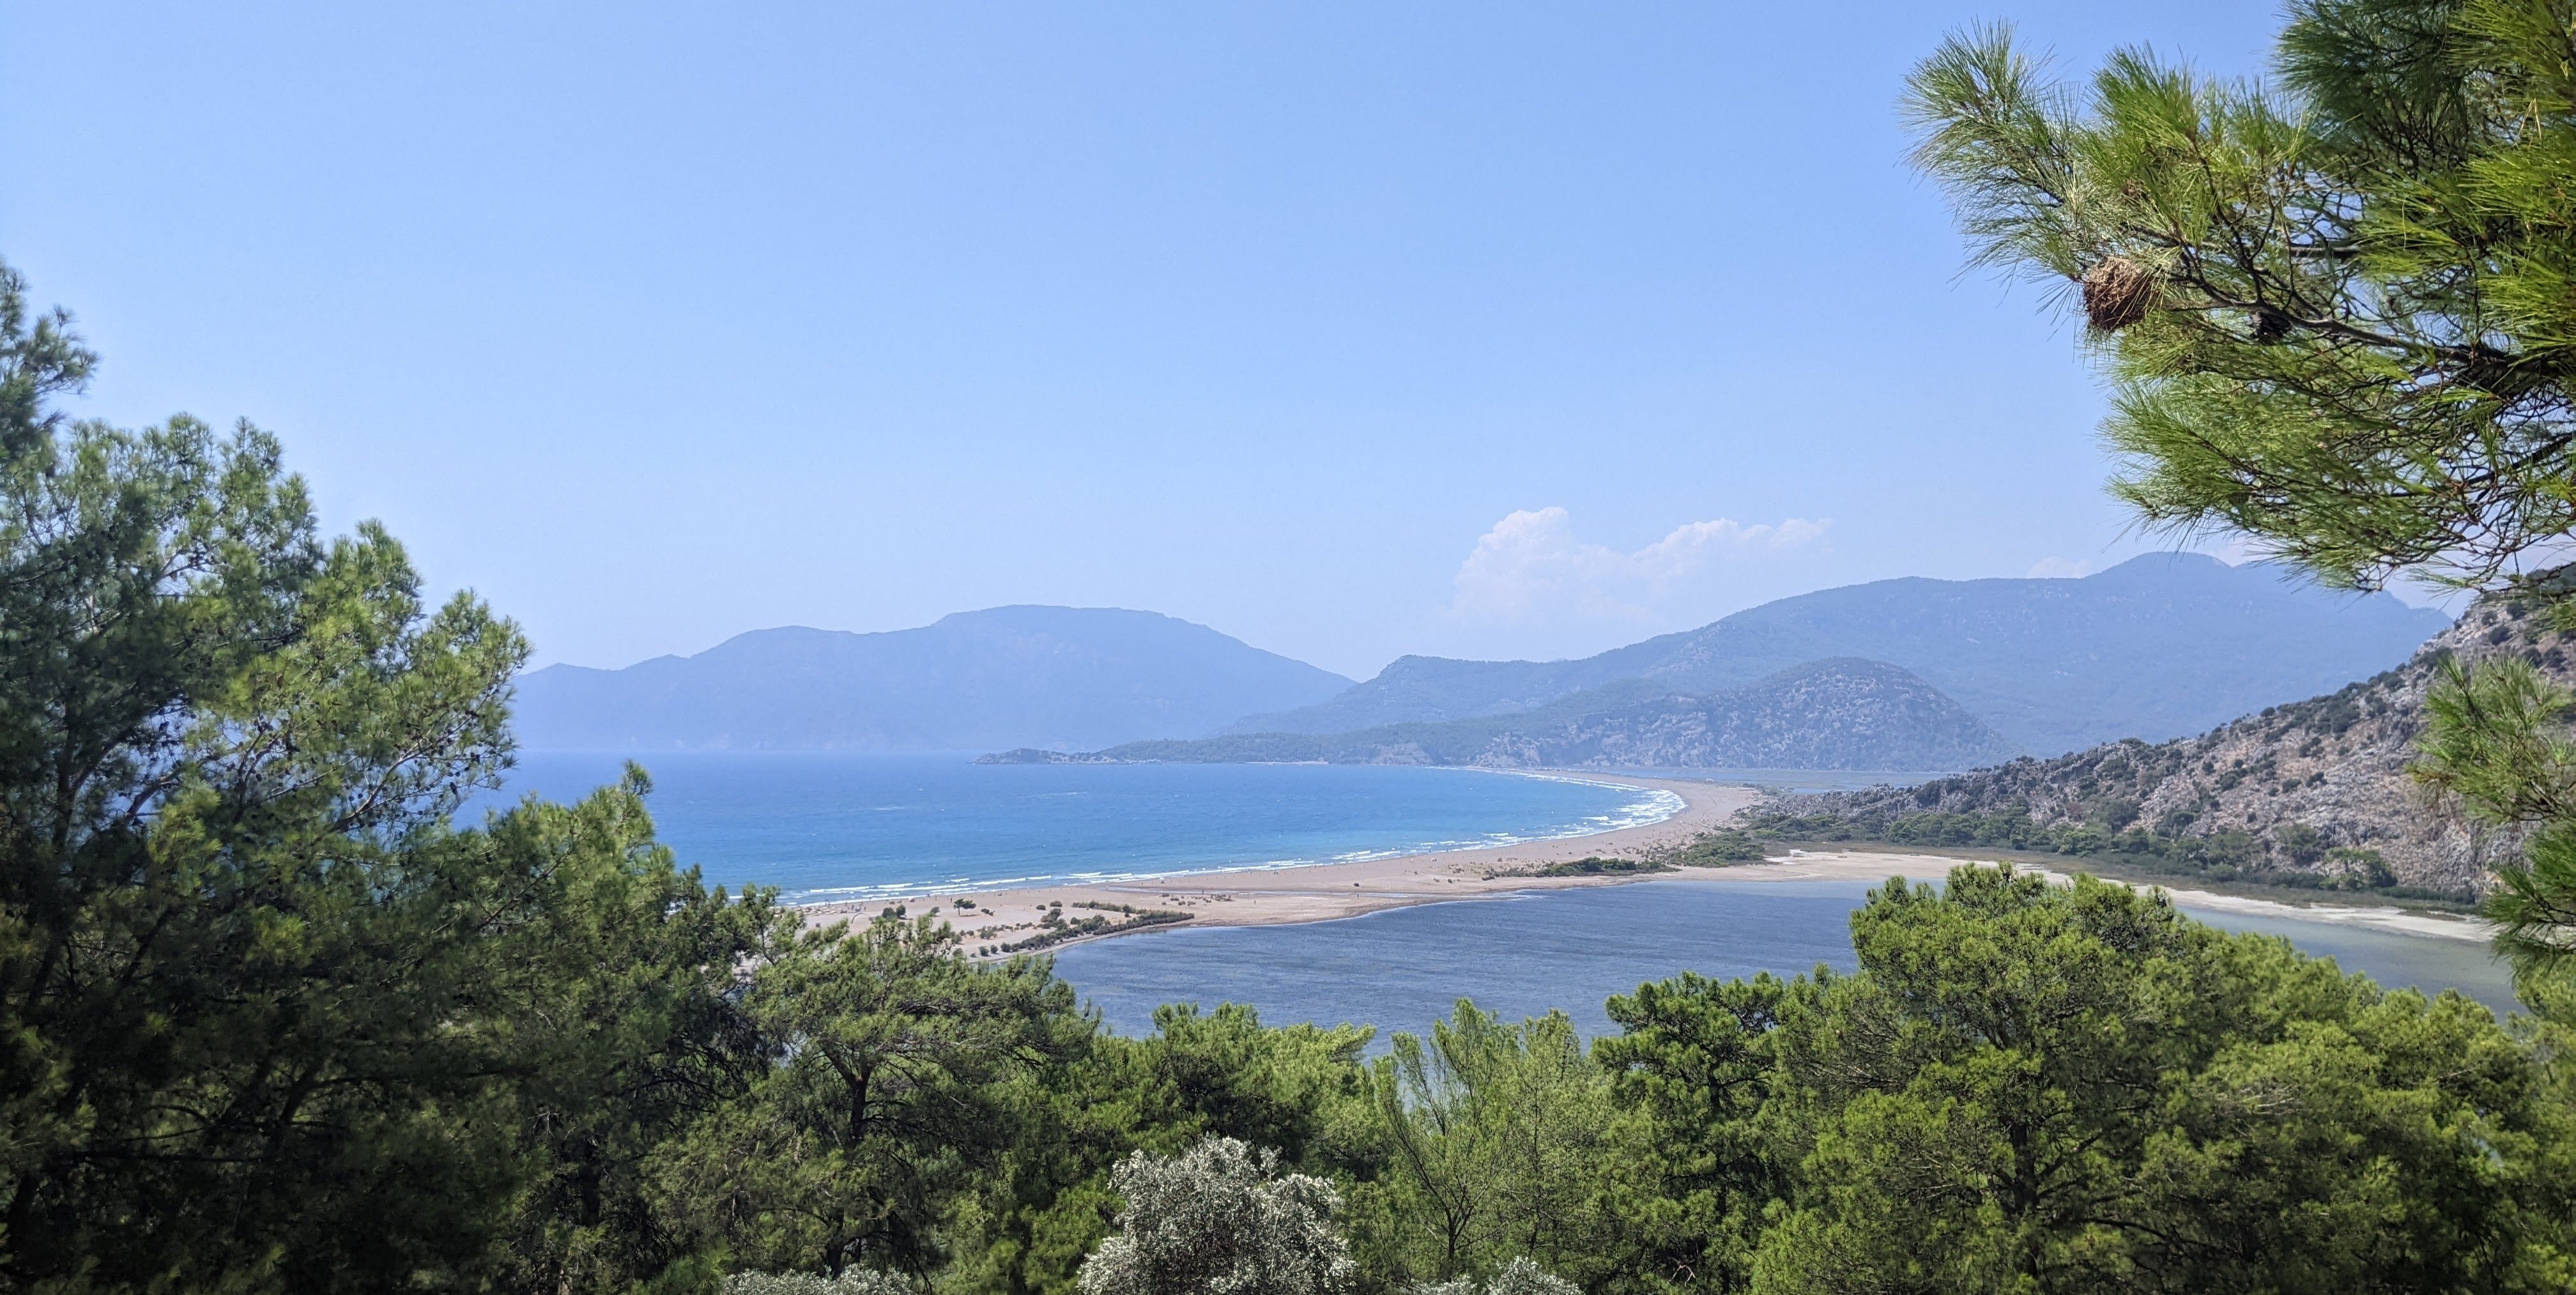
What makes Iztuzu Beach particularly unique is its status as a protected habitat for the endangered loggerhead sea turtles (Caretta caretta). These gentle creatures come ashore between May and October to lay their eggs in the soft sand, and strict conservation measures are in place to ensure their safety. For more info on the Sea Turtle Research, Rescue and Rehabilitation Center on the beach see here.
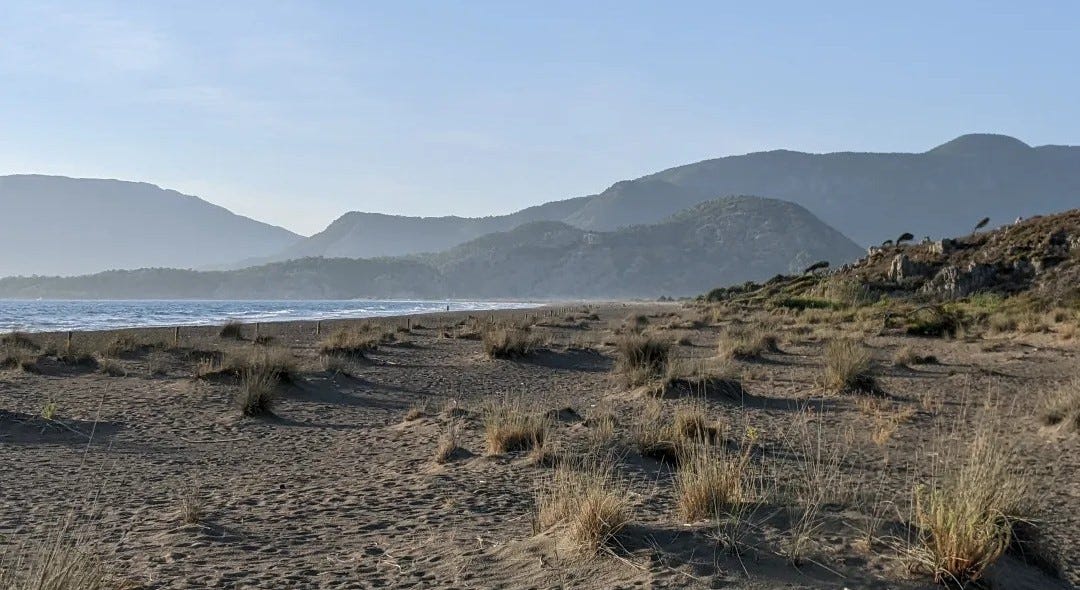
Another fascinating aspect of this beach, (at least for me) is the opportunity to witness the wind-induced thigmomorphogenesis in what I think is Pinus brutia - Turkish Pine that grow on the nearby sand dunes and mountains.
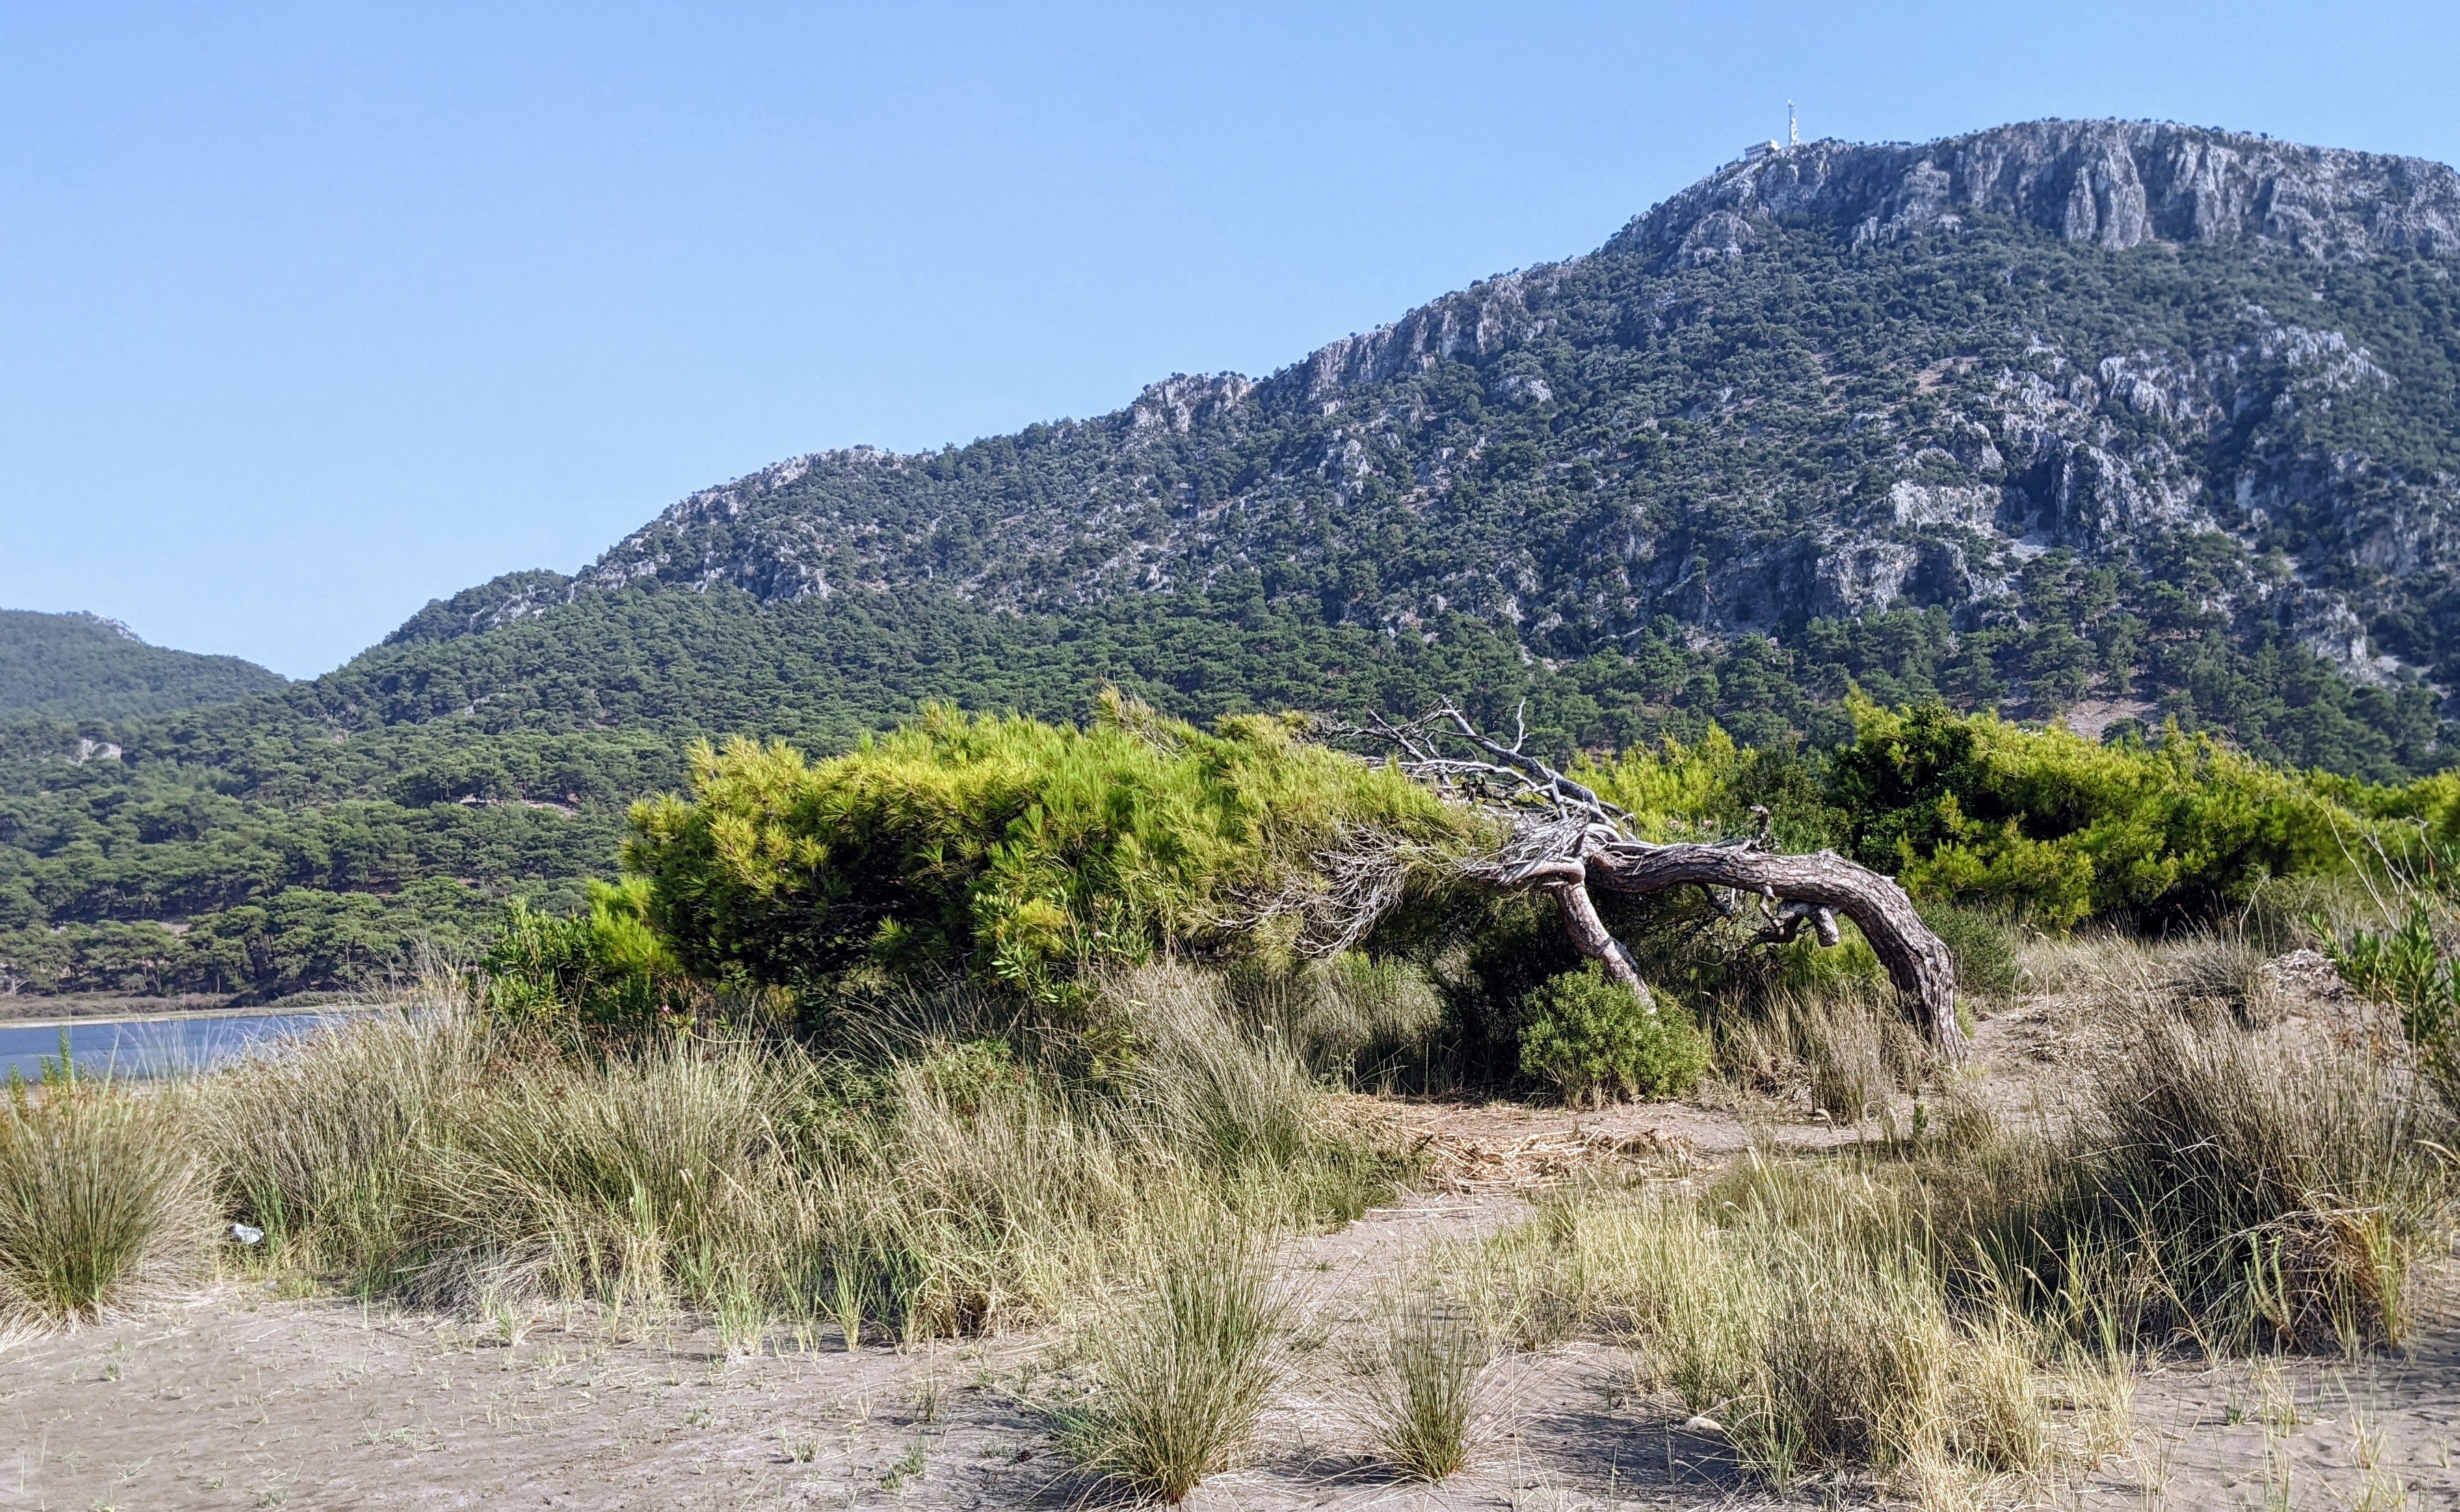
To the casual observer, it may appear that the trees are bent by the relentless winds. However, a closer look reveals a remarkable natural process: the buds exposed to the full force of the wind don't survive the onslaught, while the more sheltered buds continue to grow. This results in the distinctive extended growth pattern away from the prevailing winds. Whenever you see trees taking on this form it’s a clear sign of a “problem” prevailing wind. Problem, that is, if you are planning a garden or farm in the location.
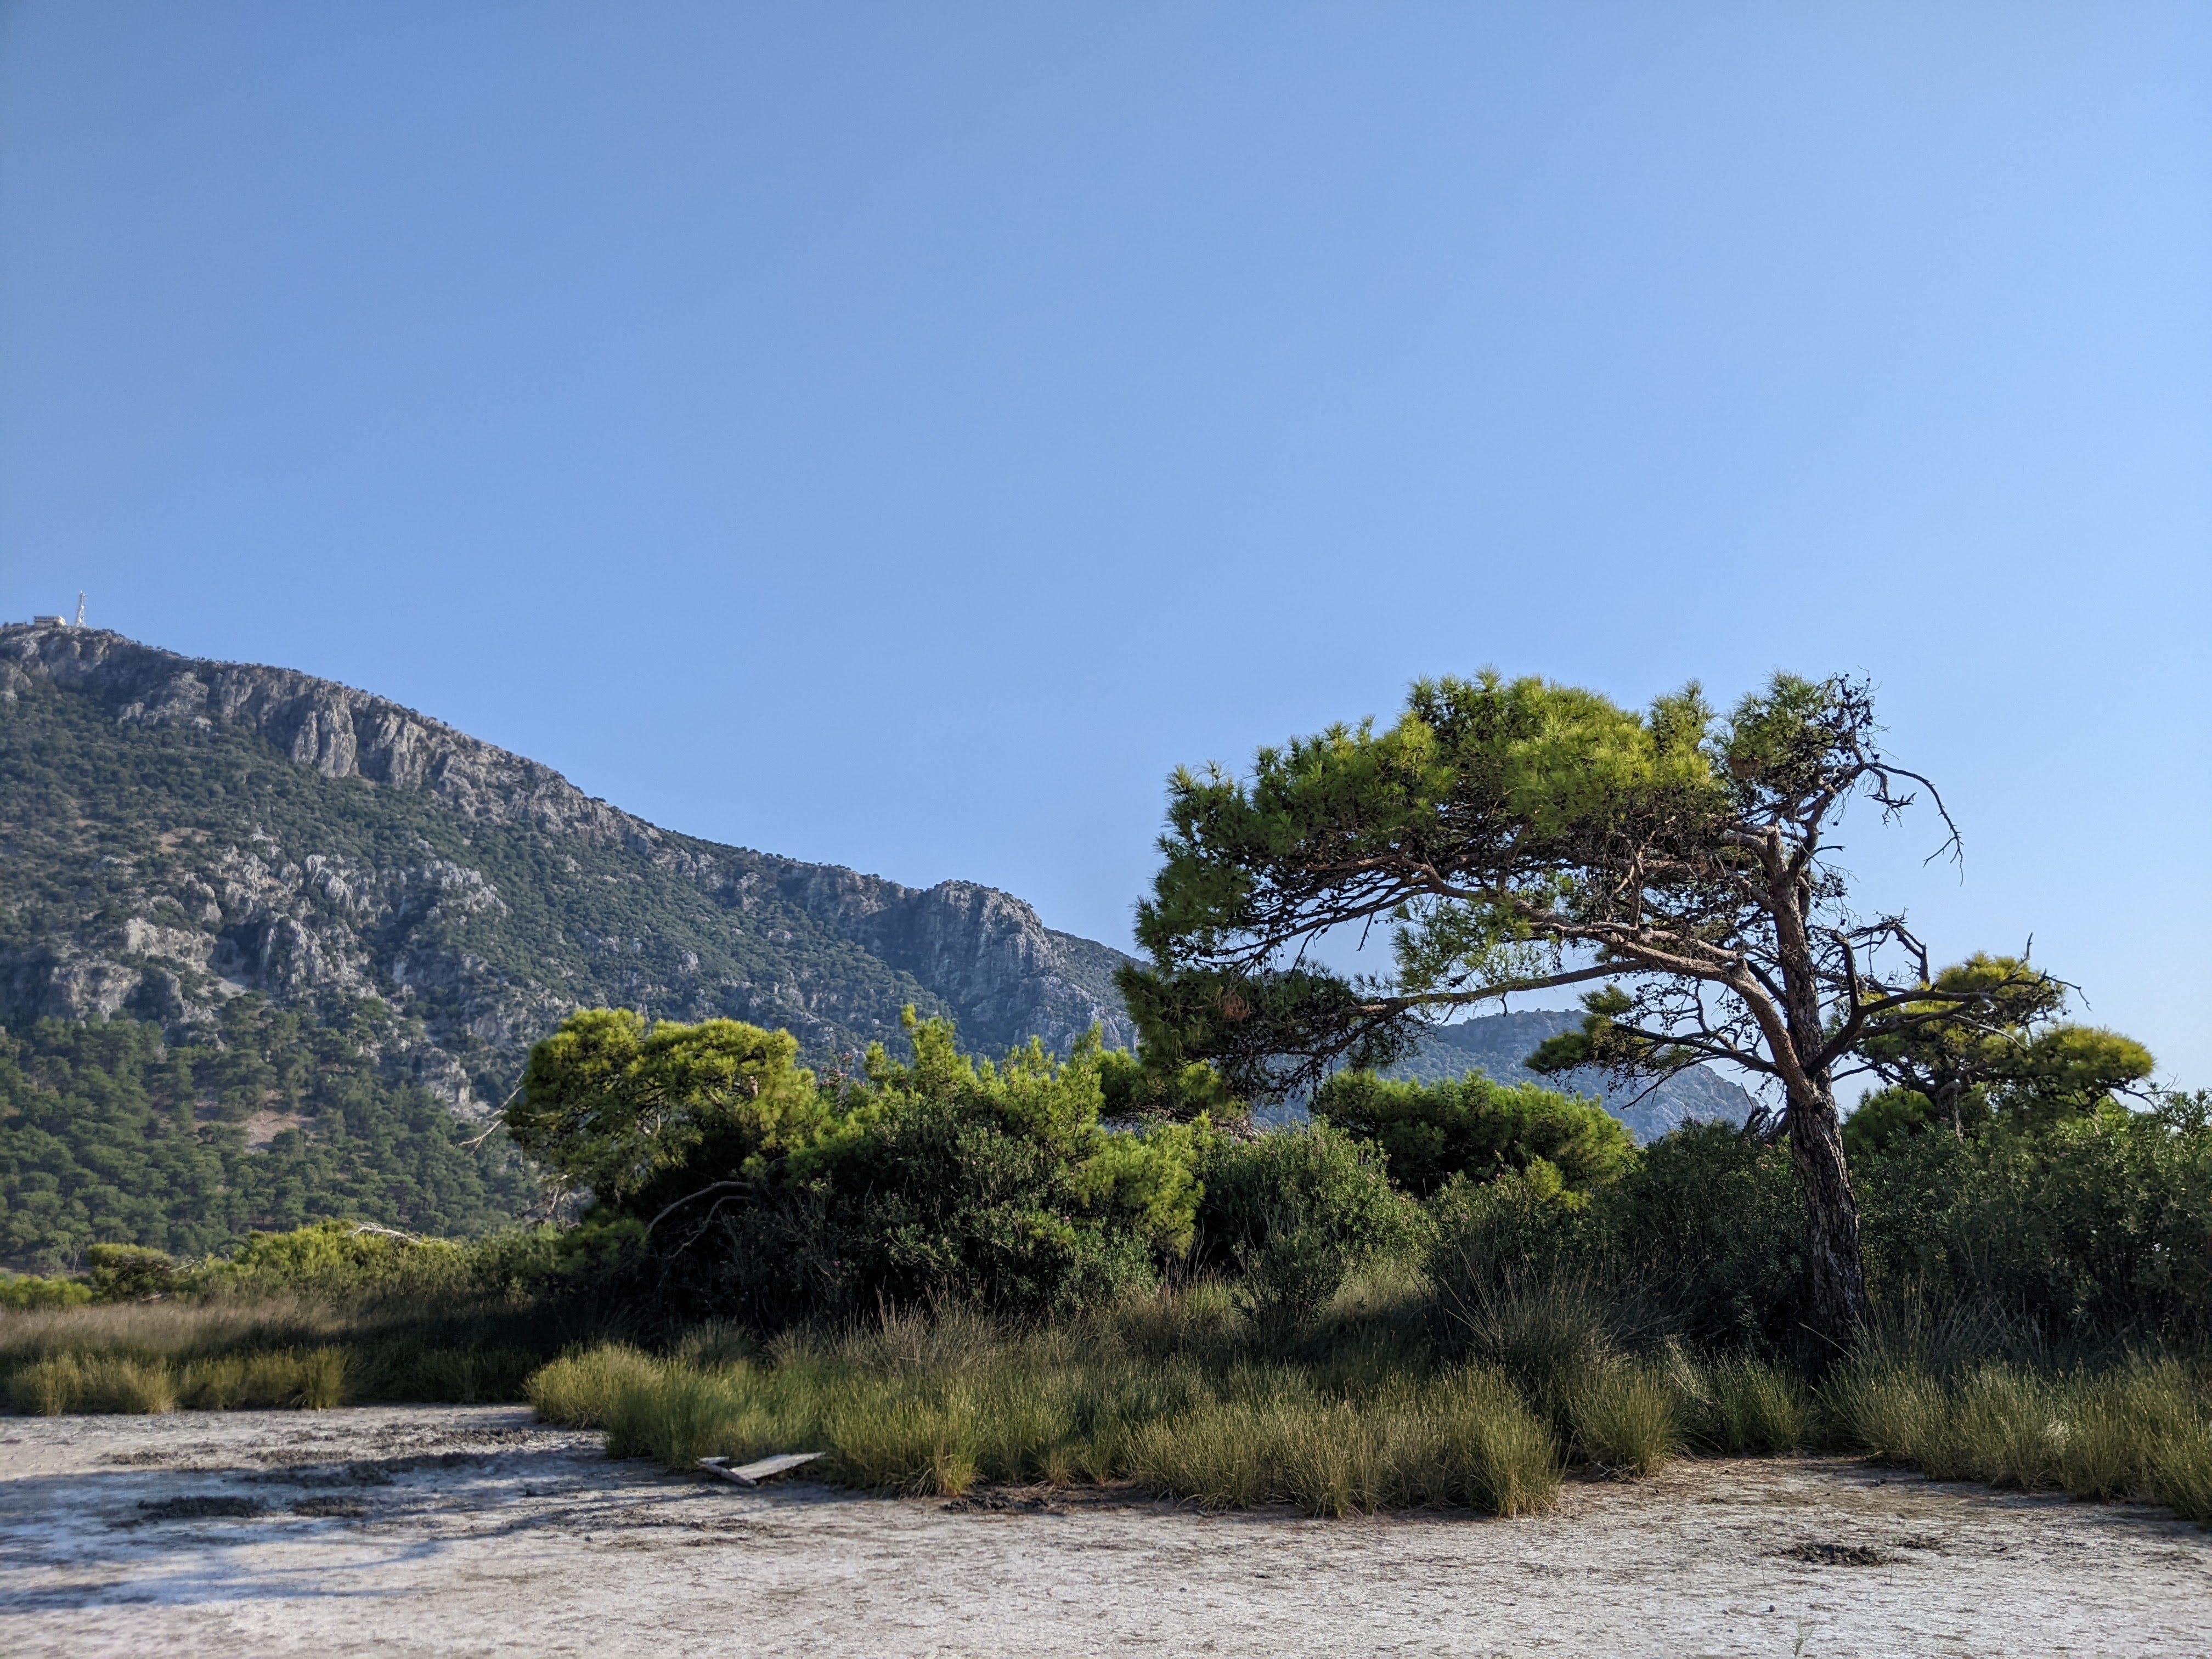
Pinus brutia - Turkish pine is endemic for the eastern Mediterranean and Turkey is the main part of its range. It usually grows at lower altitudes, from sea level to 600m. It's fascinating to observe the different growth responses to the wind within the population of pines on and around the beach. Presumably this is genetic based, where the trees are clustered in the same area.
I’ll end it here with a short 360 view of the beach in the late afternoon.
Thanks for reading, I hope you enjoyed it and please let me know in the comments section if you have any favorite spots with interesting plants from this part of world.
Support Our Project
If you appreciate the work we are doing you can show your support in several ways.
Become a member of the Bloom Room. A $70 annual subscription to our Substack provides you with access to live sessions, design tutorials, a members forum and more, see details here.
Make a purchase of plants or seeds from our Nursery or Online Store
Joining us for one of our Practical Courses or Online Courses
Comment, like, and share our content on social media.
We offer a diversity of plants and seeds for permaculture, forest gardens, and regenerative landscapes including a range of fruit and nut cultivars. We Deliver all over Europe from Nov - March. - Give a happy plant a happy home :)
Welcome to our Online Store where you can find Forest Garden/ Permaculture plants, seeds, bulbs, and Polyculture multi-packs along with digital goods and services such as Online Courses, Webinars and eBooks. We hope you enjoy the store and find something you like. It's your purchases that keep our Project going.

You can also find our full list of trees. shrubs and herbs for forest gardens on our nursery website.